Tagged: DIY
Meet..
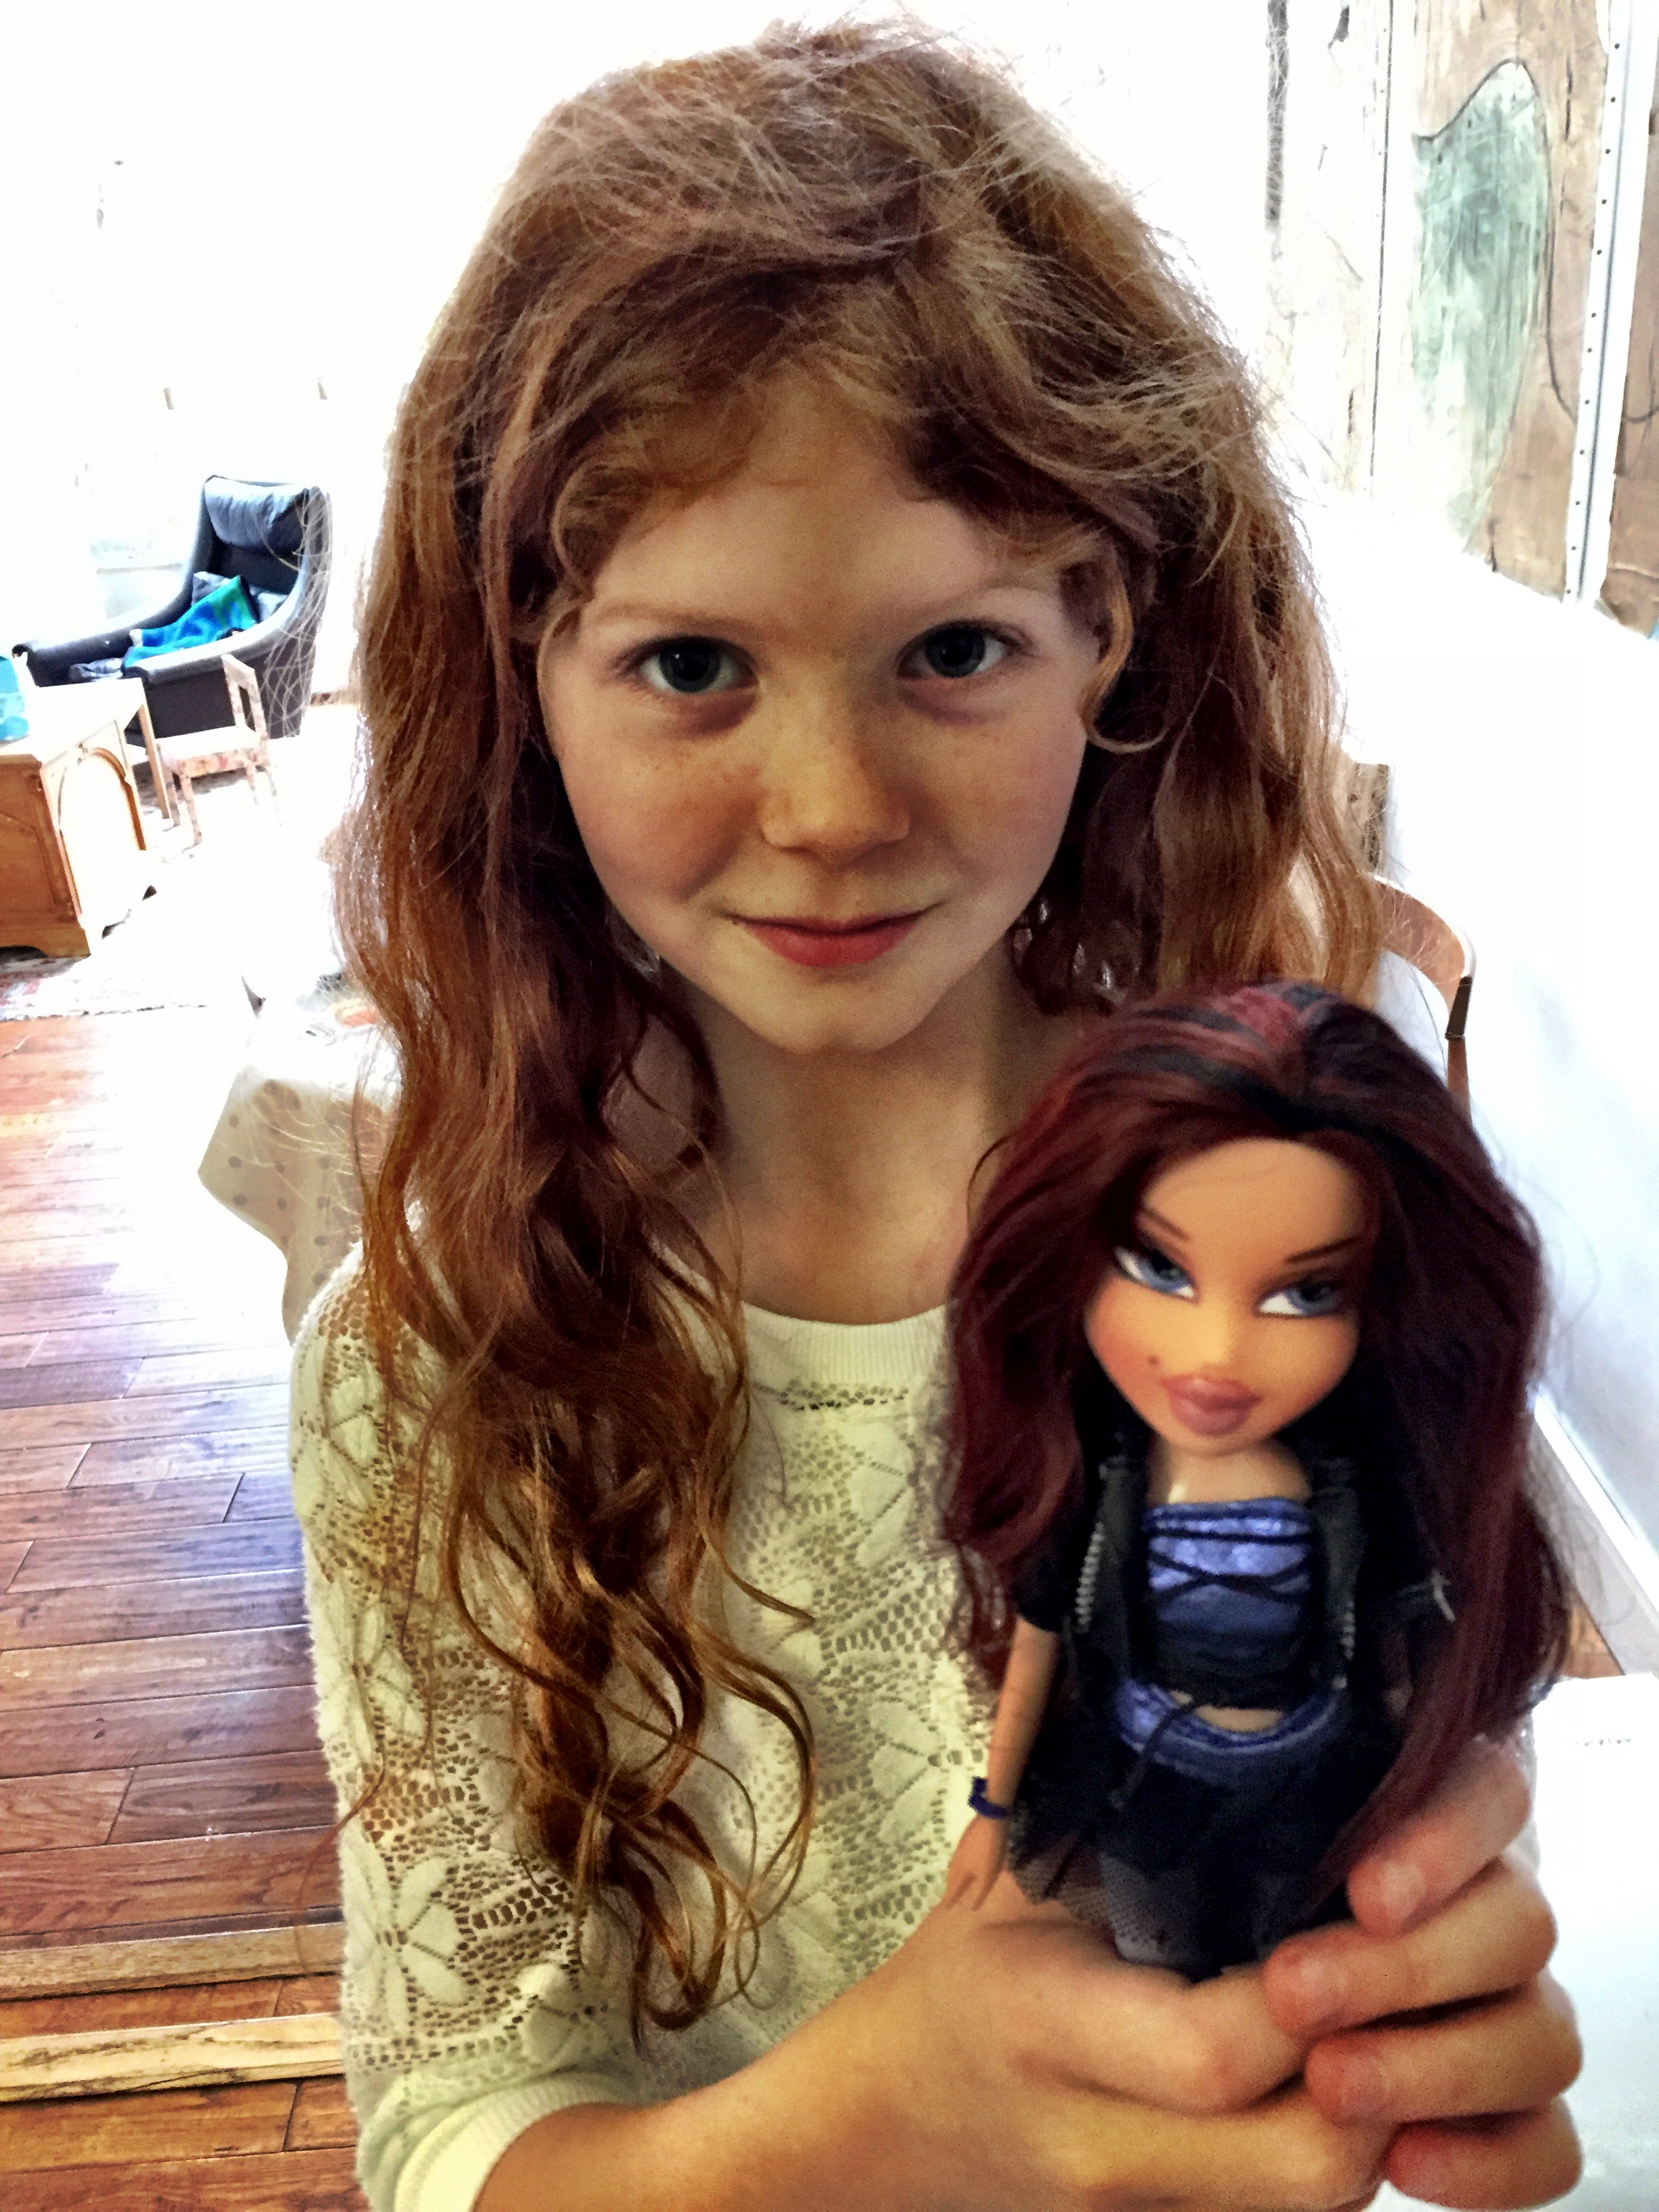
Bella with Bratz doll Bella..
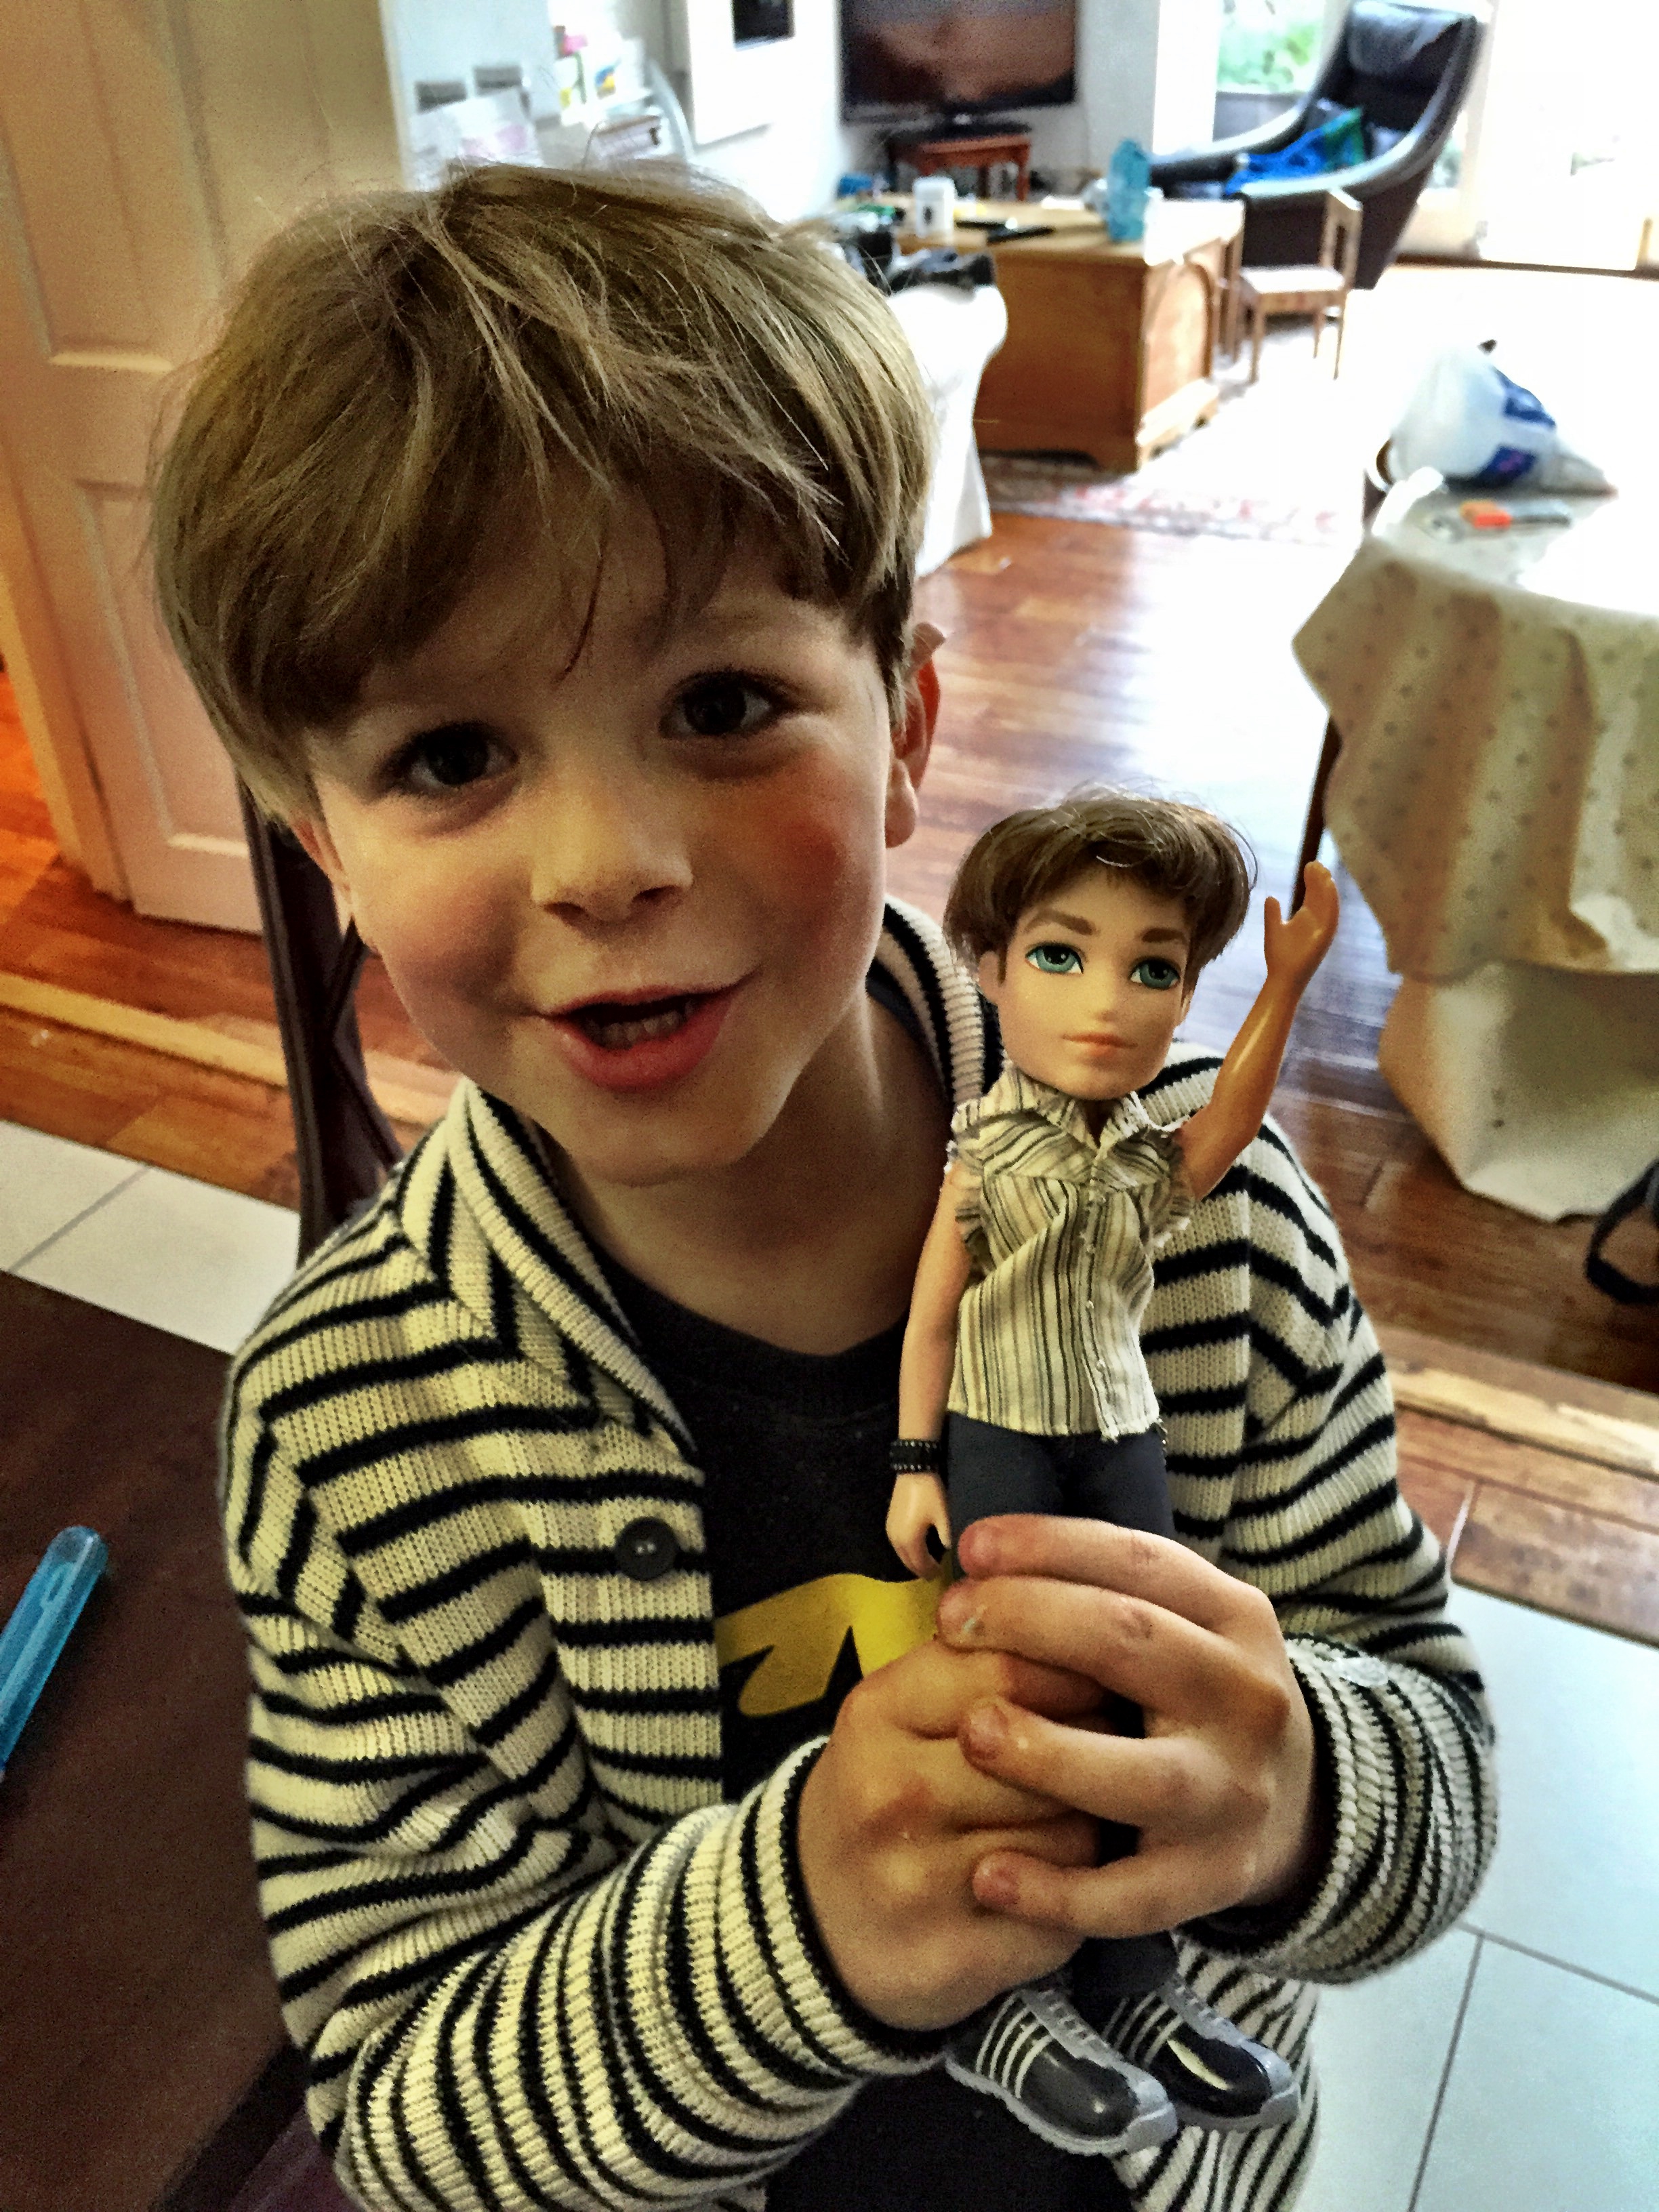
And Charlie with his doll Charlie, all ready for the tree-change experience we’re attempting today (I have one too!). Results tomorrow..but I have a feeling it’s not as easy as it looks!!
Laters, Kate x
The Ride of Our Life!

The Top Secret Project?…

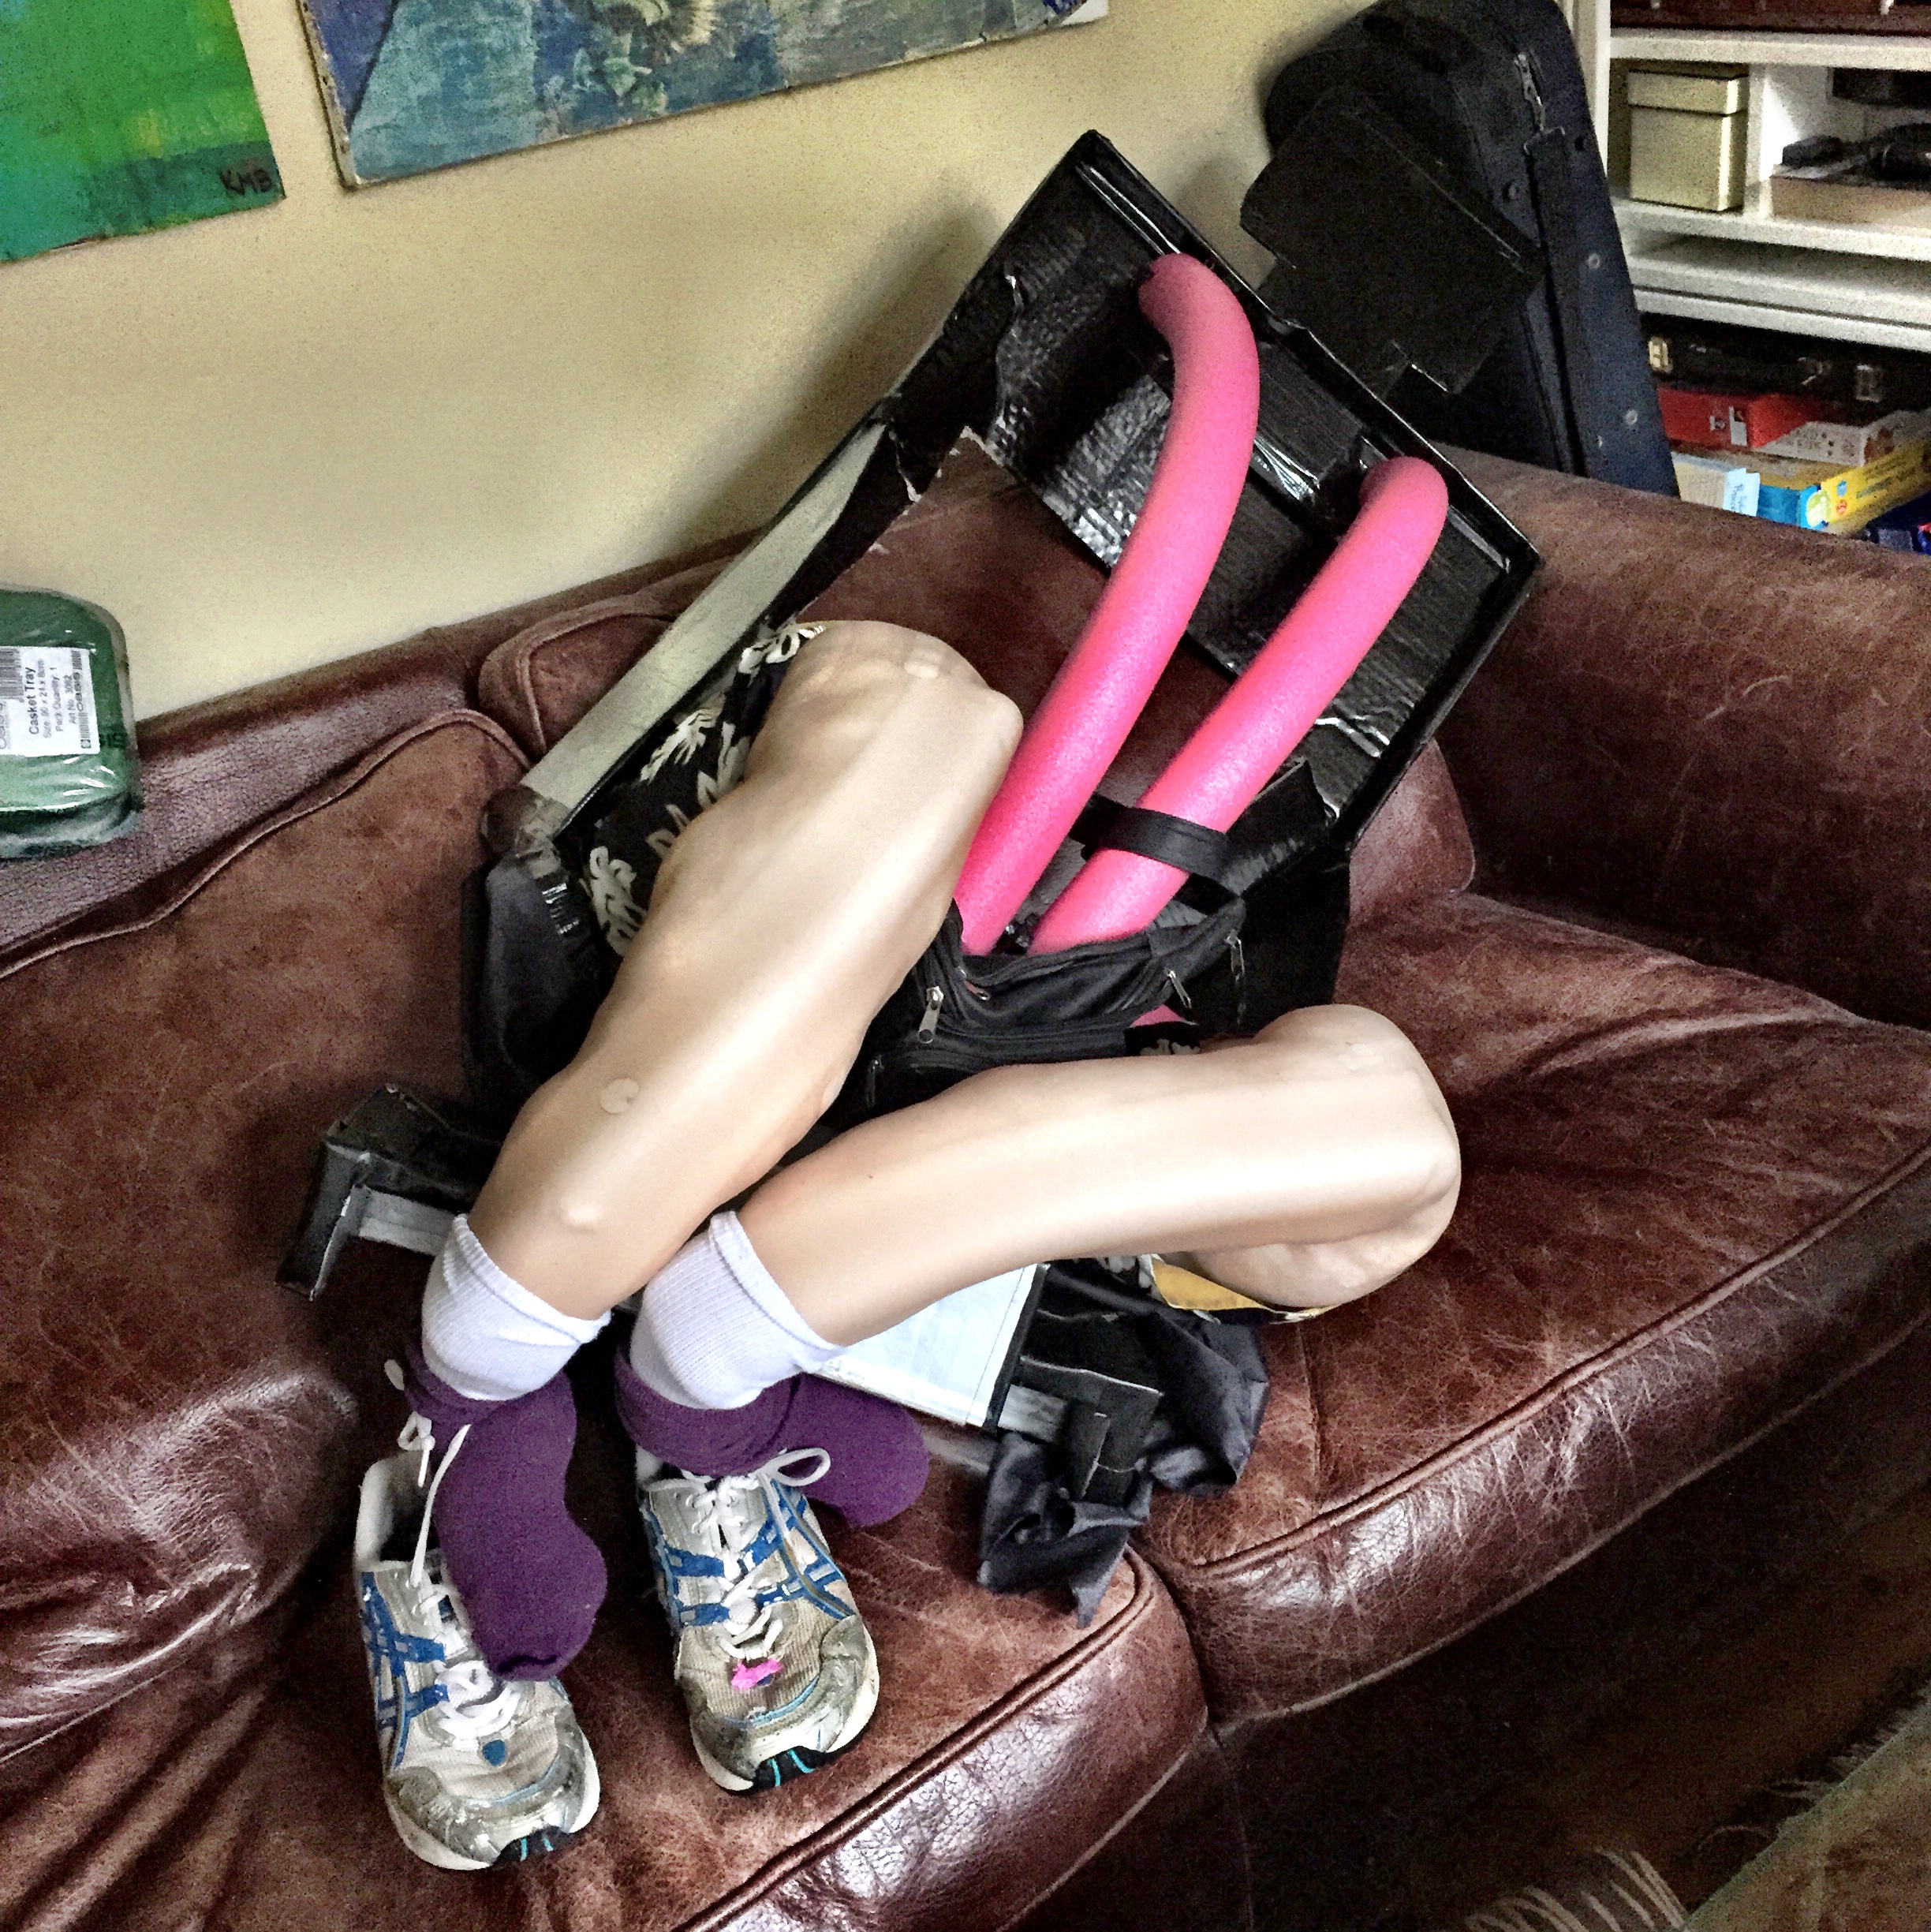
Started like this..as made by Mandy and Philip.
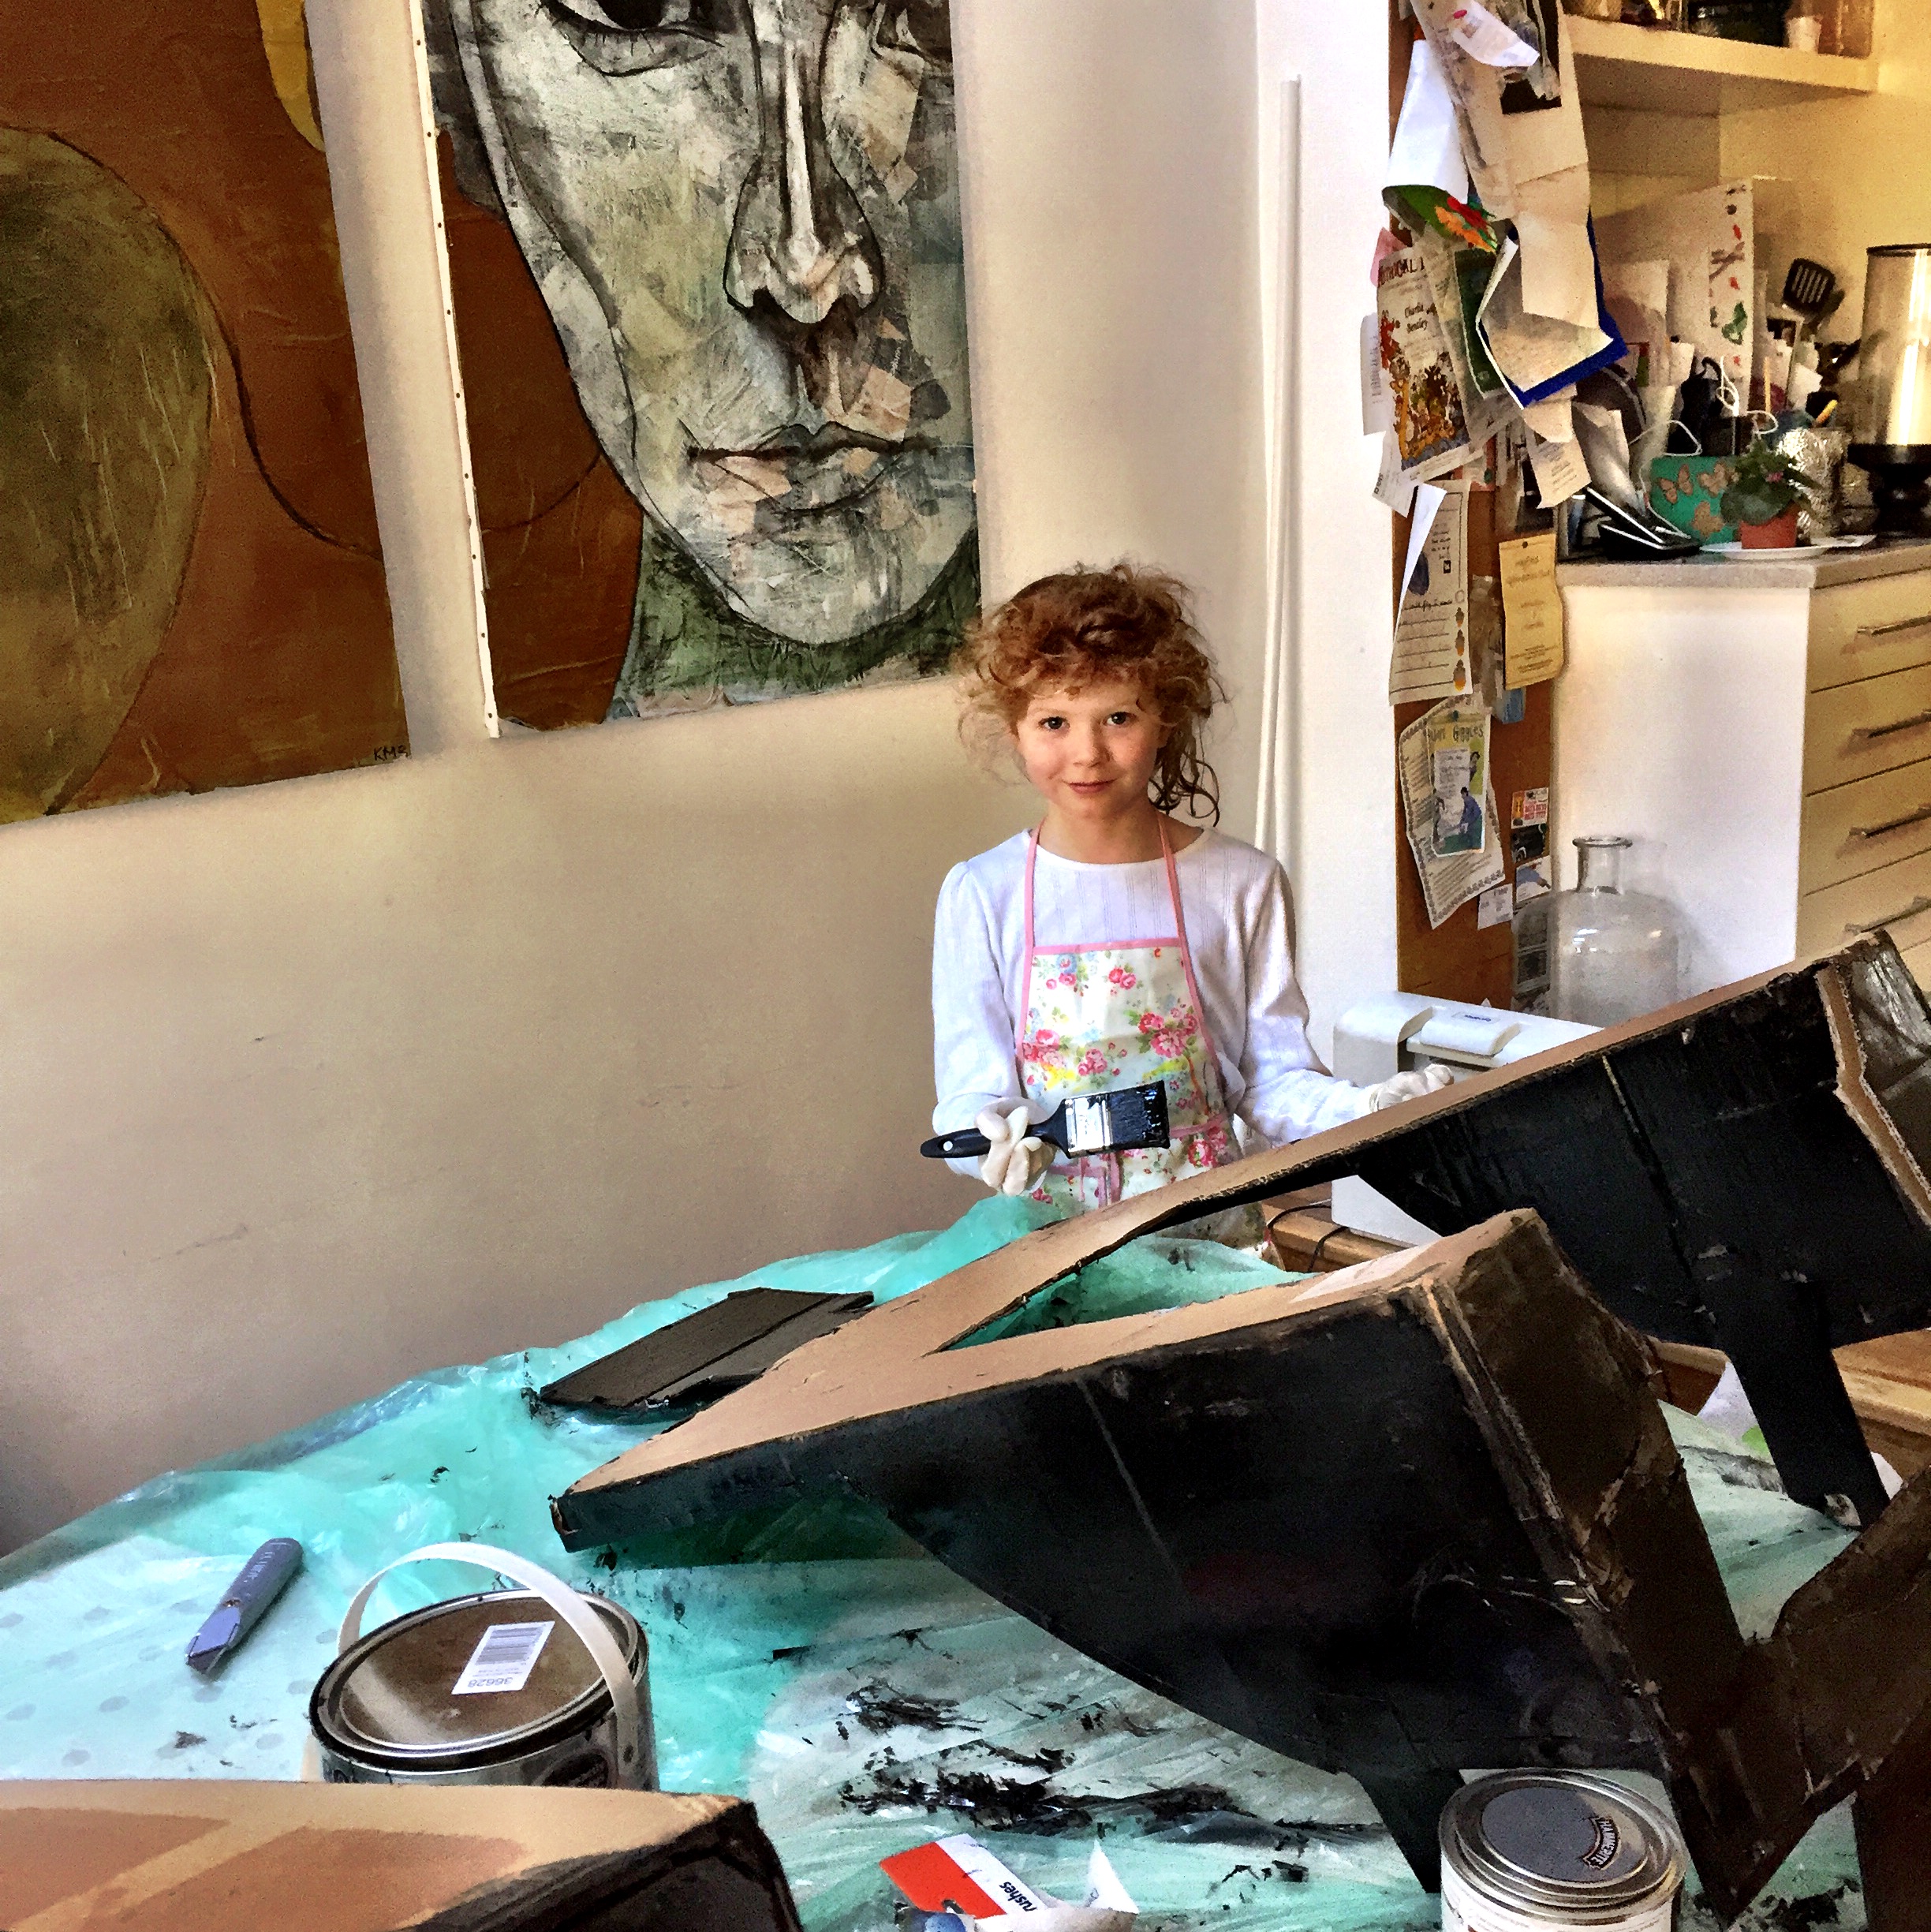
Went on to this..
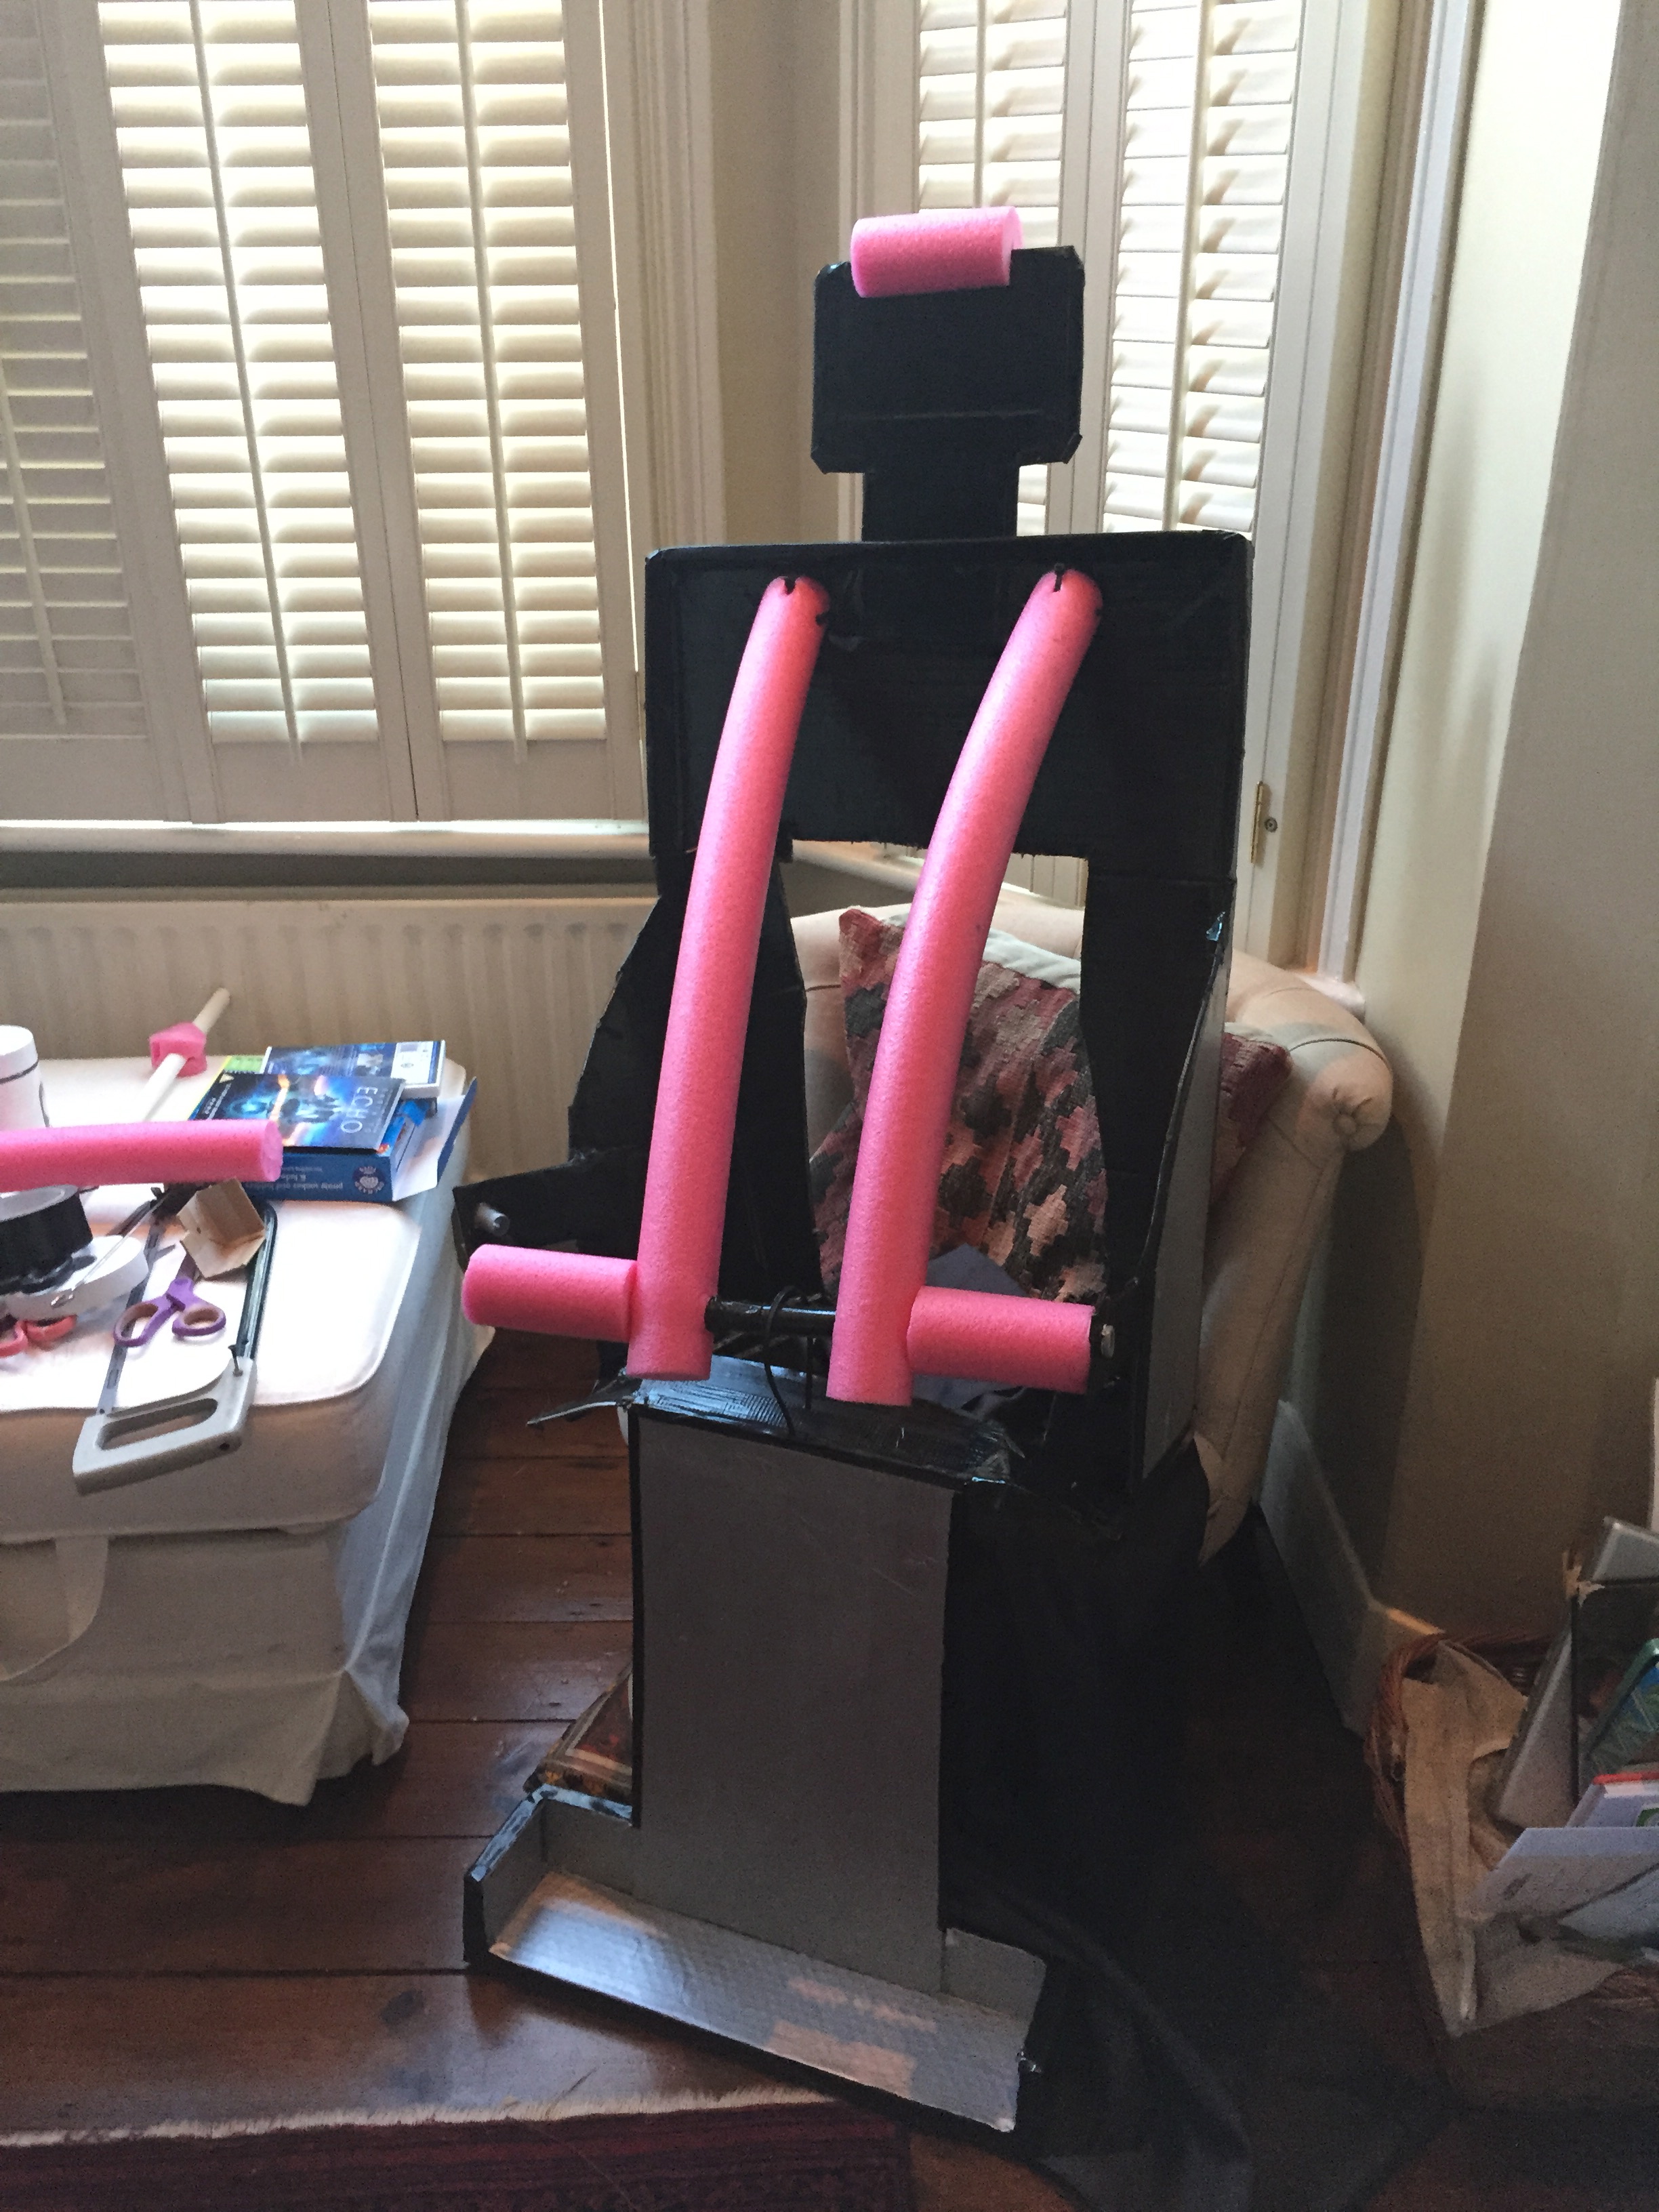
Transformed to this..

Then multiplied..by eight..

We added legs.
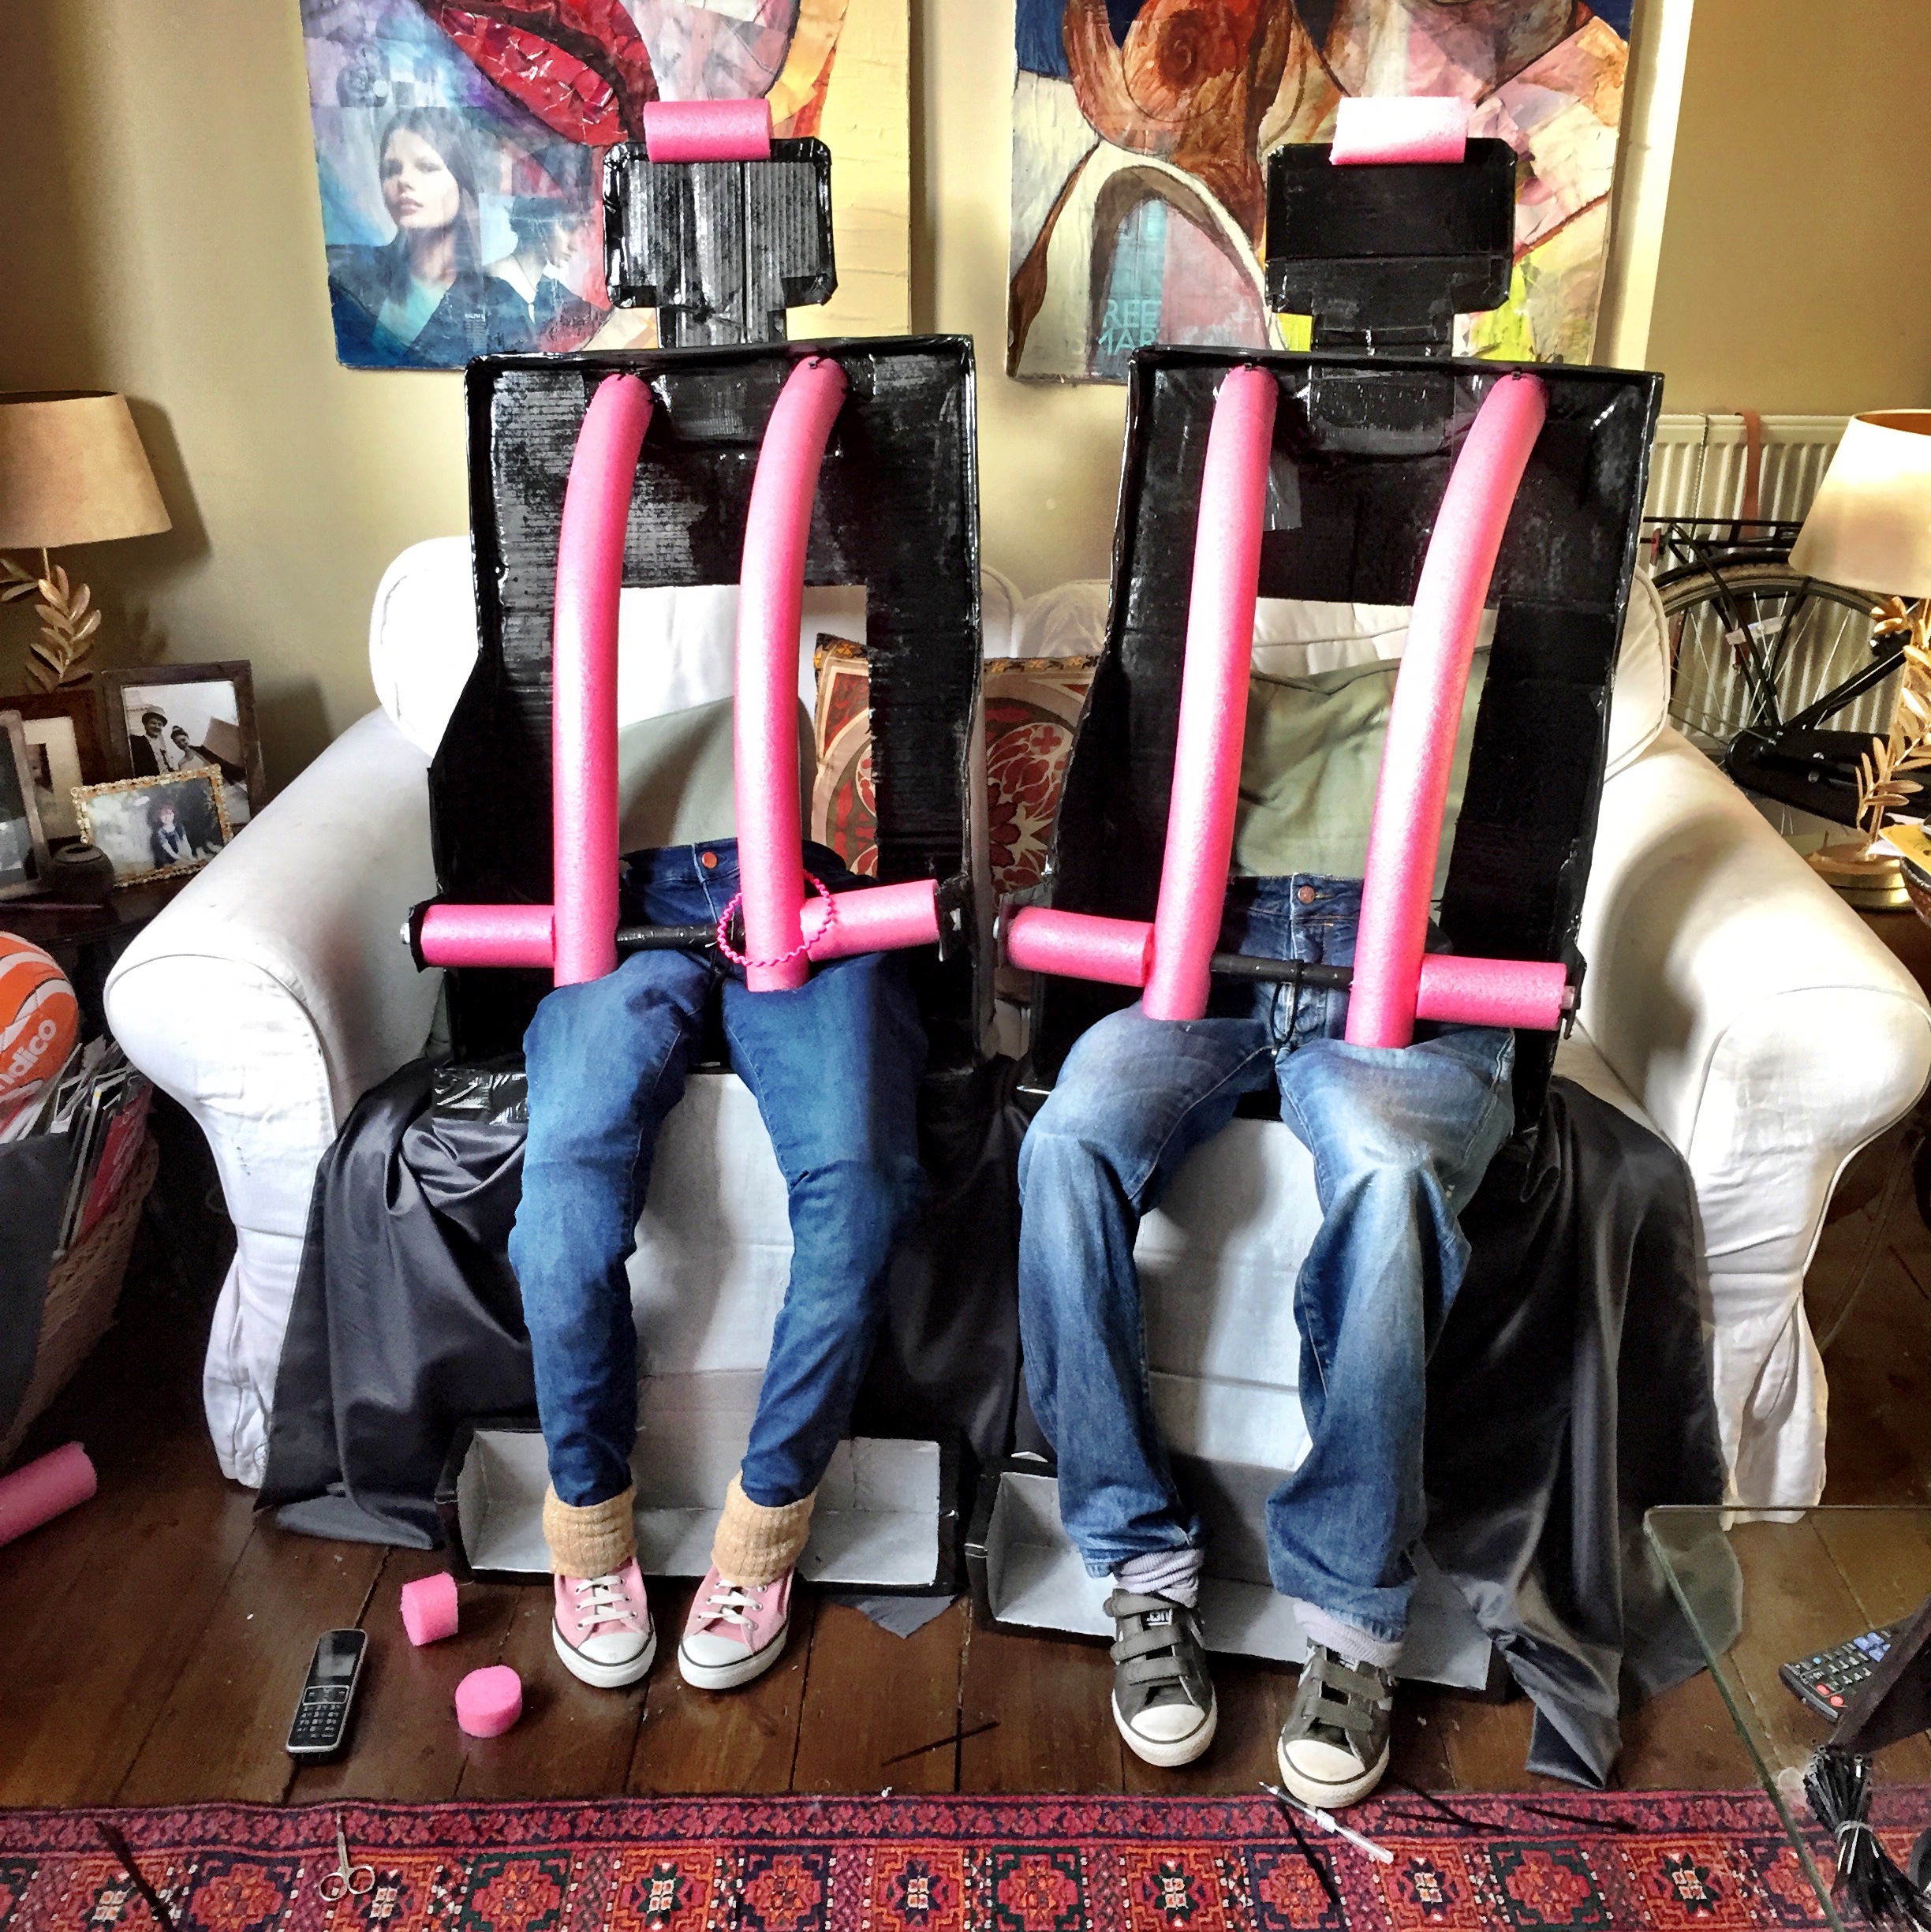
Lots of legs..

(It was a shock every time we walked in the room!)

And then the top halves! And all for the School Quiz!!!!….

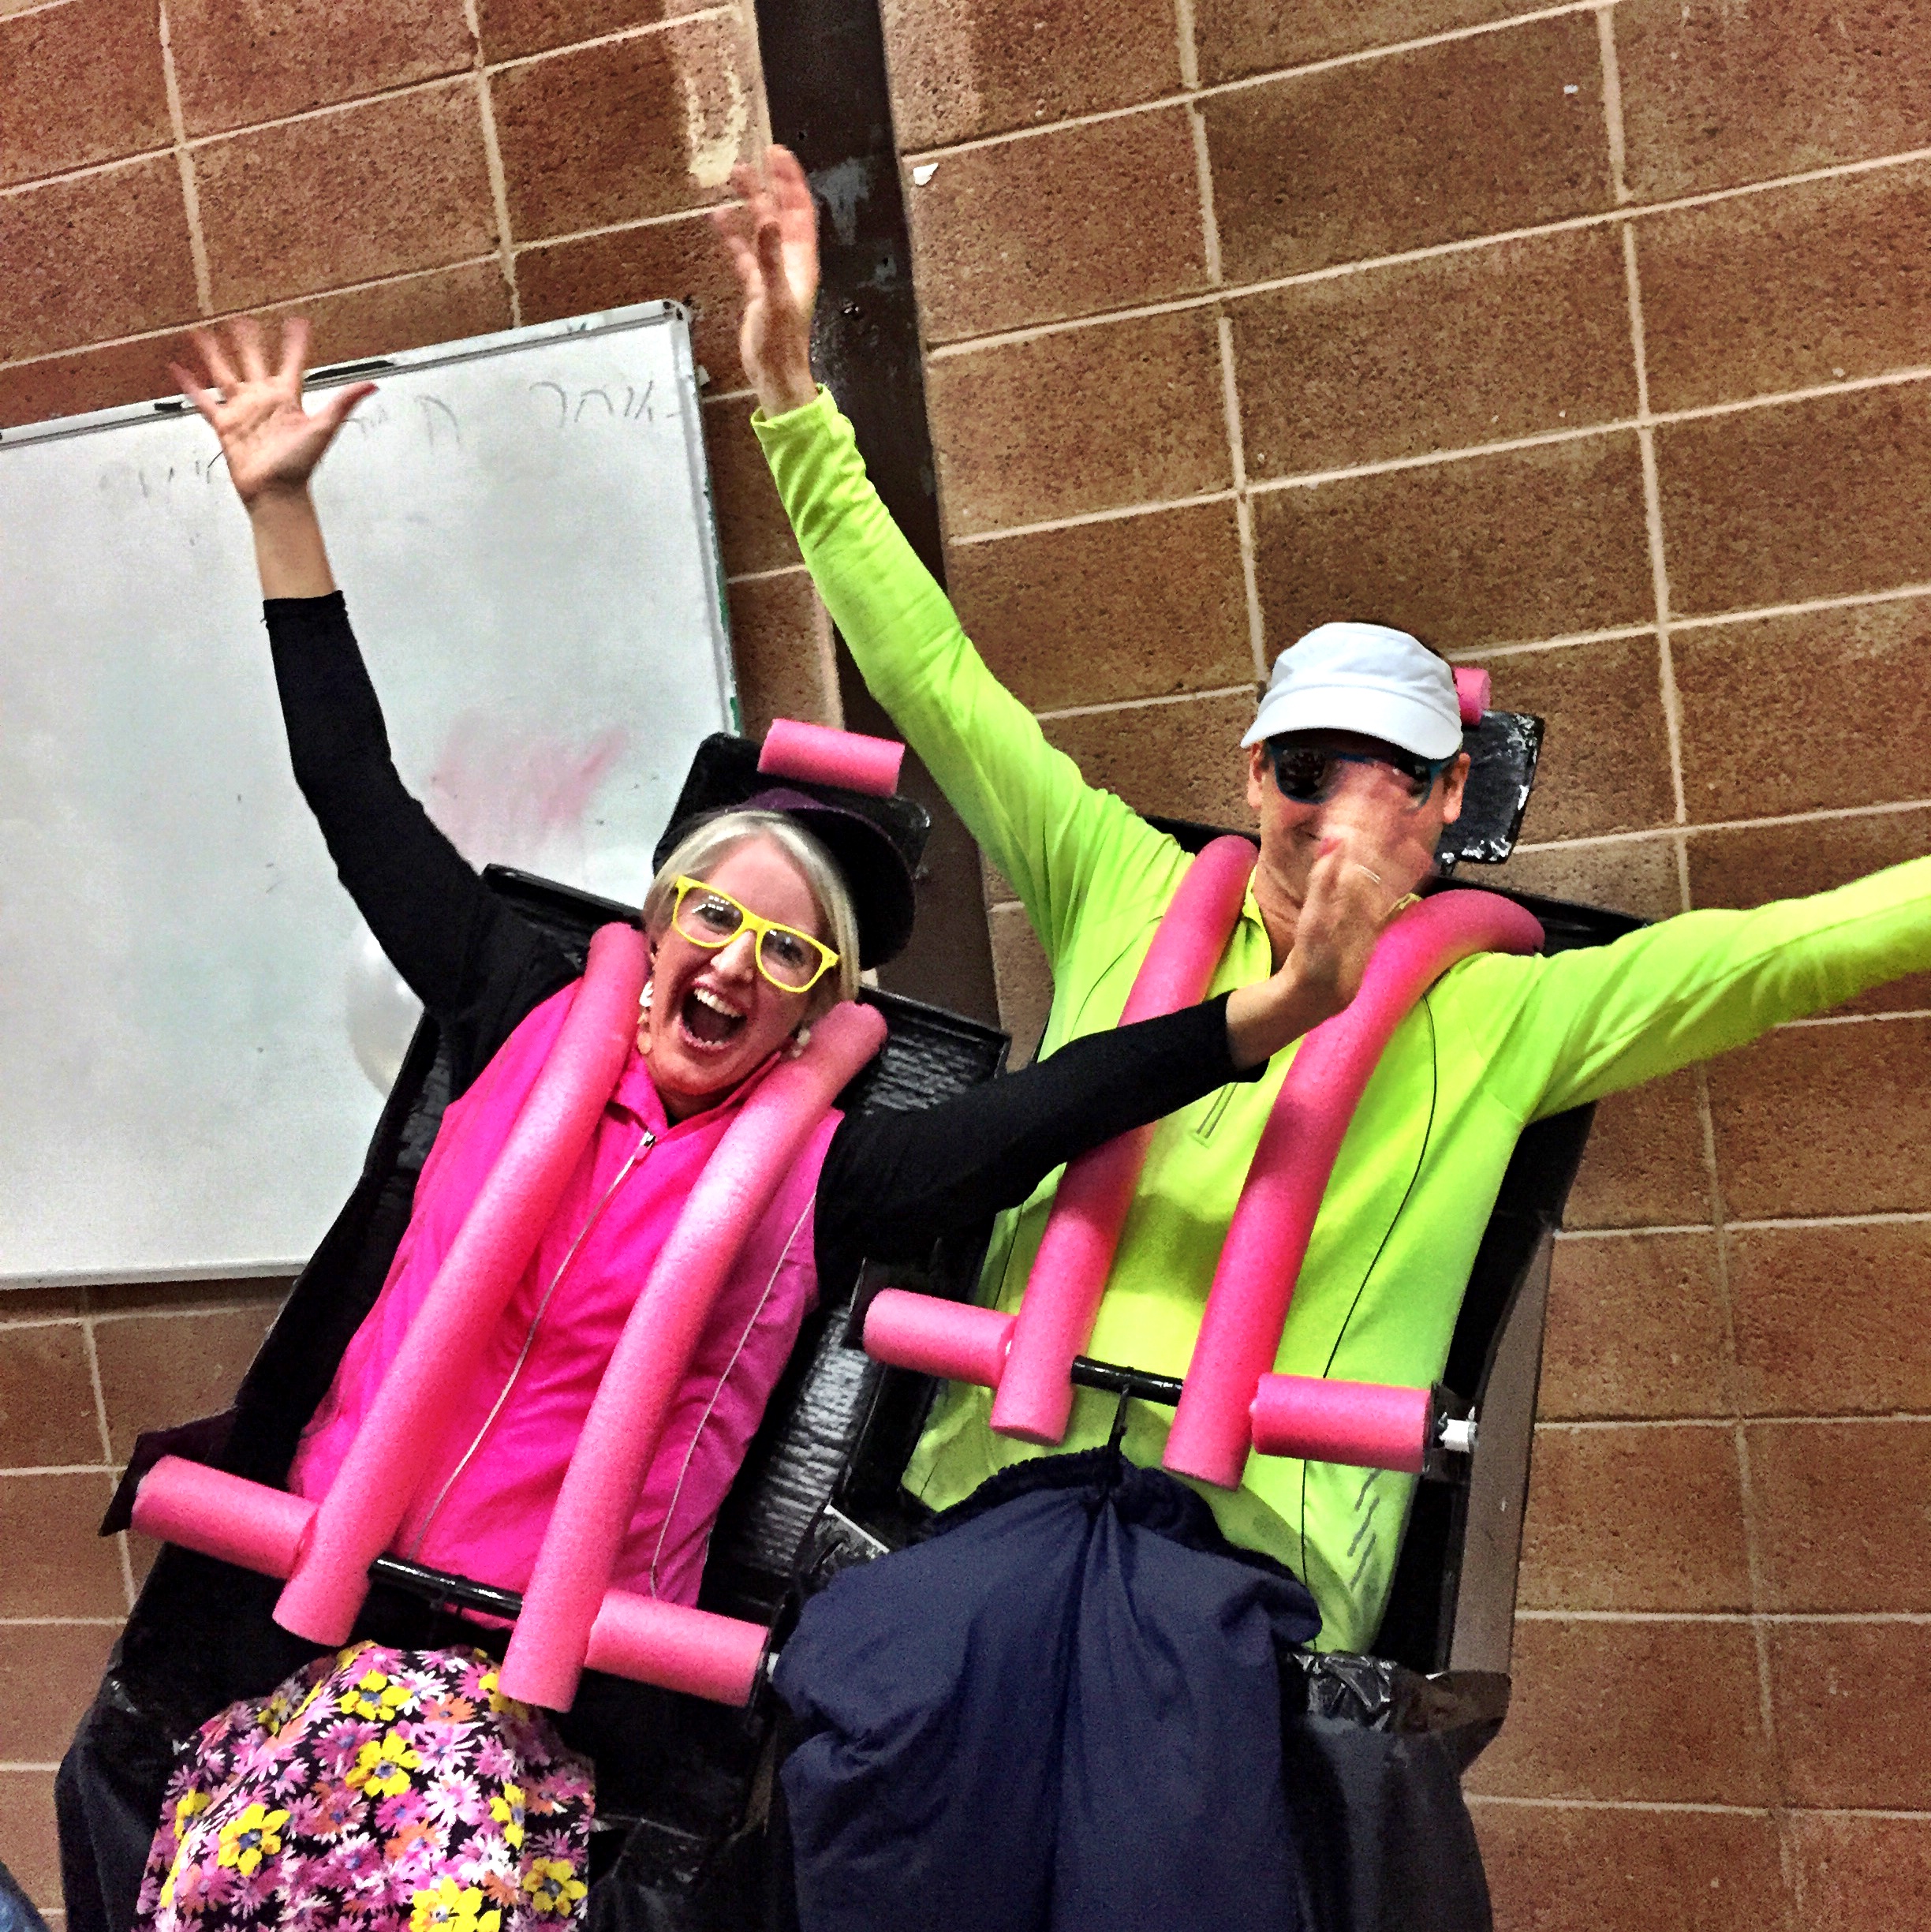
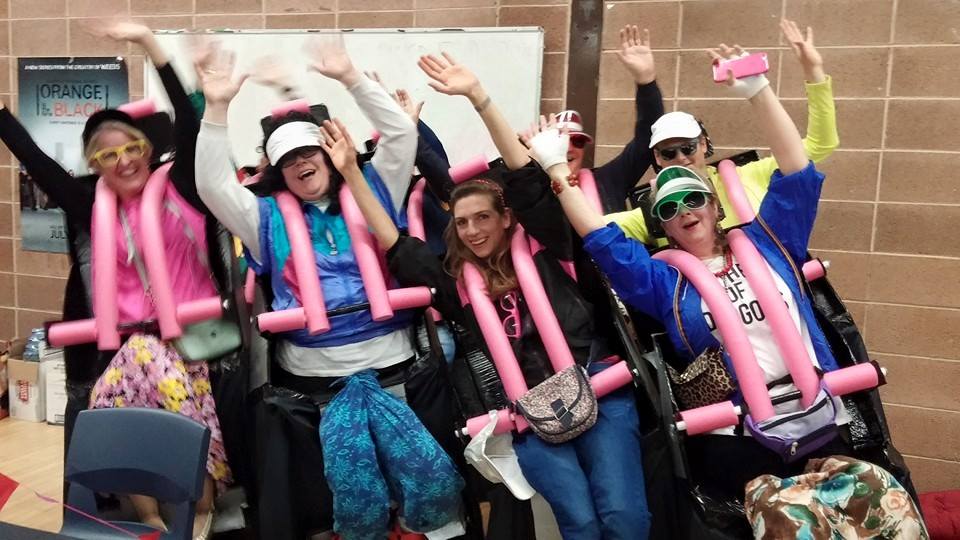
Go to Facebook for the vid!


It was a top, top night..such tables as ‘fifty shades of Farrow and Ball’..’Teachers Pets’ – dressed as animals with school ties and complete with squeakers..and a fabulous ‘my big fat gypsy wedding’ with dresses, cake, tent and fairy lights!


But we won!!!!!!!!!!!!!!!!!!!!!!!!!!!!!!!!!!!!!!!!!
It was really rather fabulous!
Laters, Kate x
Creative Magic x
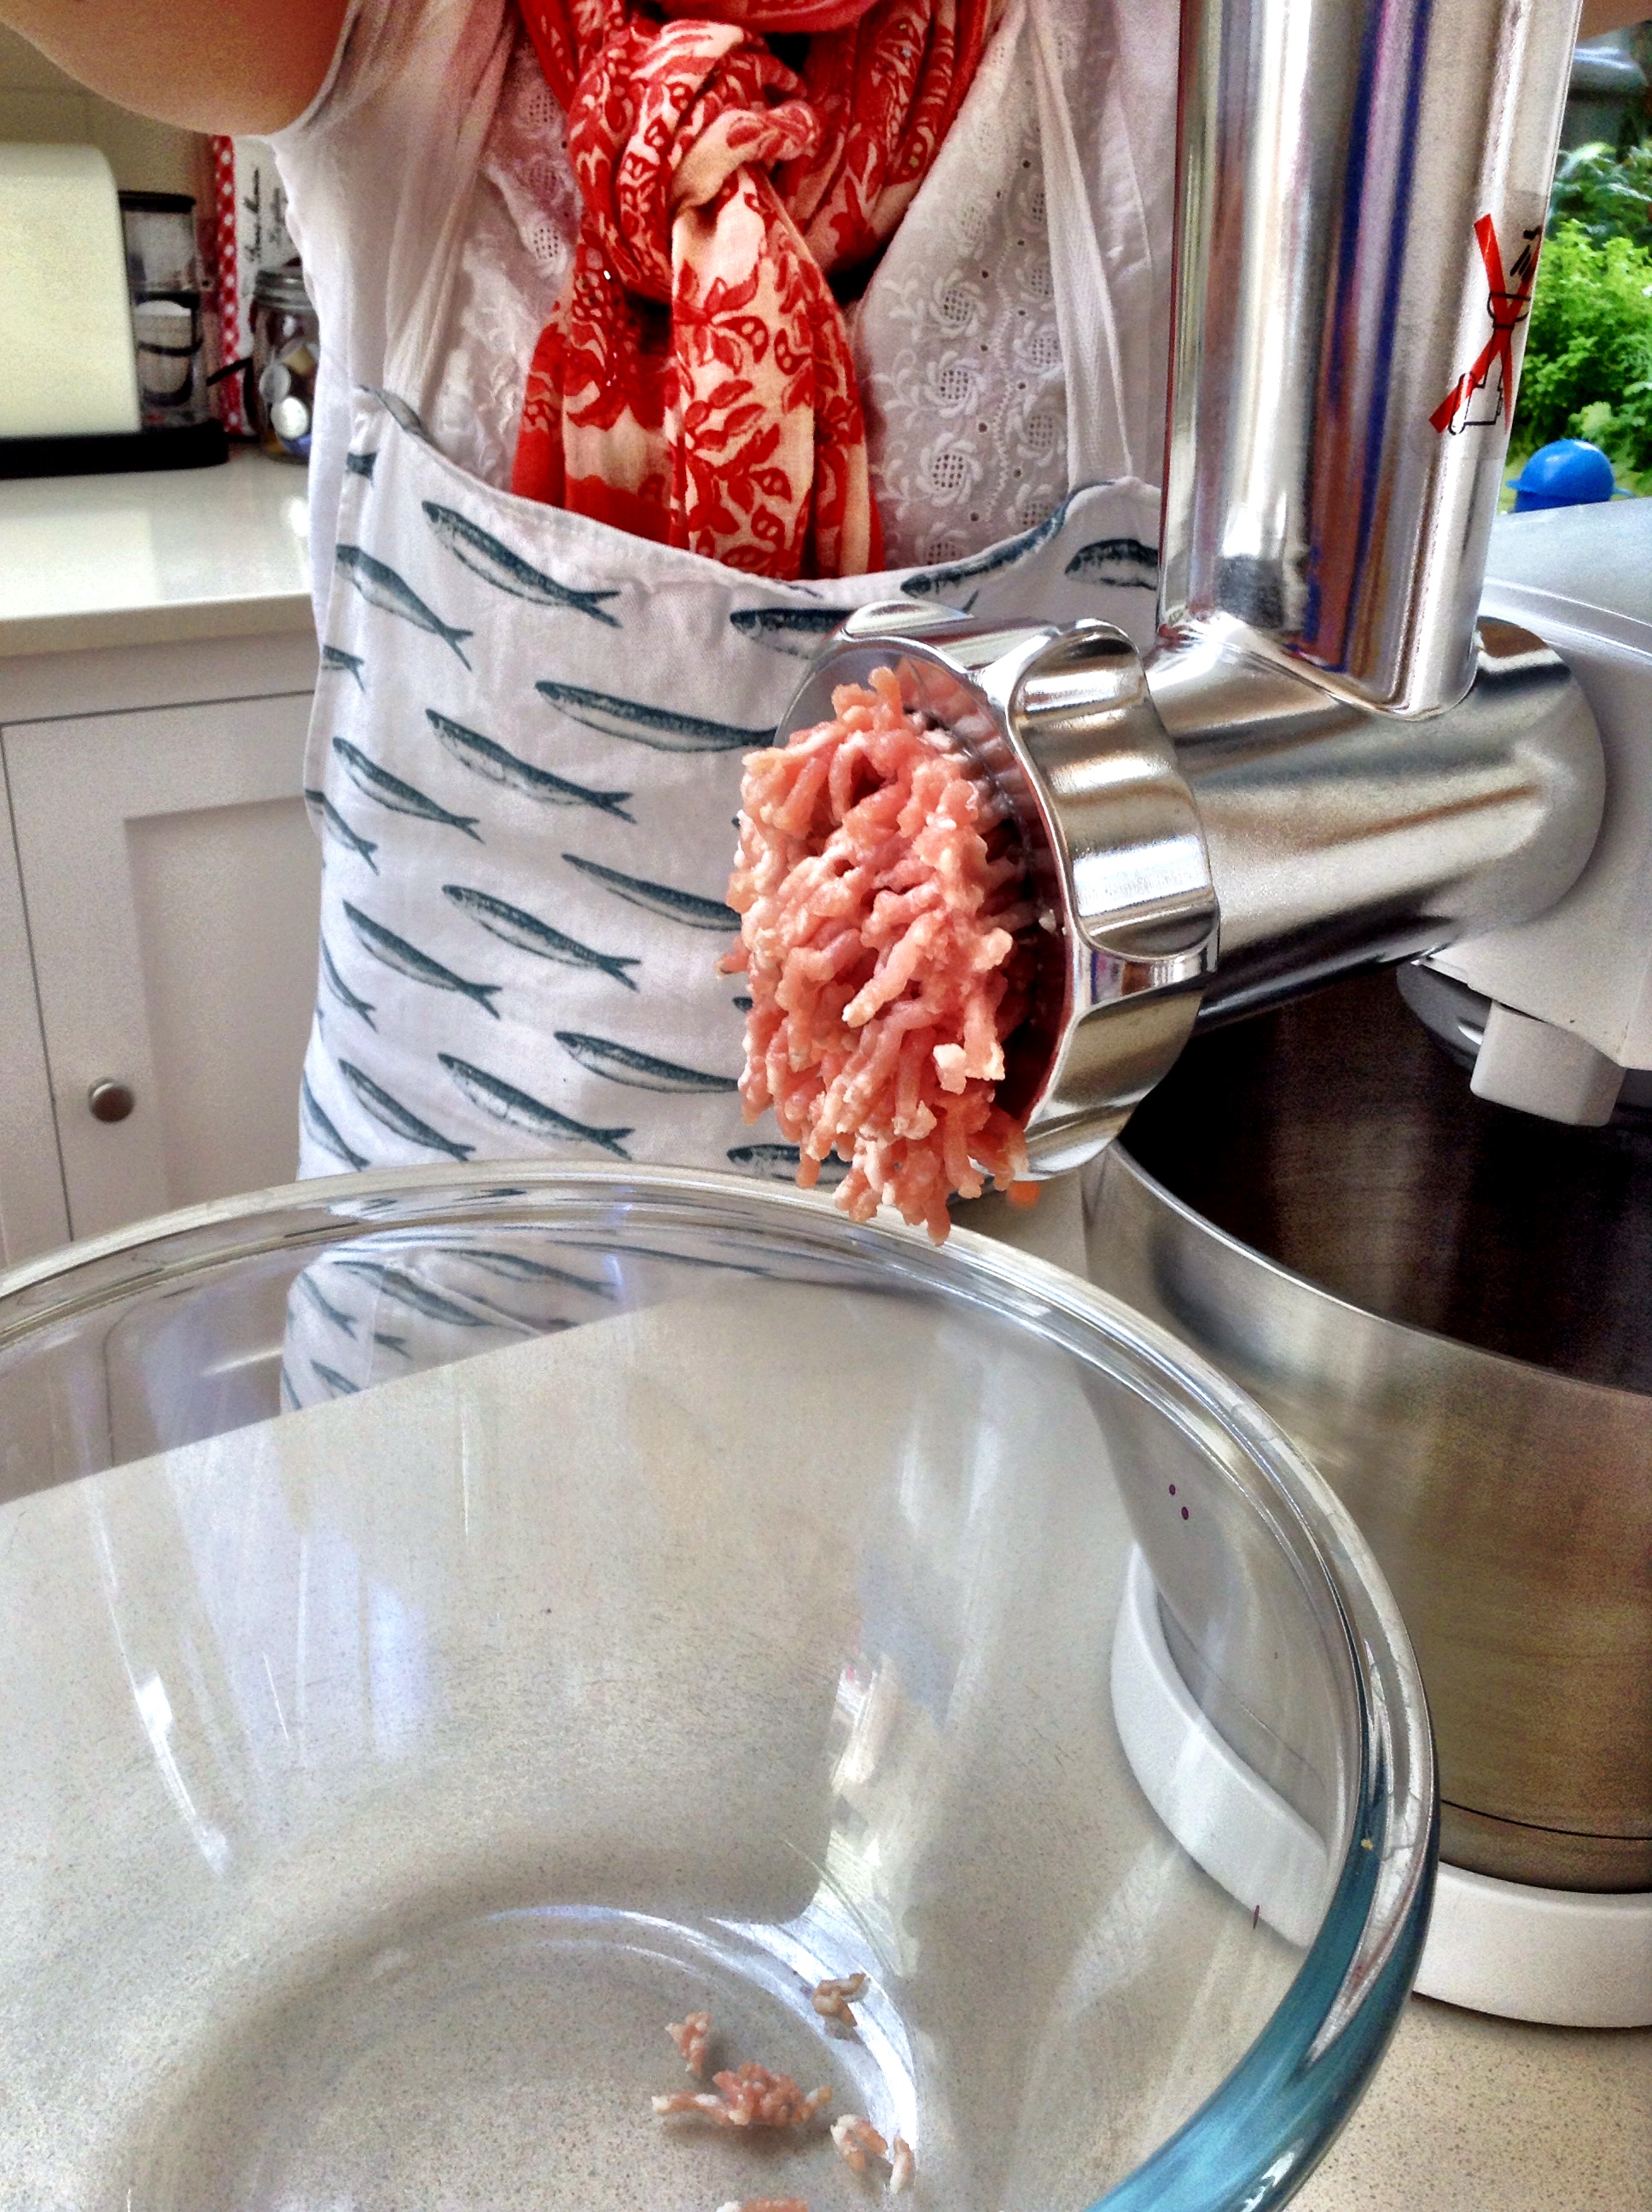
After the long summer break, it’s the much anticipated start of Creative Coffee (click for details) this morning – chutneys and oat cakes today, but above are pictures from a previous session of sausage making rather than a demonstration of what happens to unfortunate attendees..

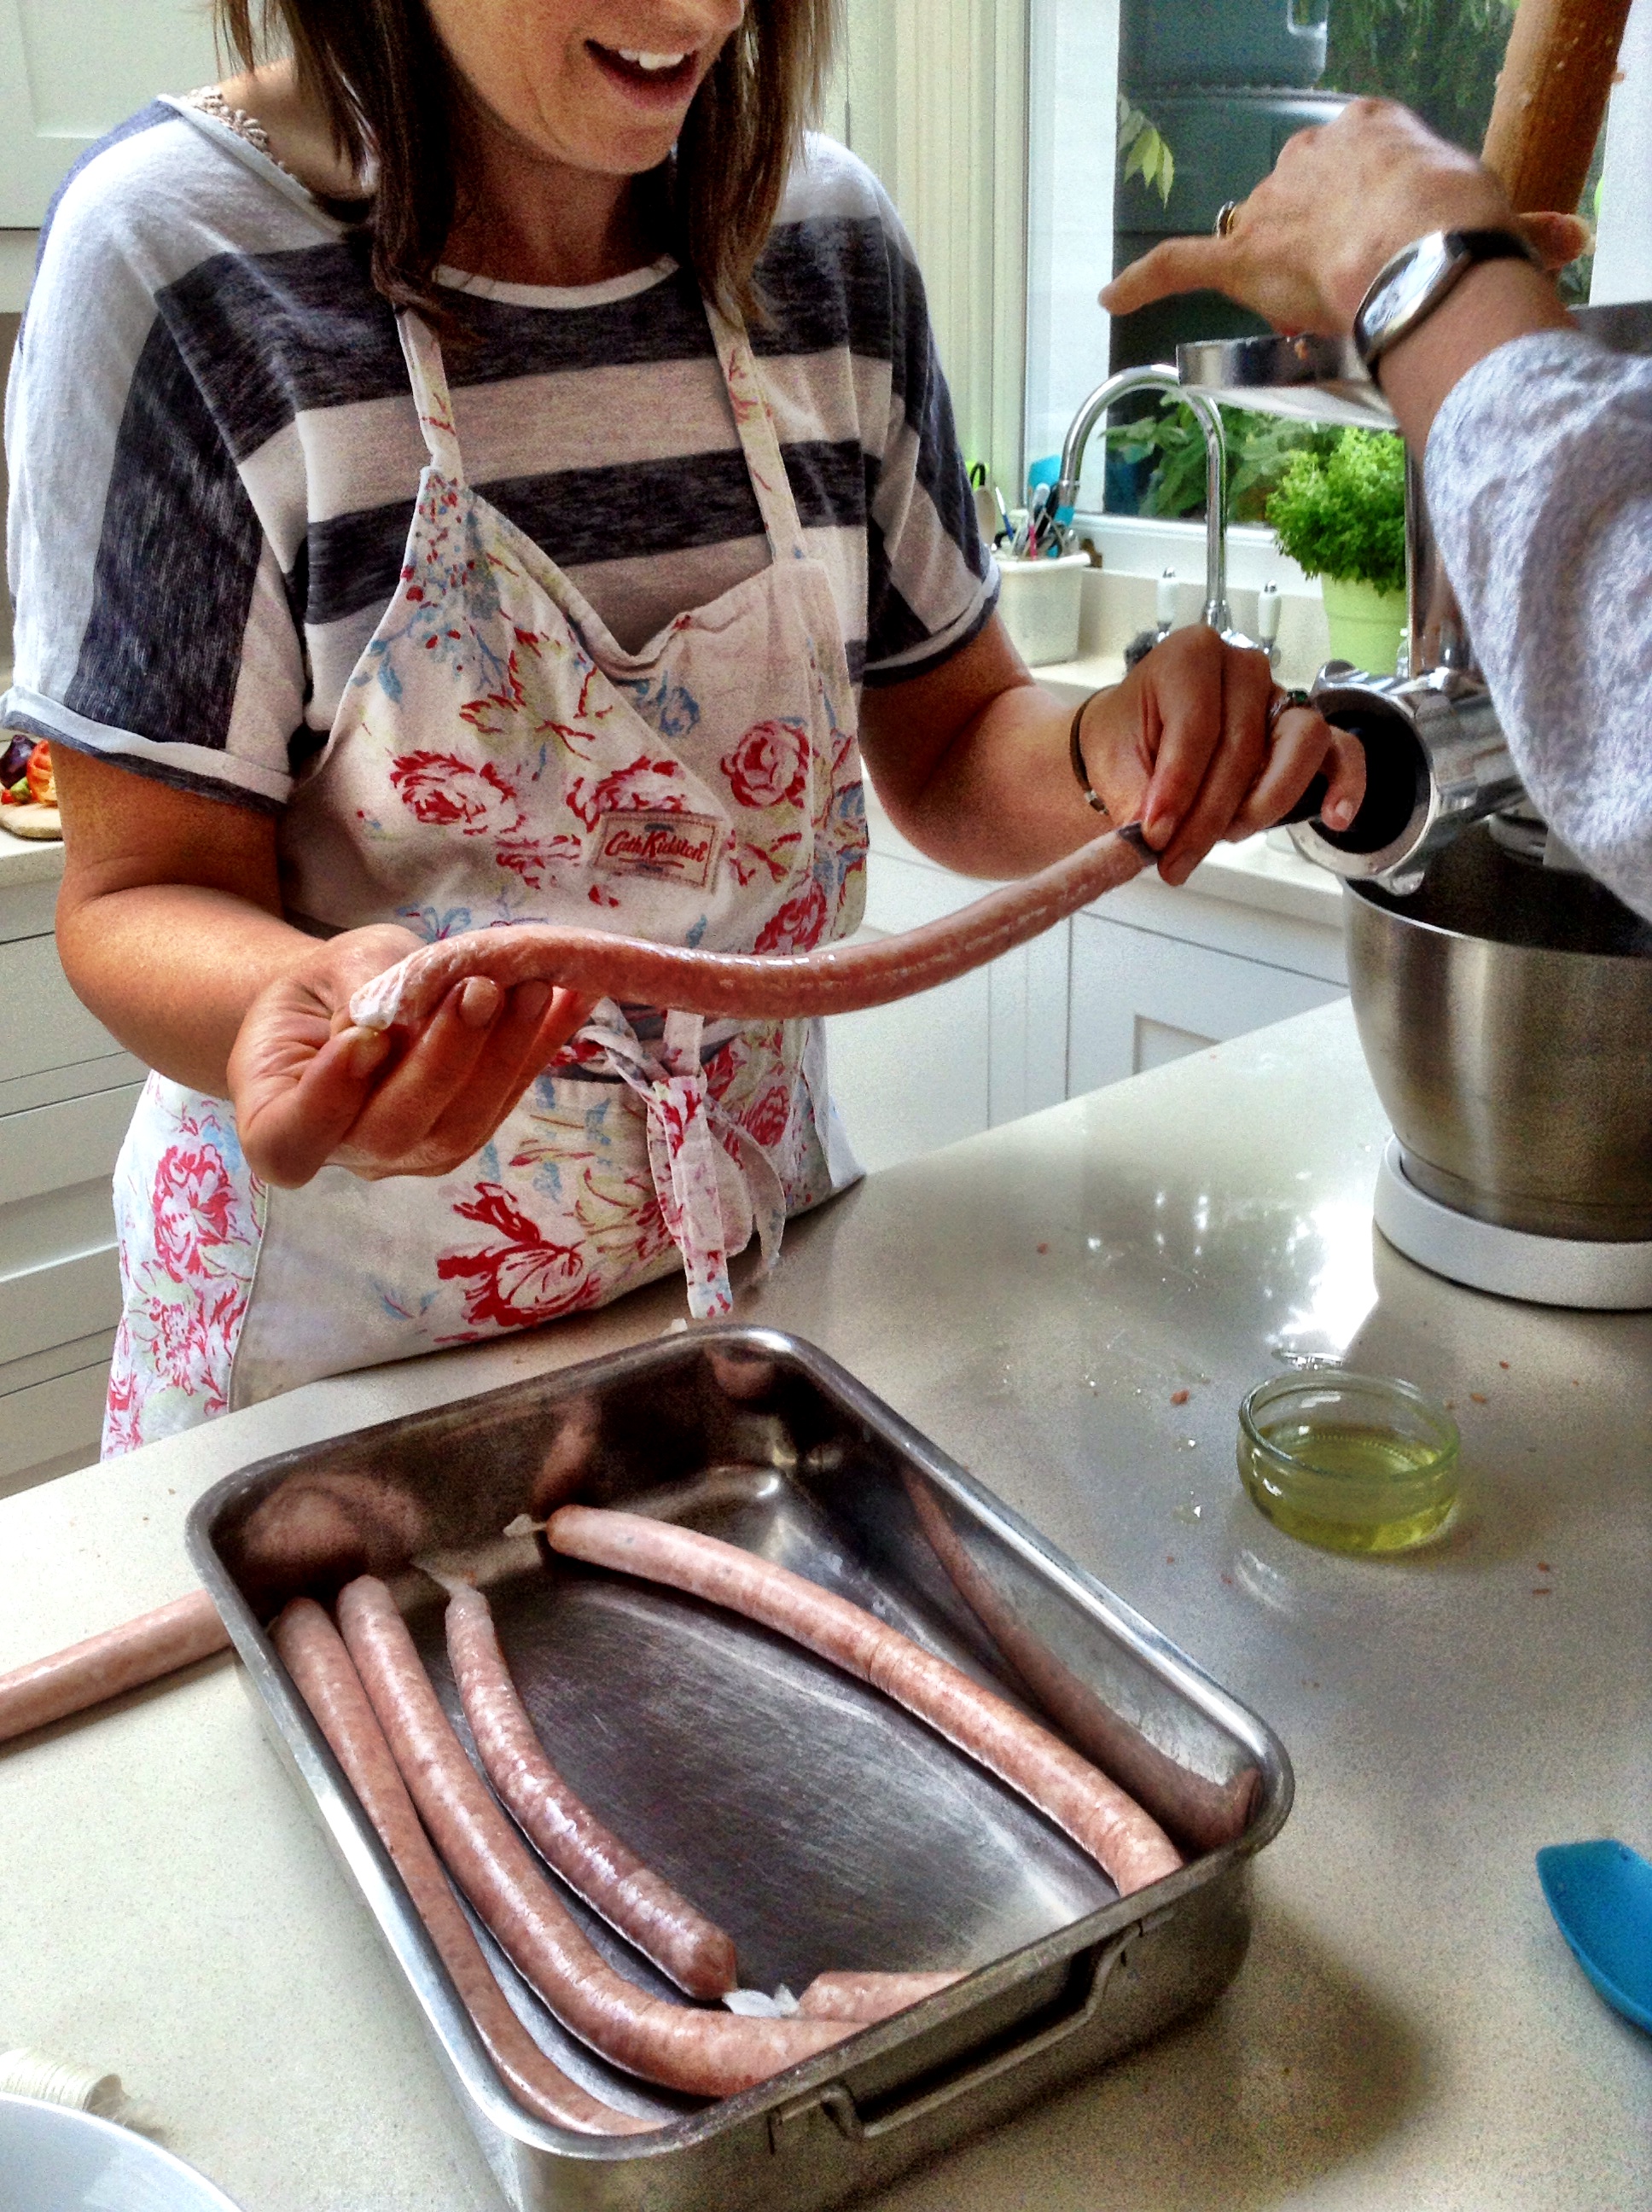
We made them right through from mincing the meat, adding bread crumbs and spices (for three different kinds of sausage no less) to the requisite comedy moment, complete with lubricating oil..
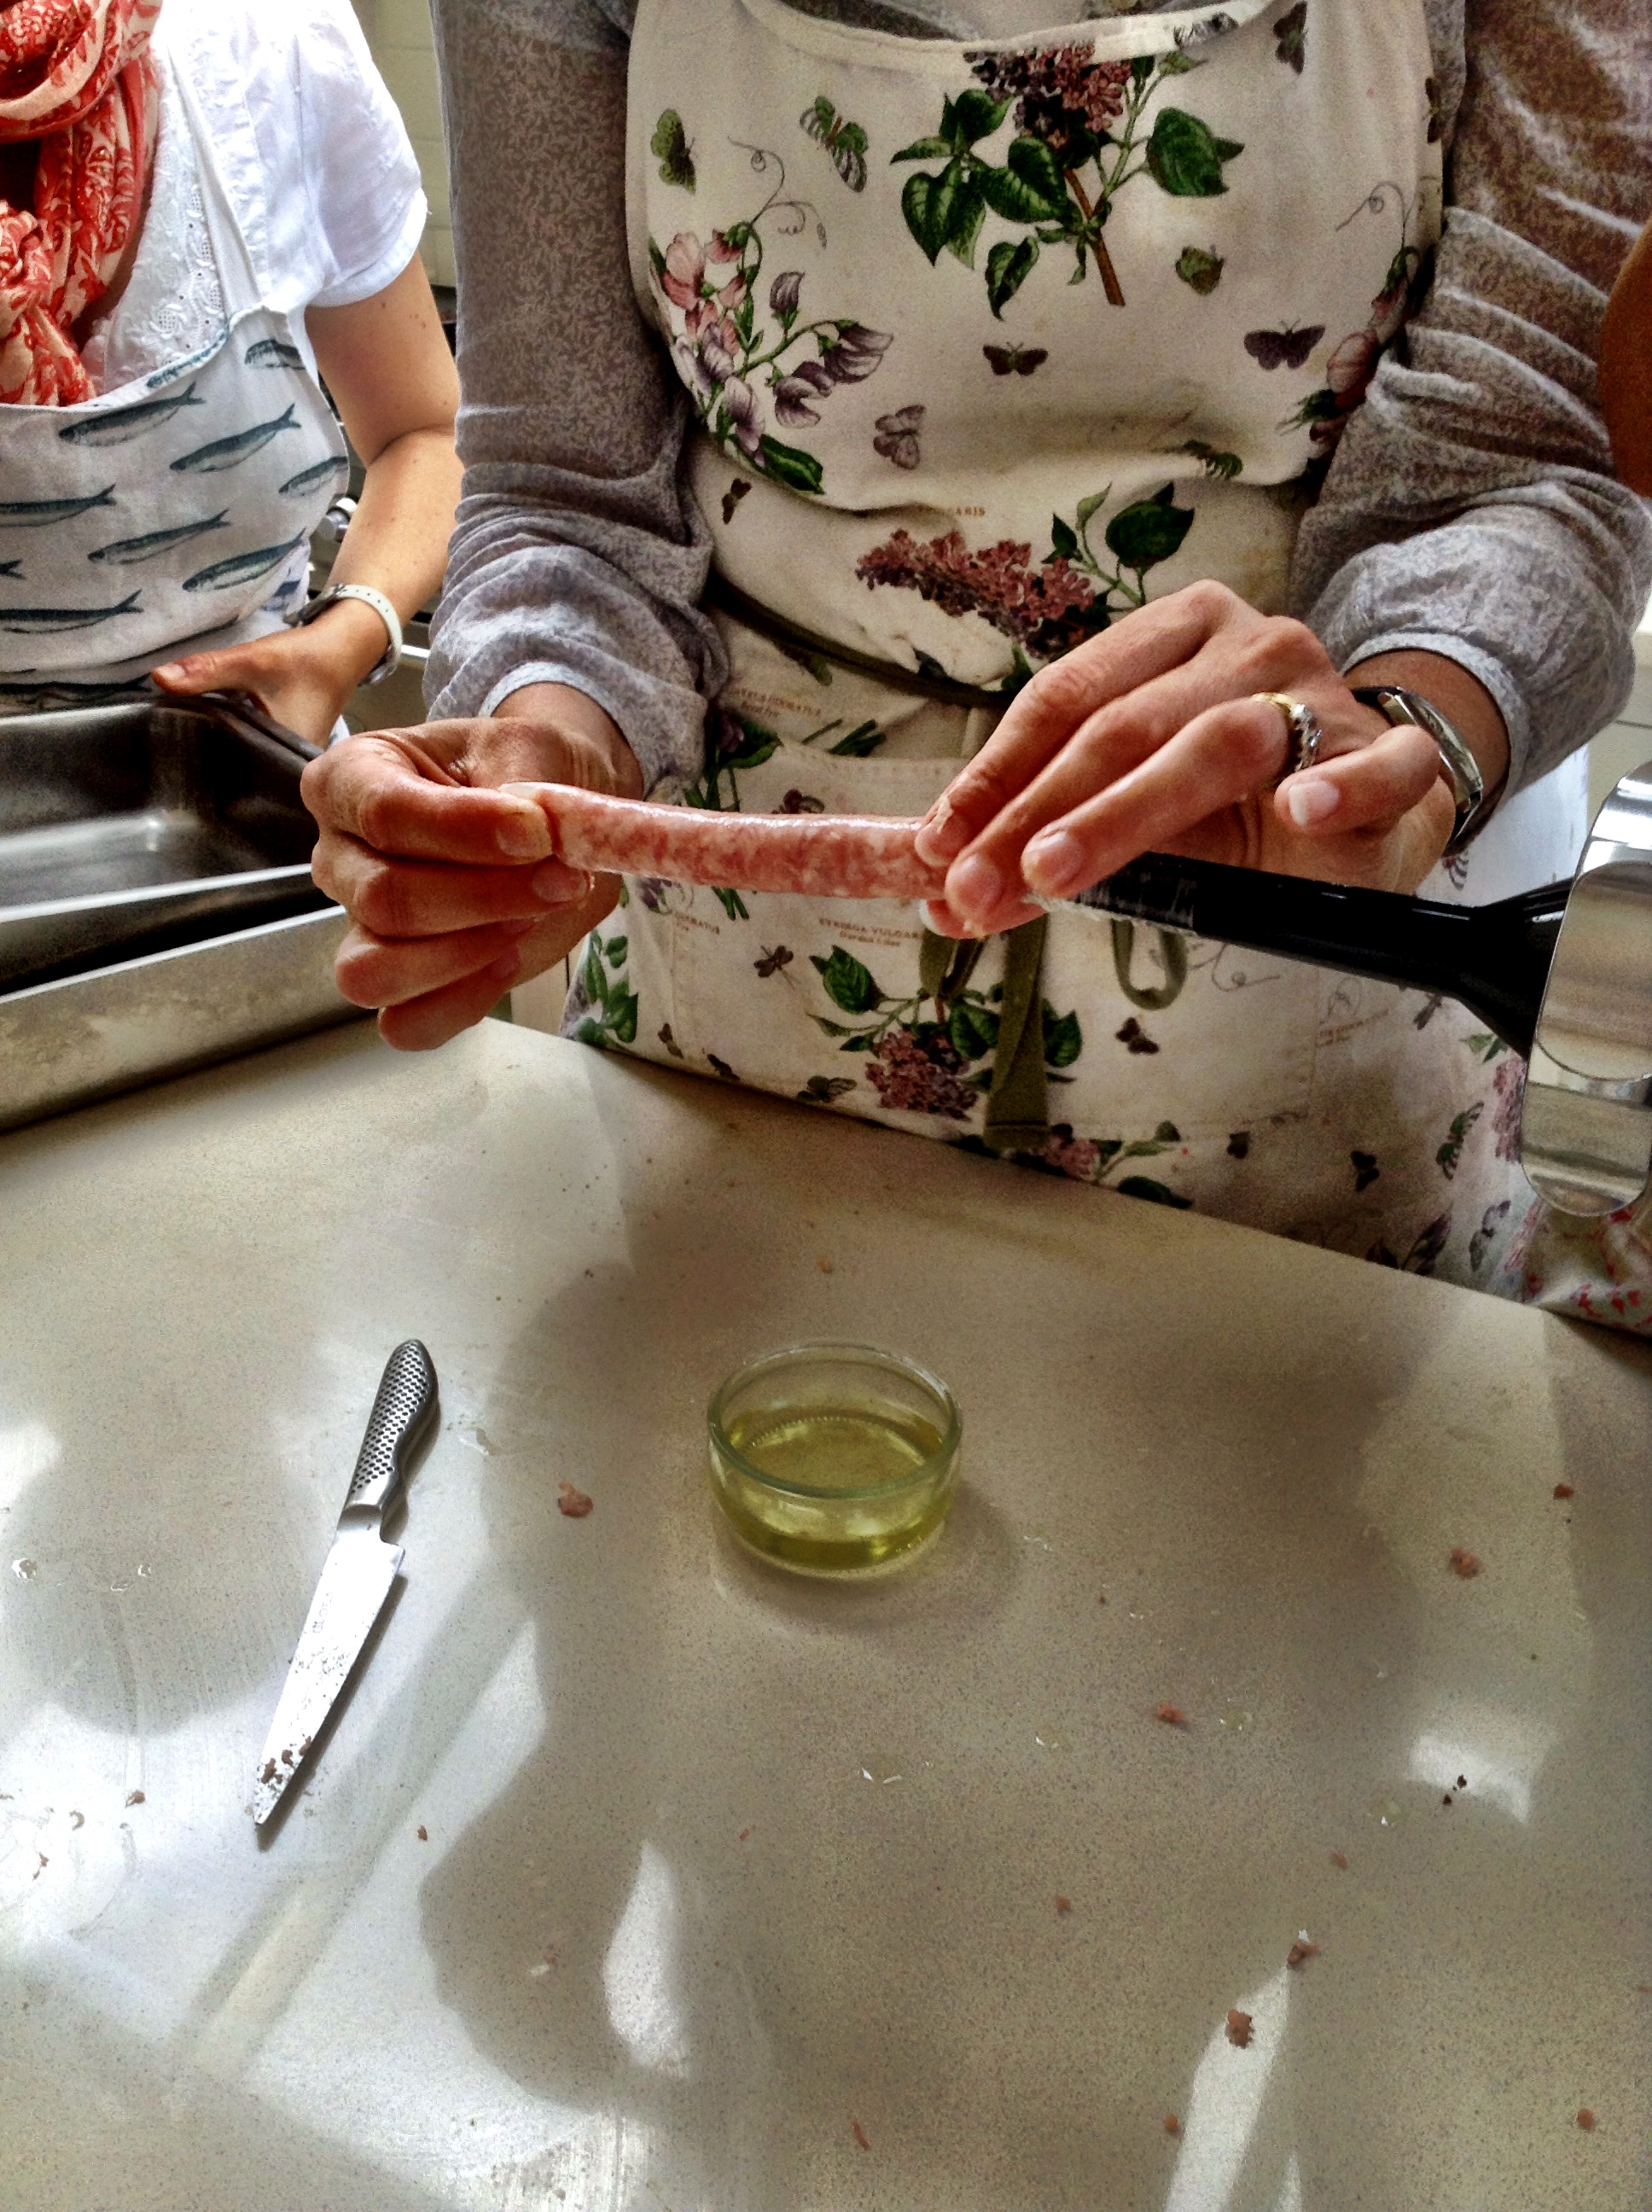
There was much tittering!

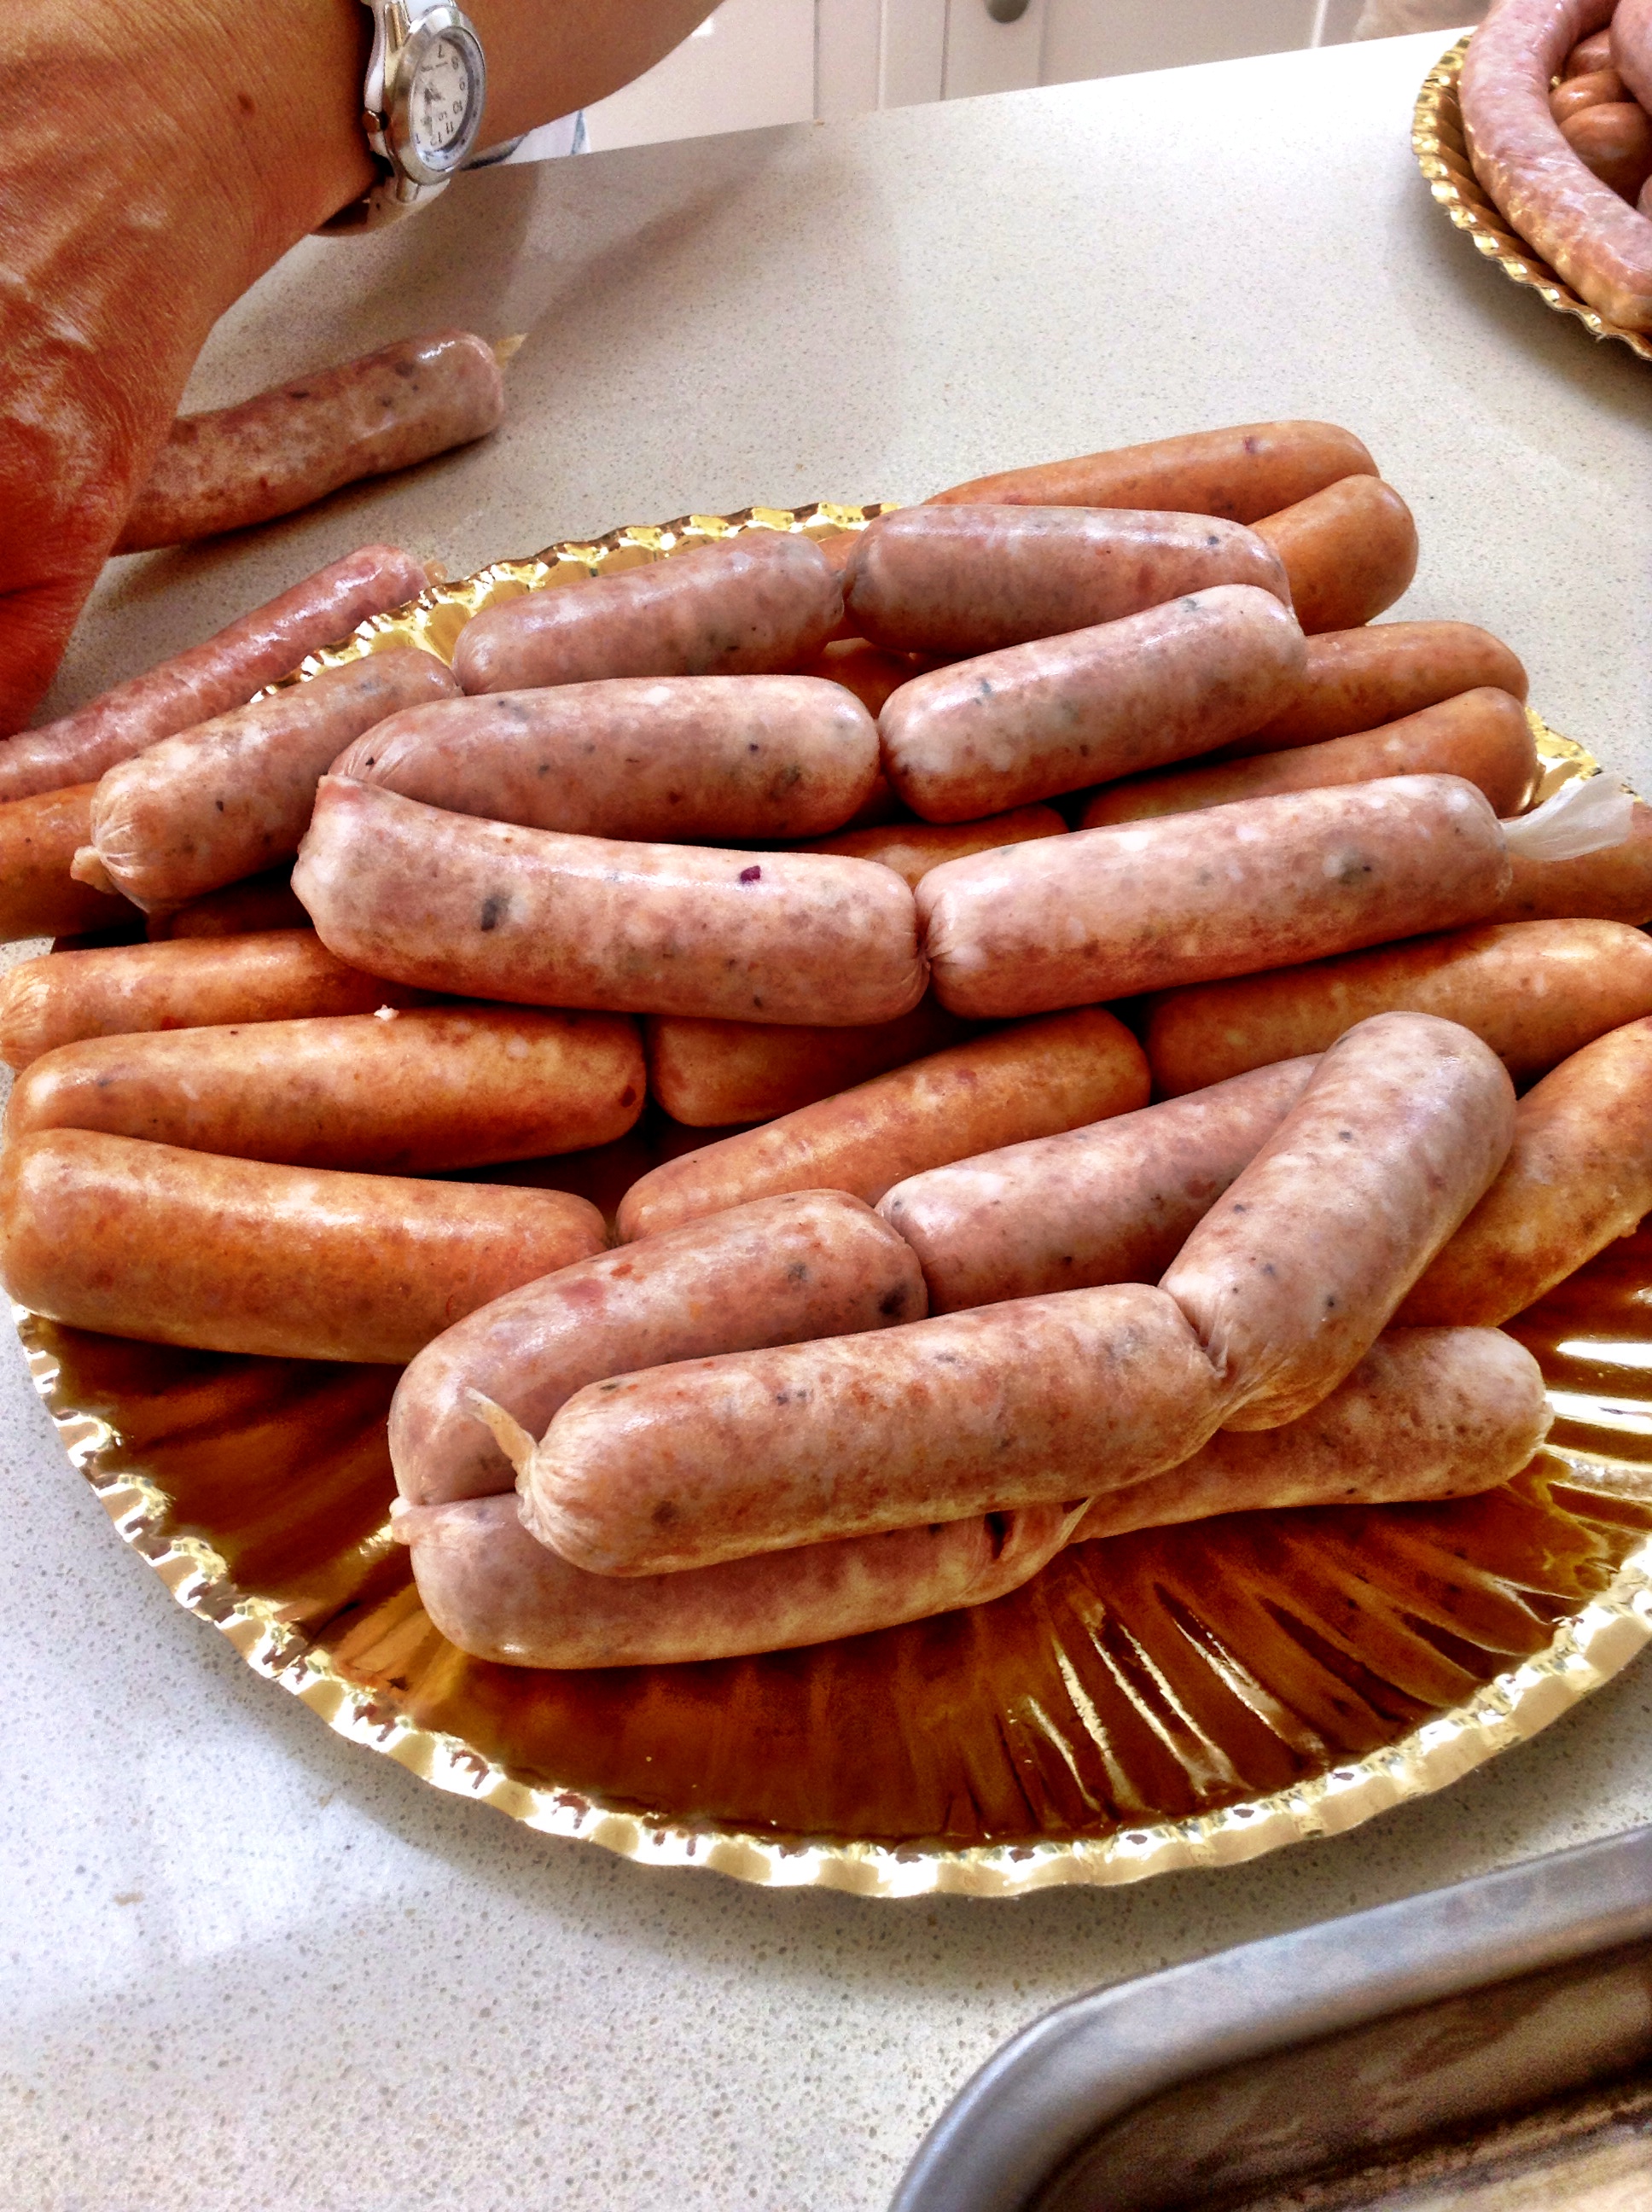
A plate of very special bangers!
It’s hard to explain, but when I go to Creative Coffee – which essentially means making something from scratch that would be easier to buy in a shop – I realise what a privileged life I lead..
Laters, Kate x
I Dyed.. x
Like the lifespan of a butterfly, the summer term is flying to it’s end. For Bella’s class it’s quite a poignant time as her year get re-mixed into different classes for September so after three years together it’s a real time of change. As a little hurrah for the mums of her 2B class I held a Shibori tie-dye day..with all the essentials….

Joy of joys..the sun shone!
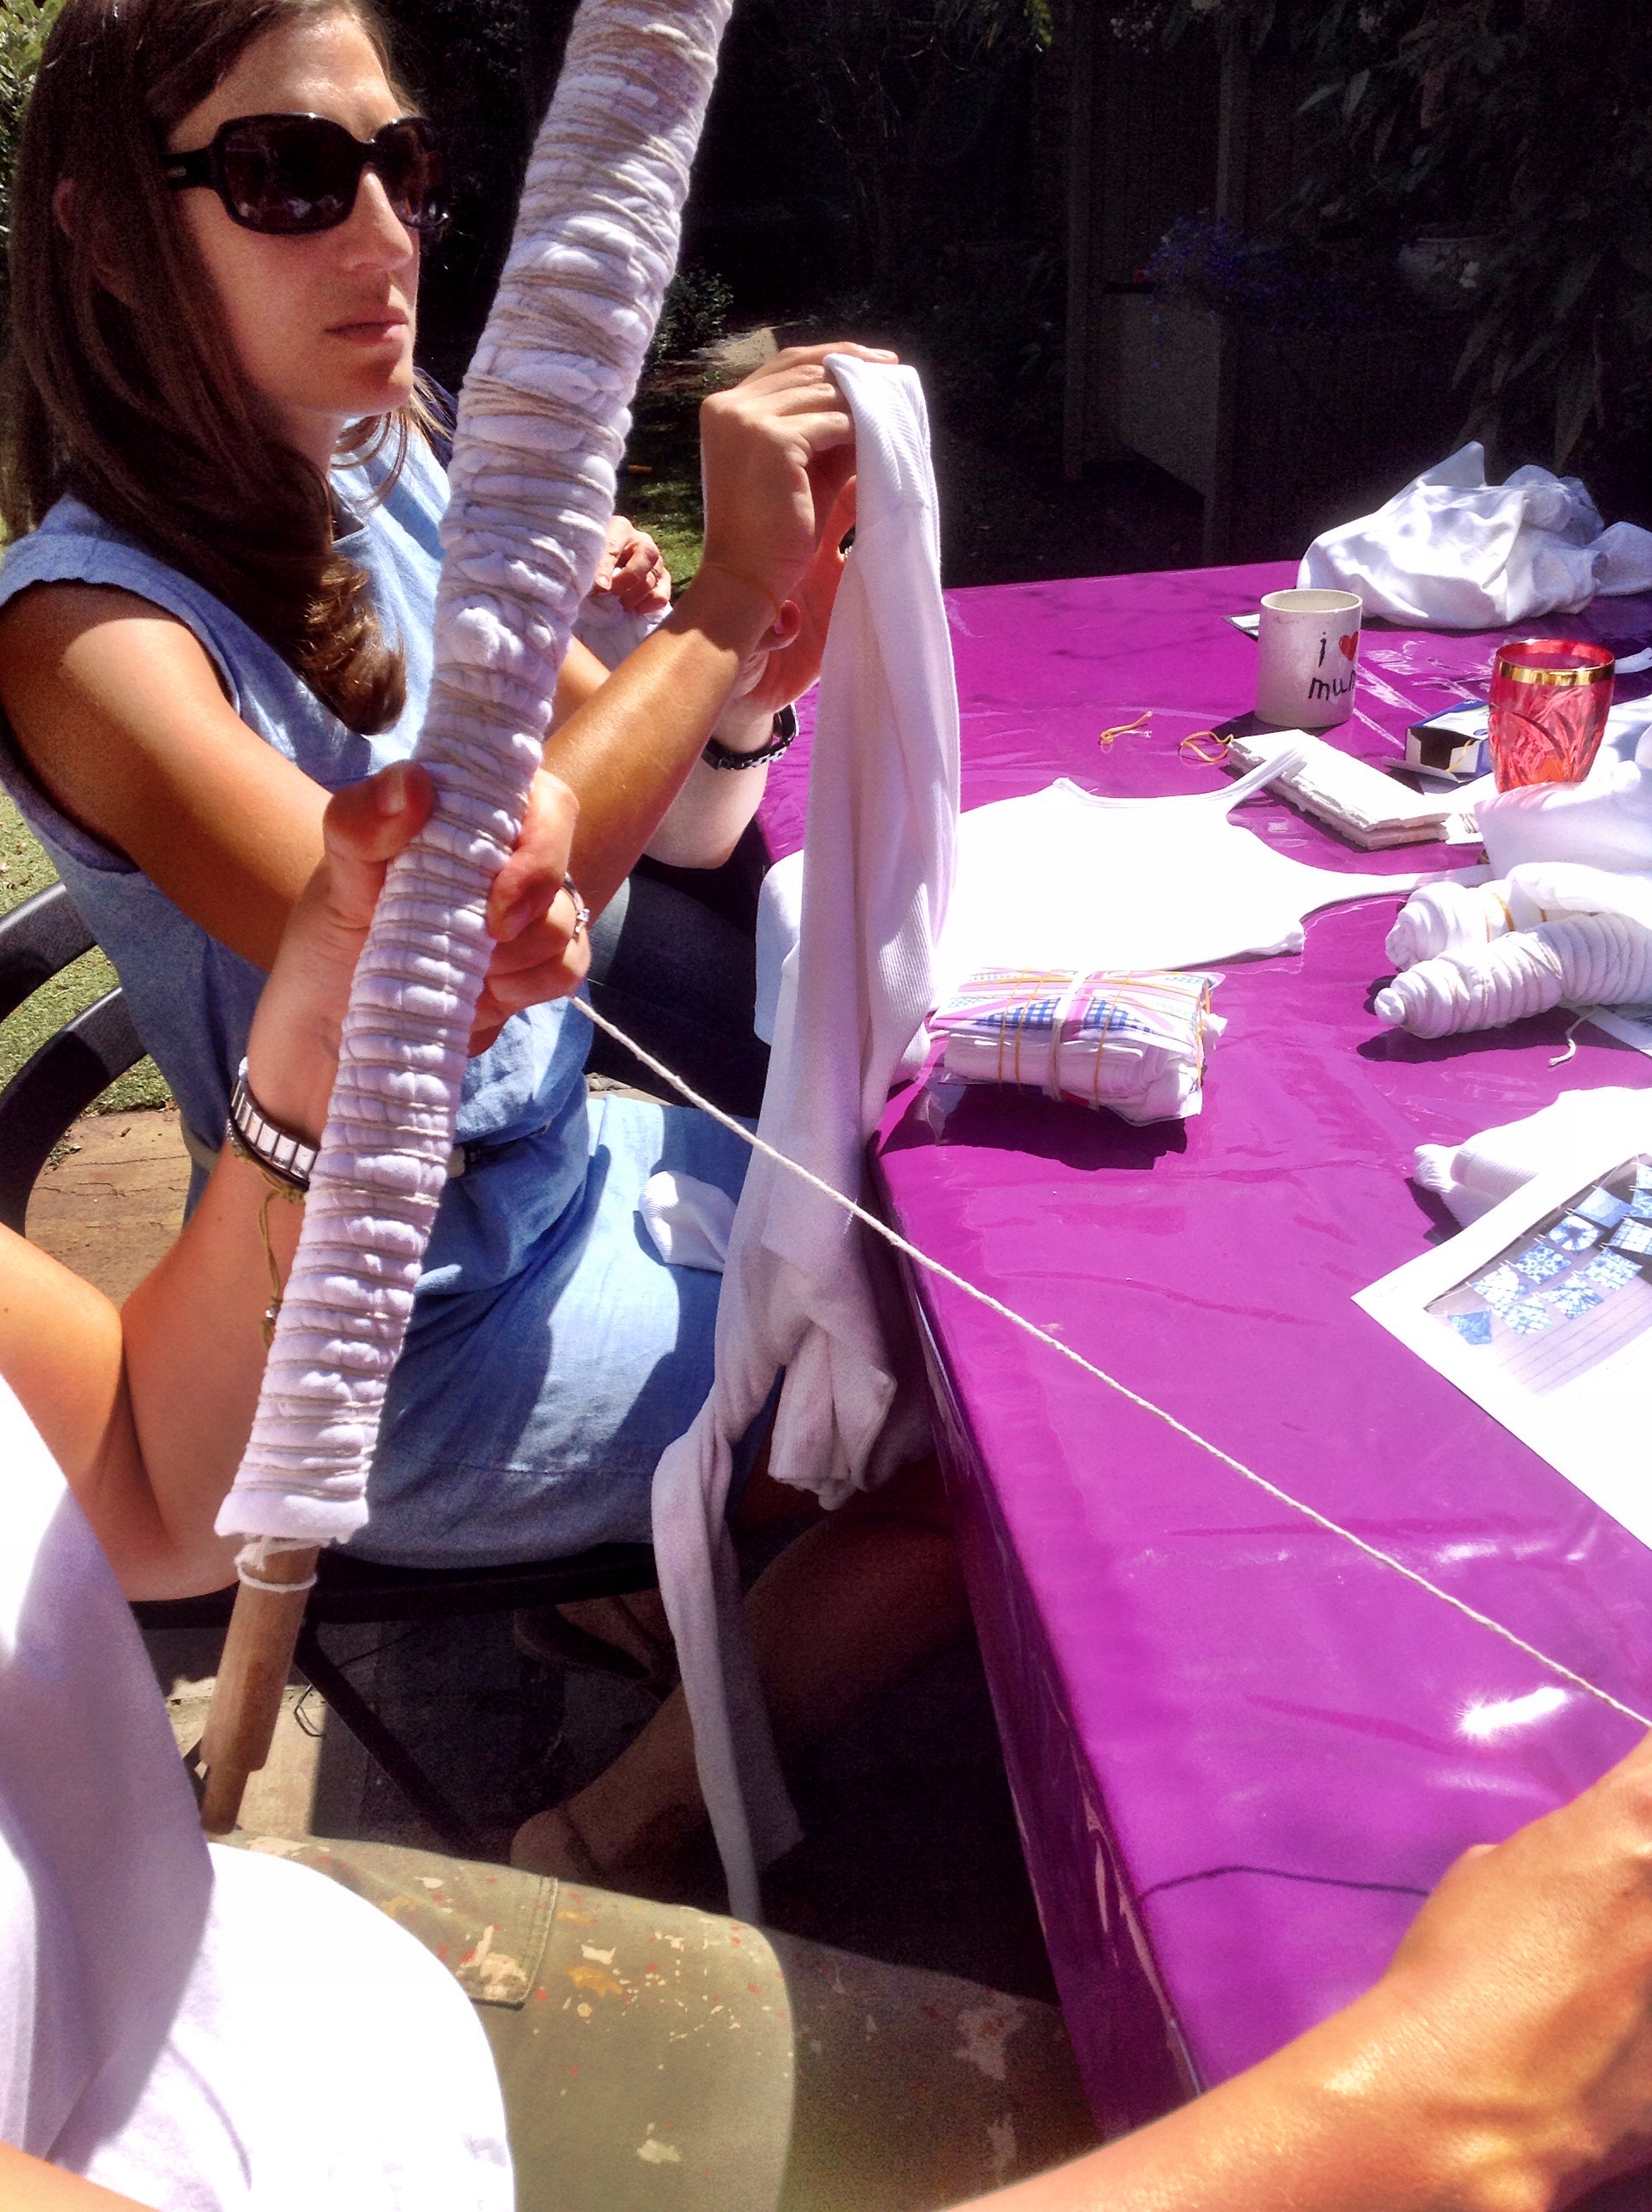
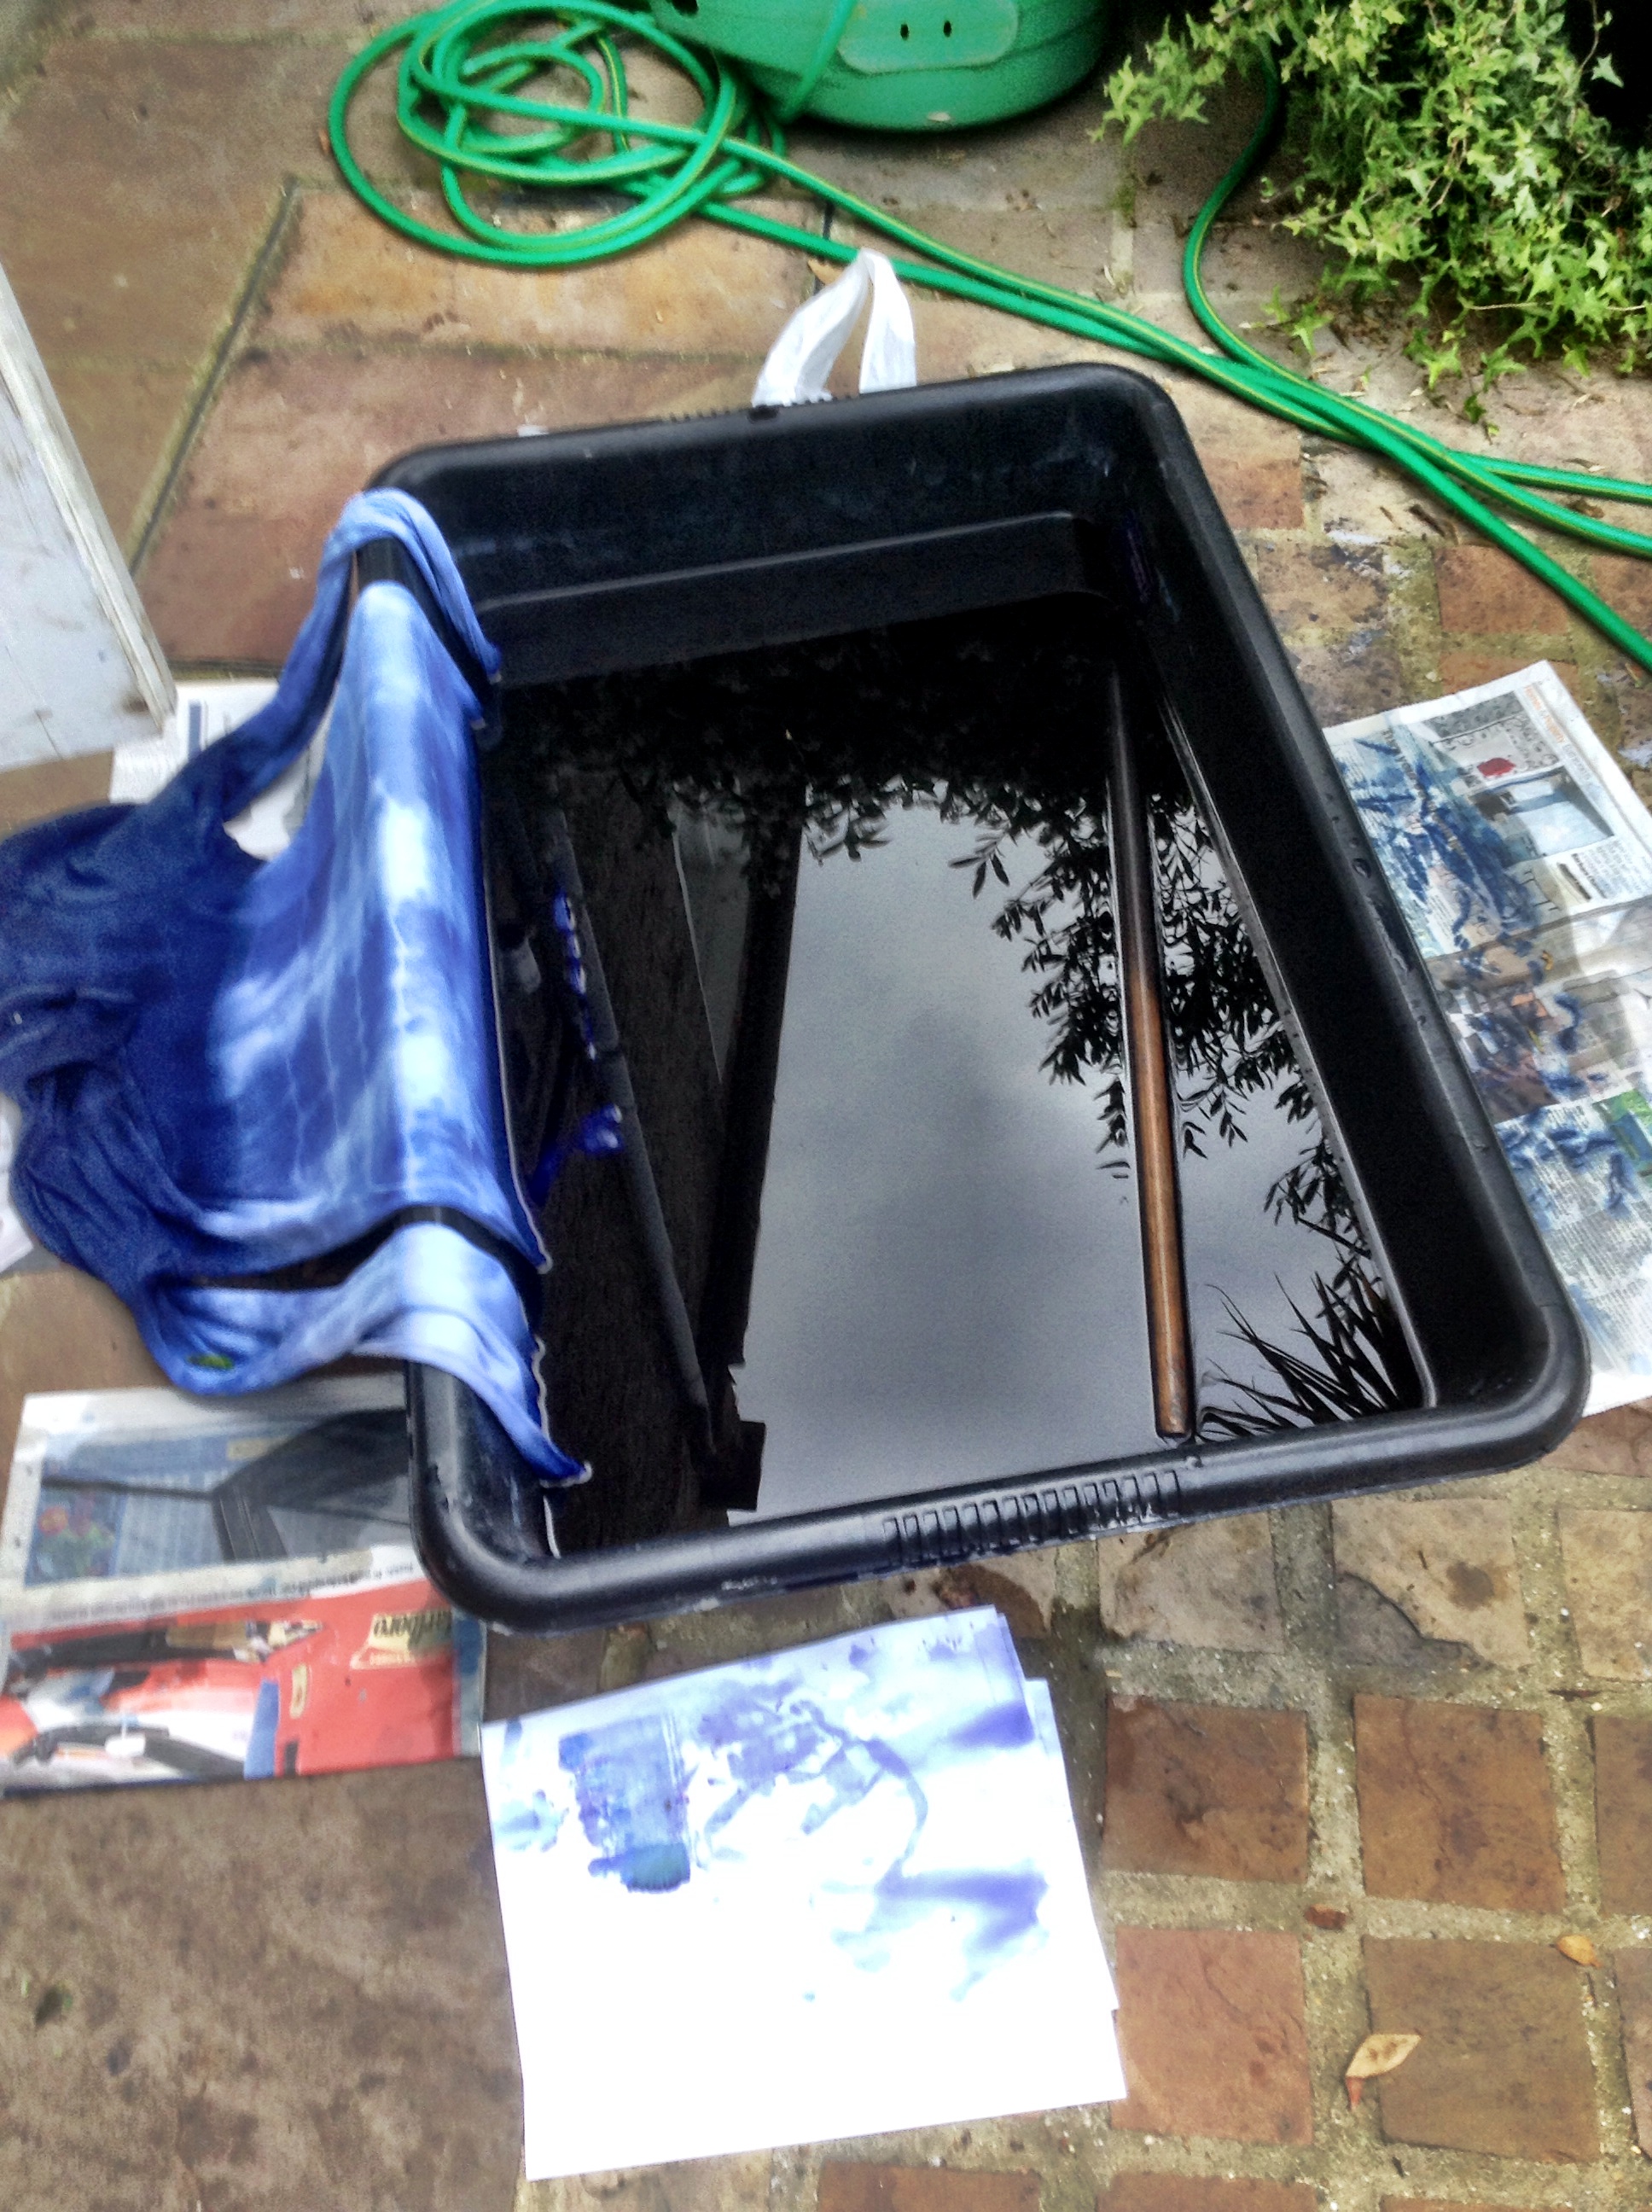
Is that a stick I see before me?
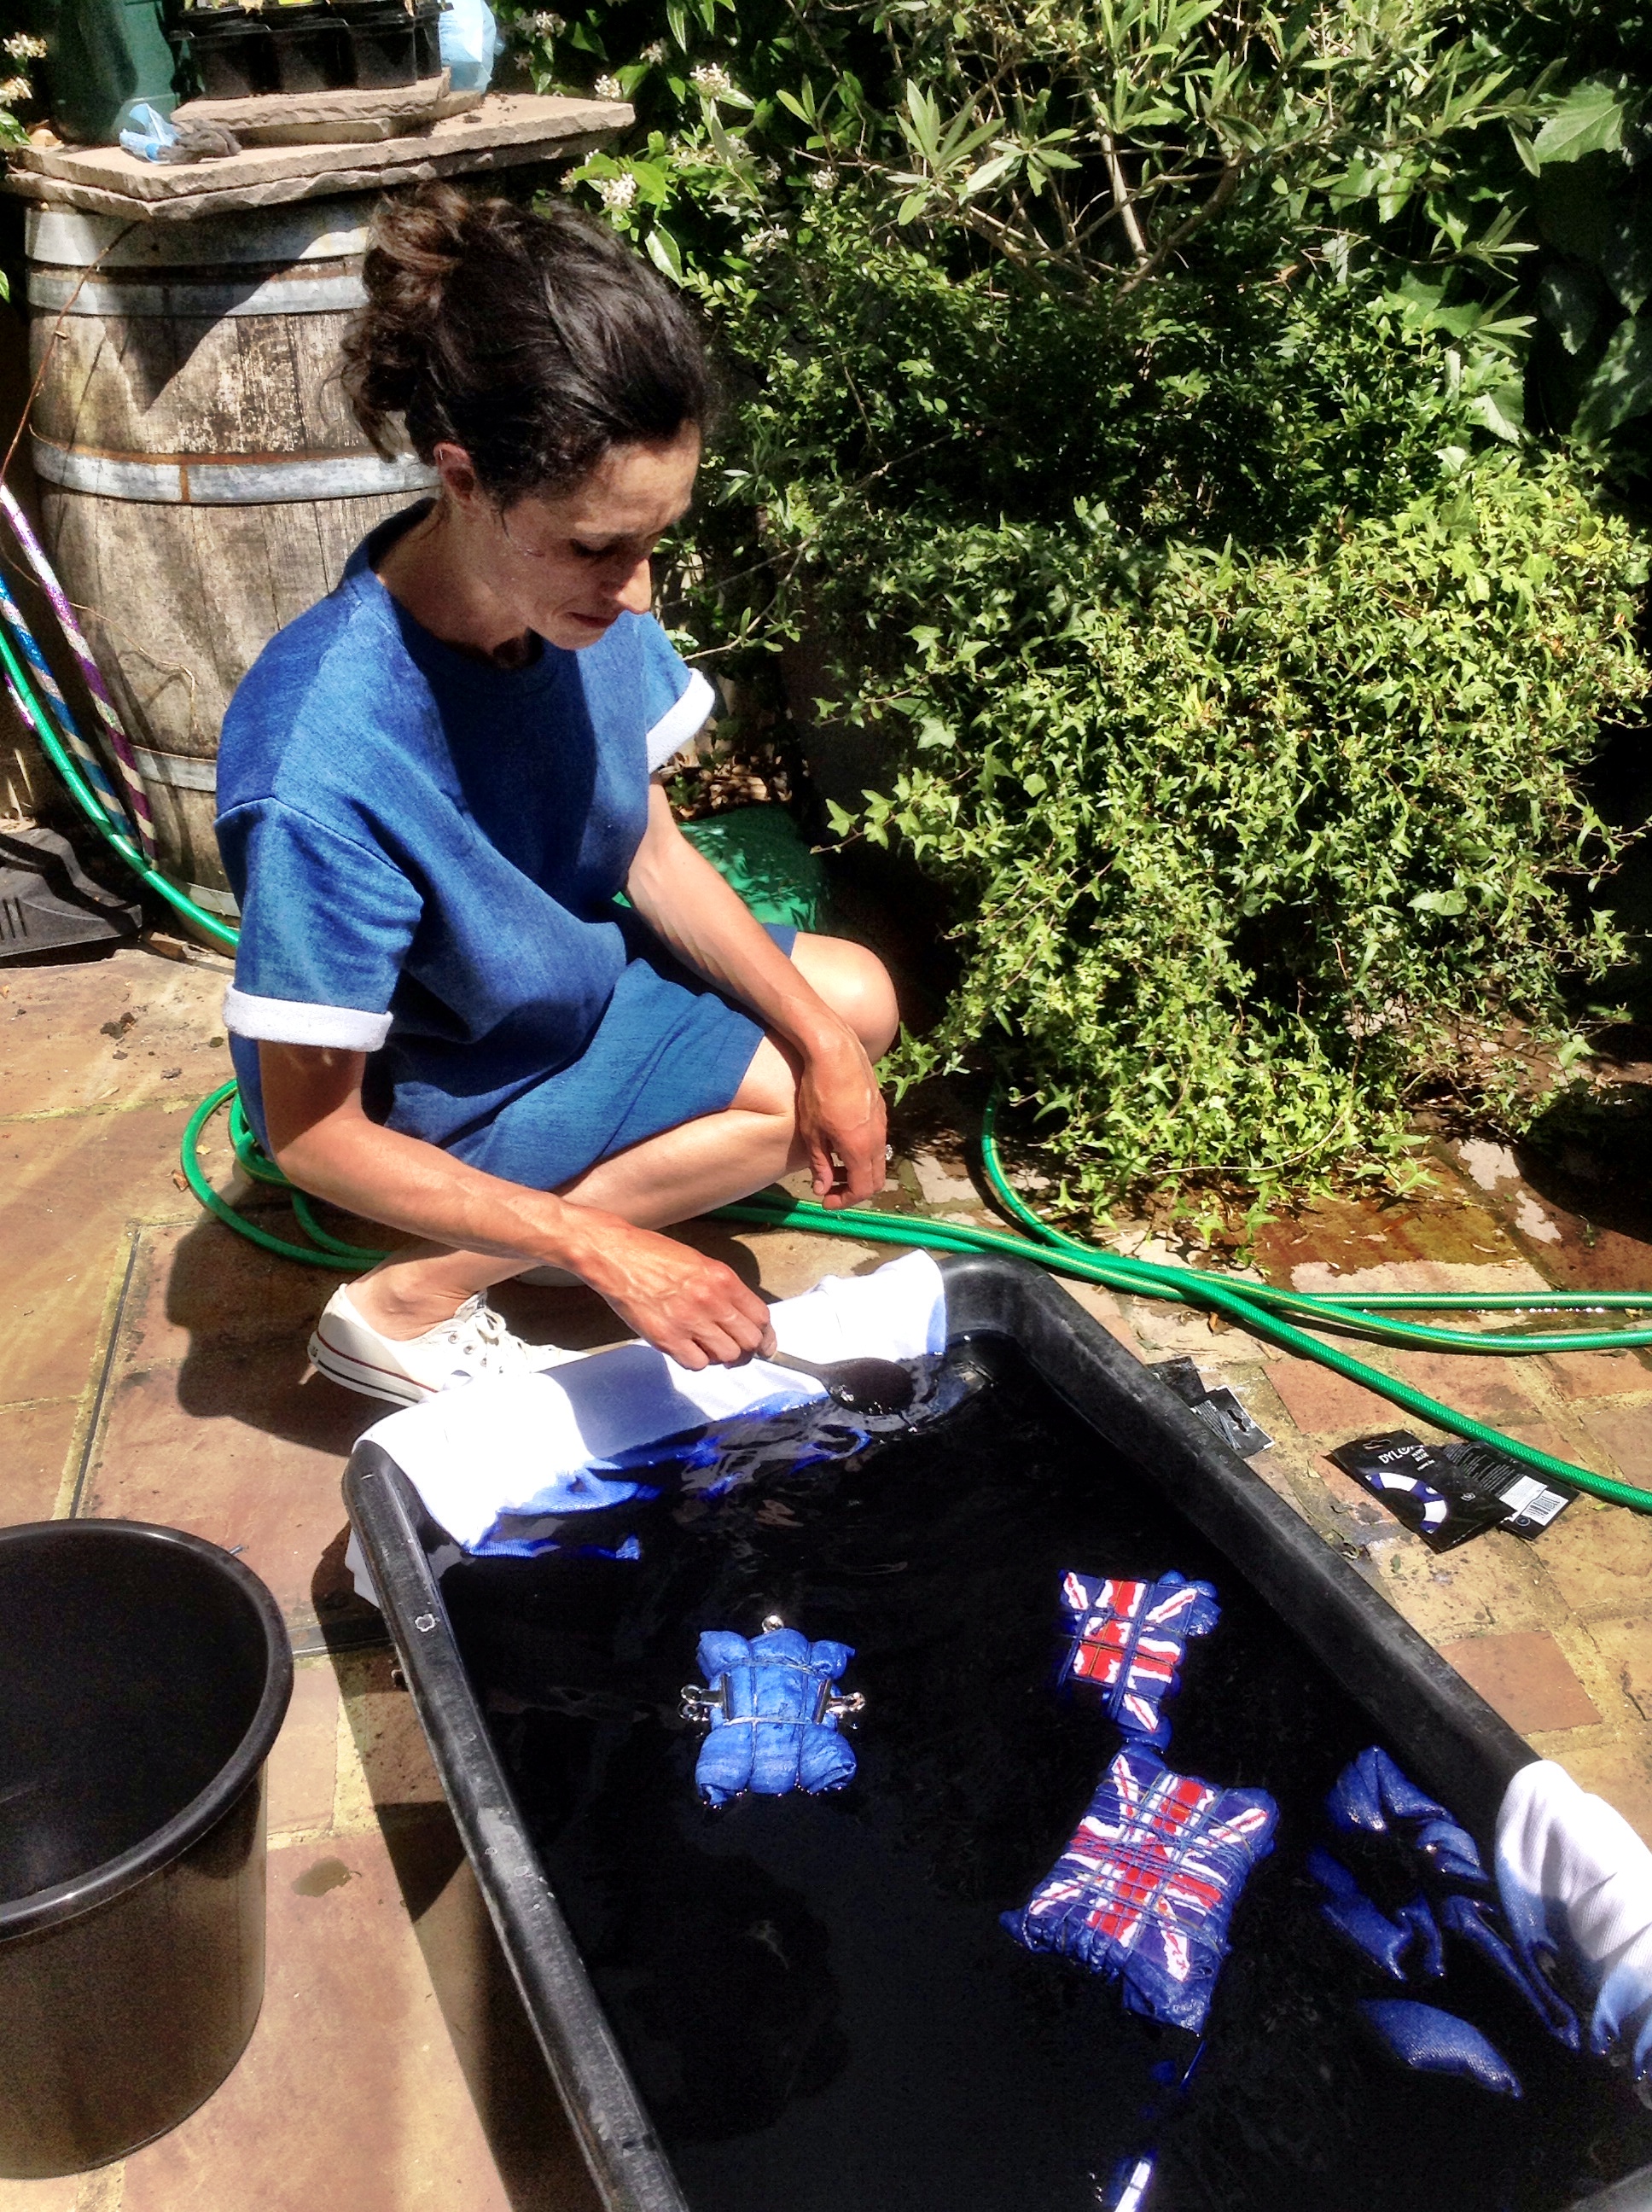
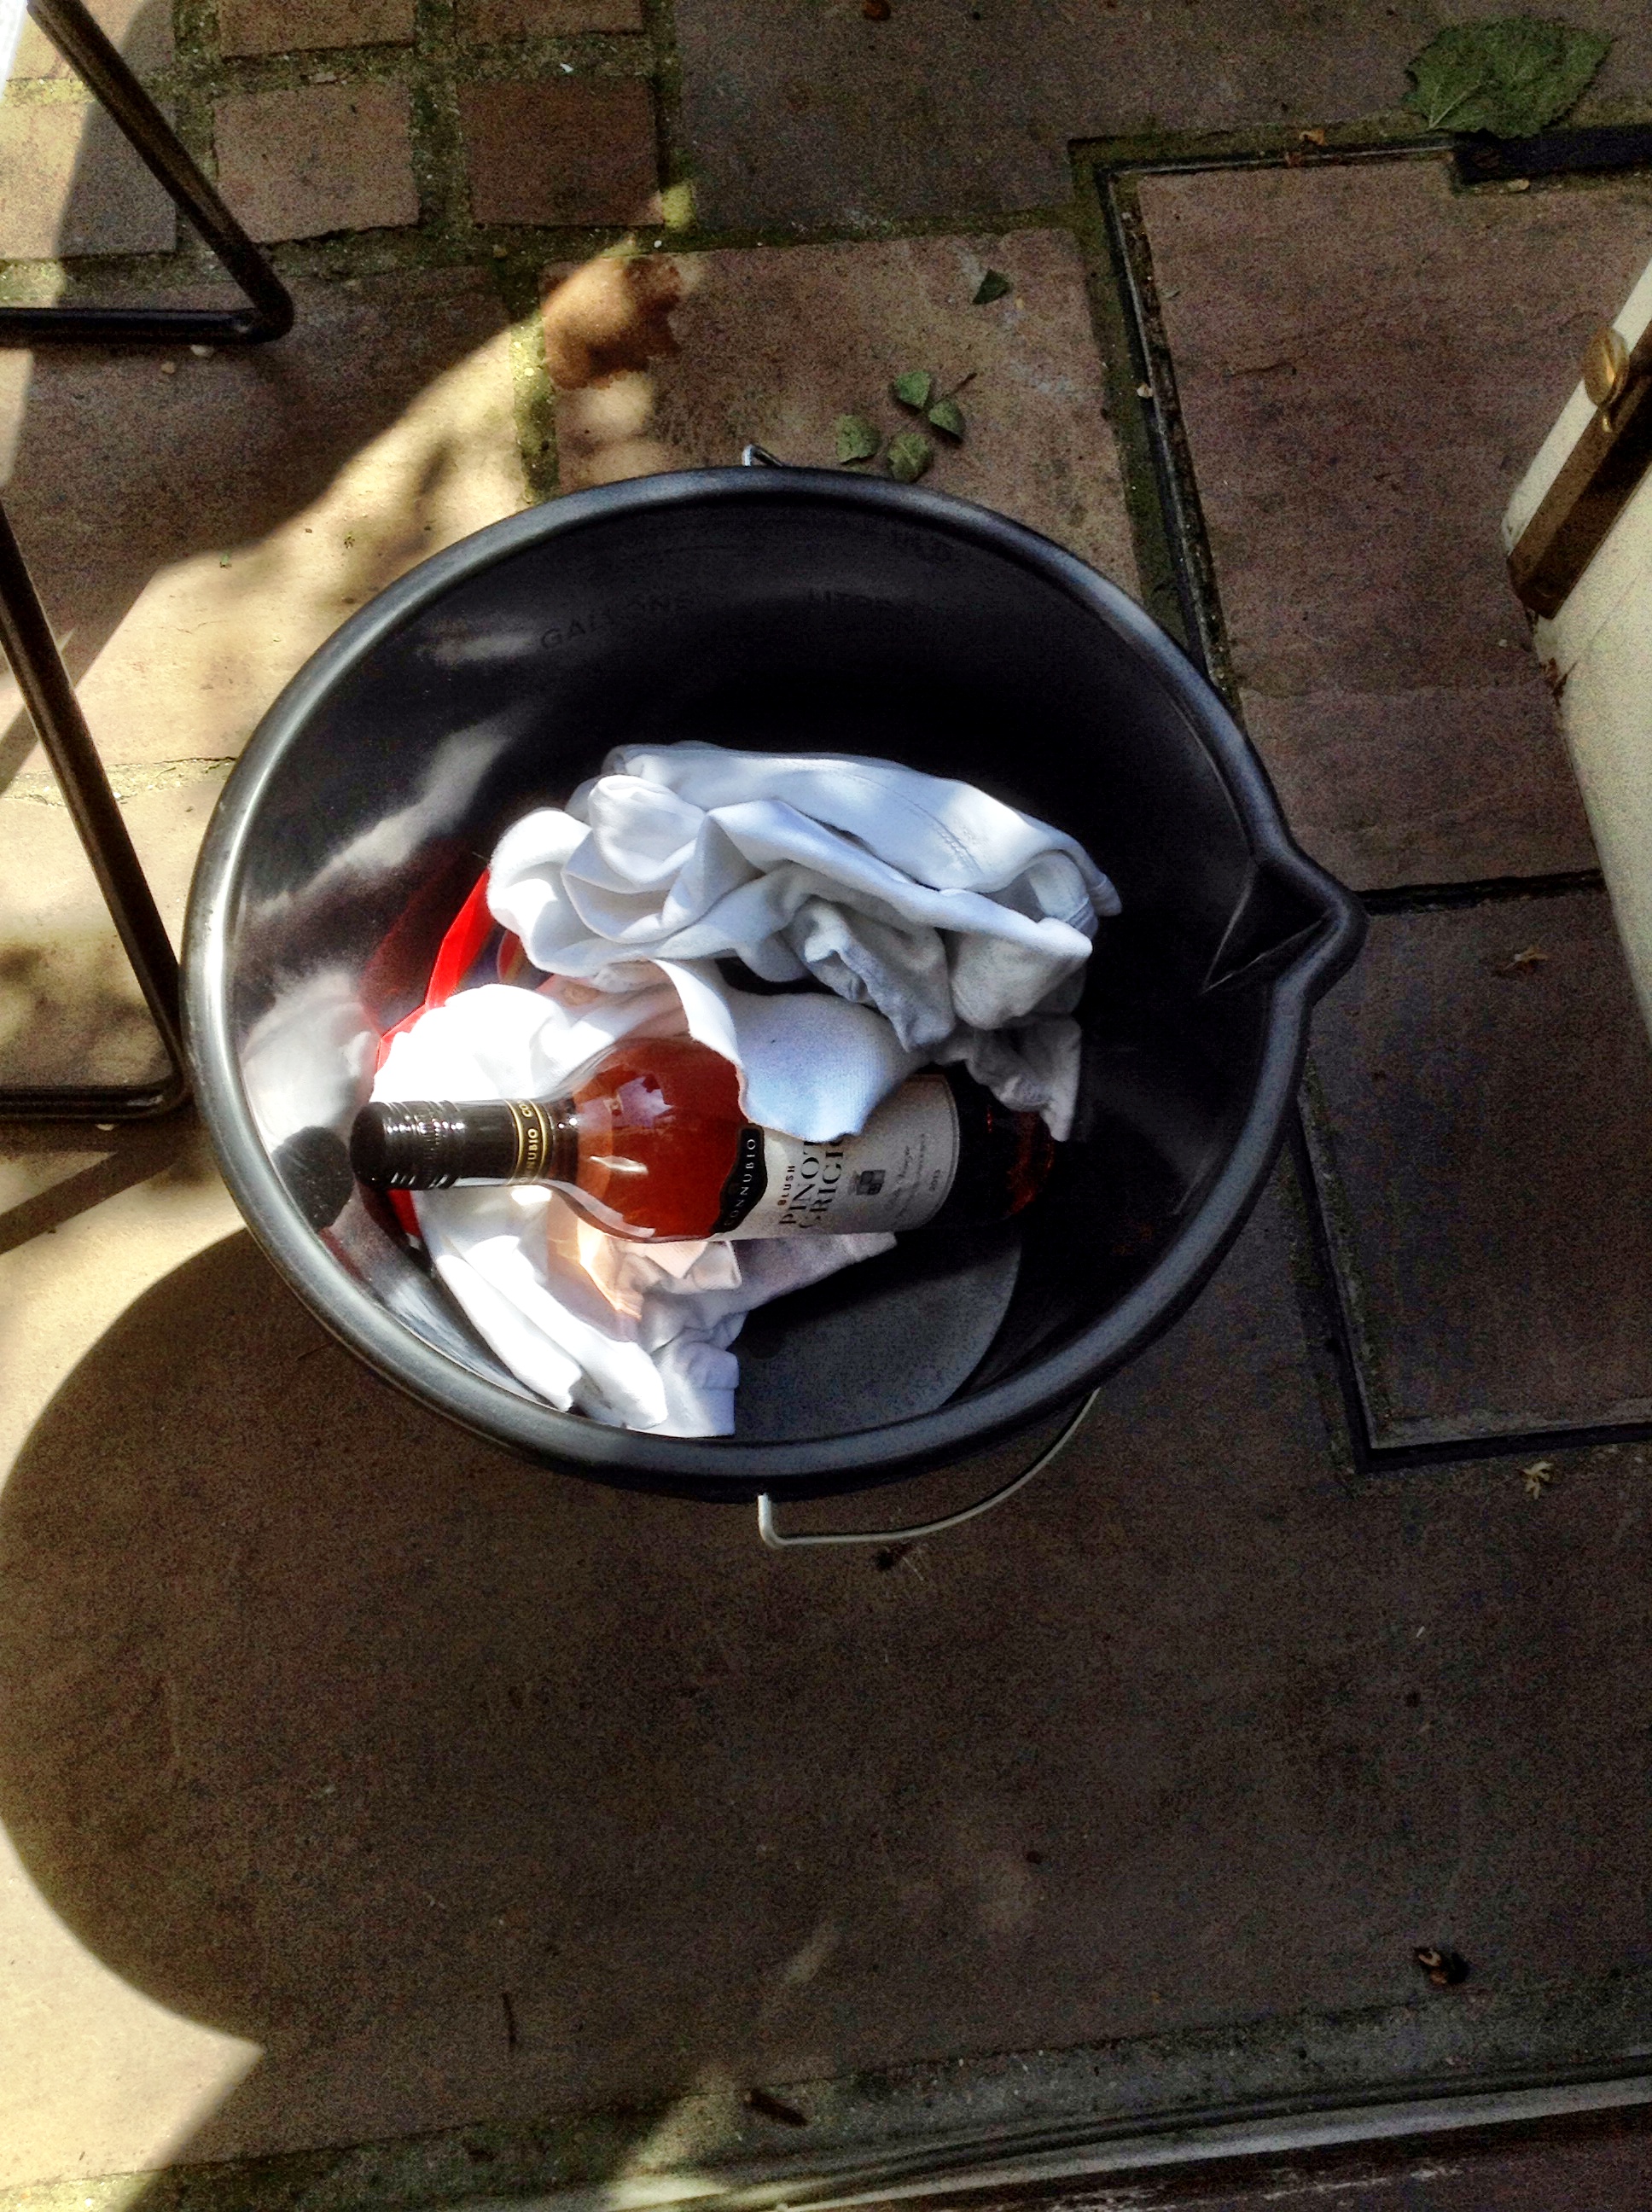
Our patriotic dye bath..previously used for mixing concrete for the patio. The union jacks come from cut up passport covers from the 99p shop – they were perfect for holding the material in place to create the square shaped tie-dye pattern.

The magic starts when you unwrap..it’s a bit like Christmas..you have no idea what they’re going to be like..

But the results were pretty spectacular!
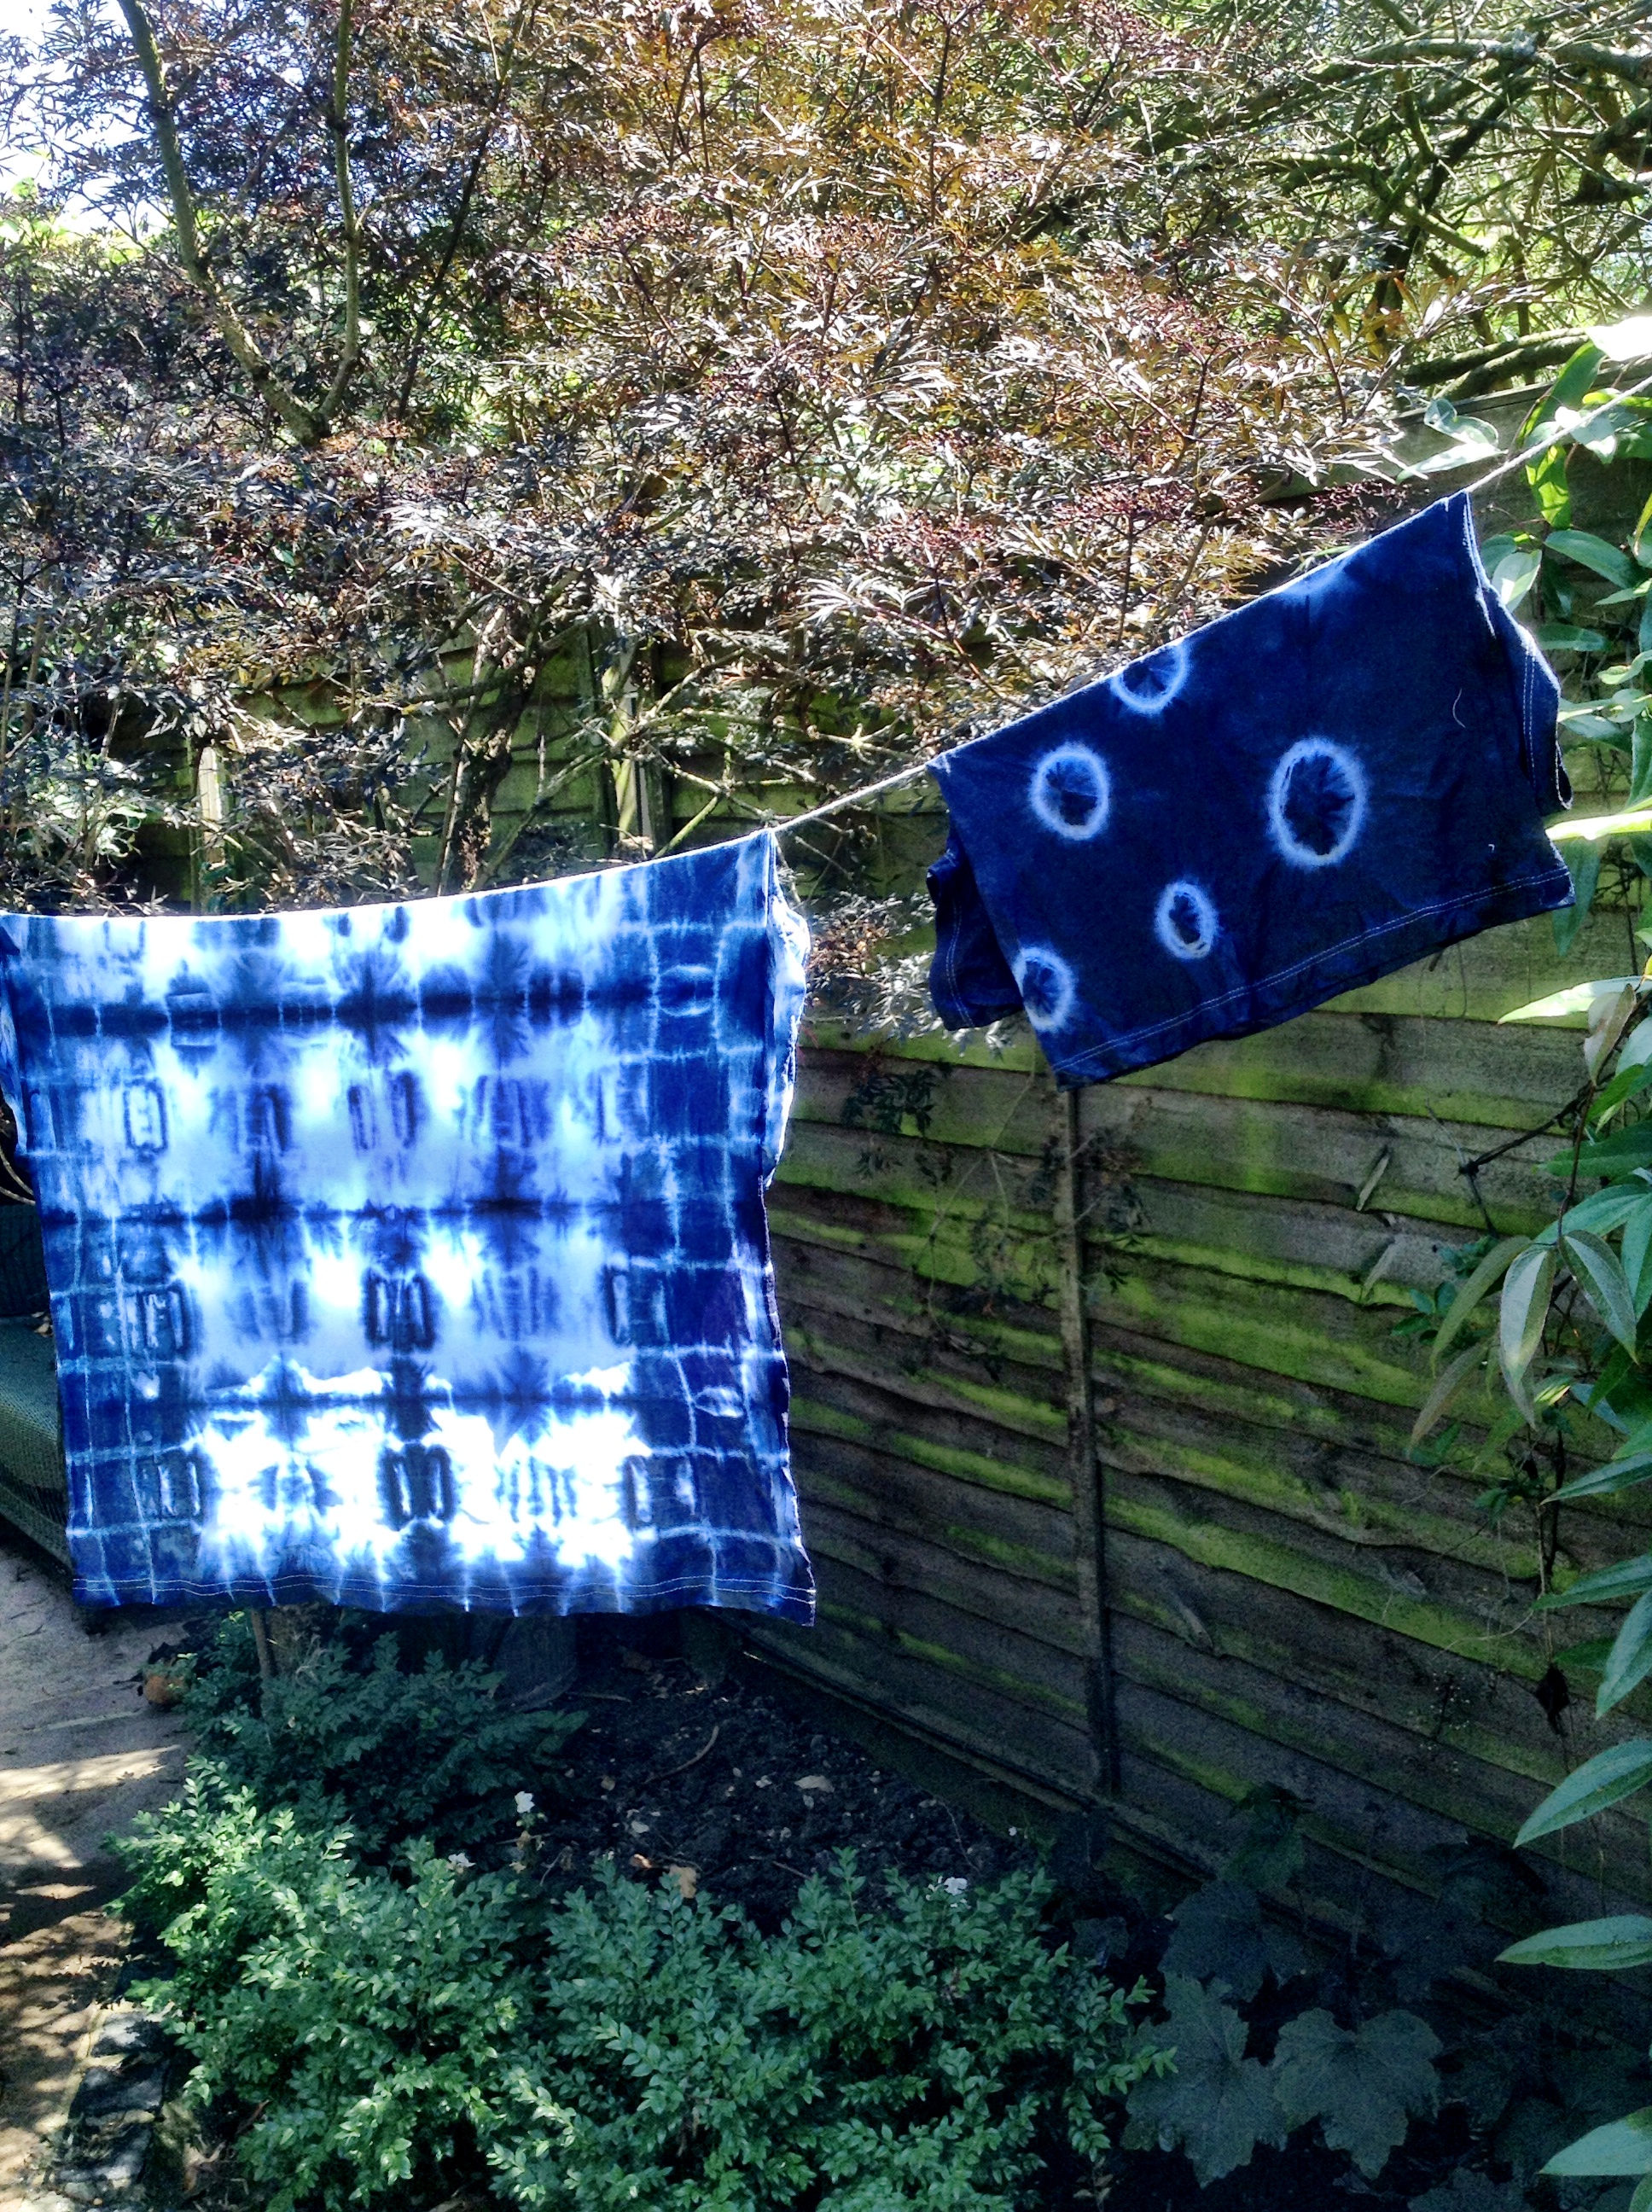
Each one different and unique! My washing line has never looked so cool!

OMG – It actually looks like the tutorial photo!


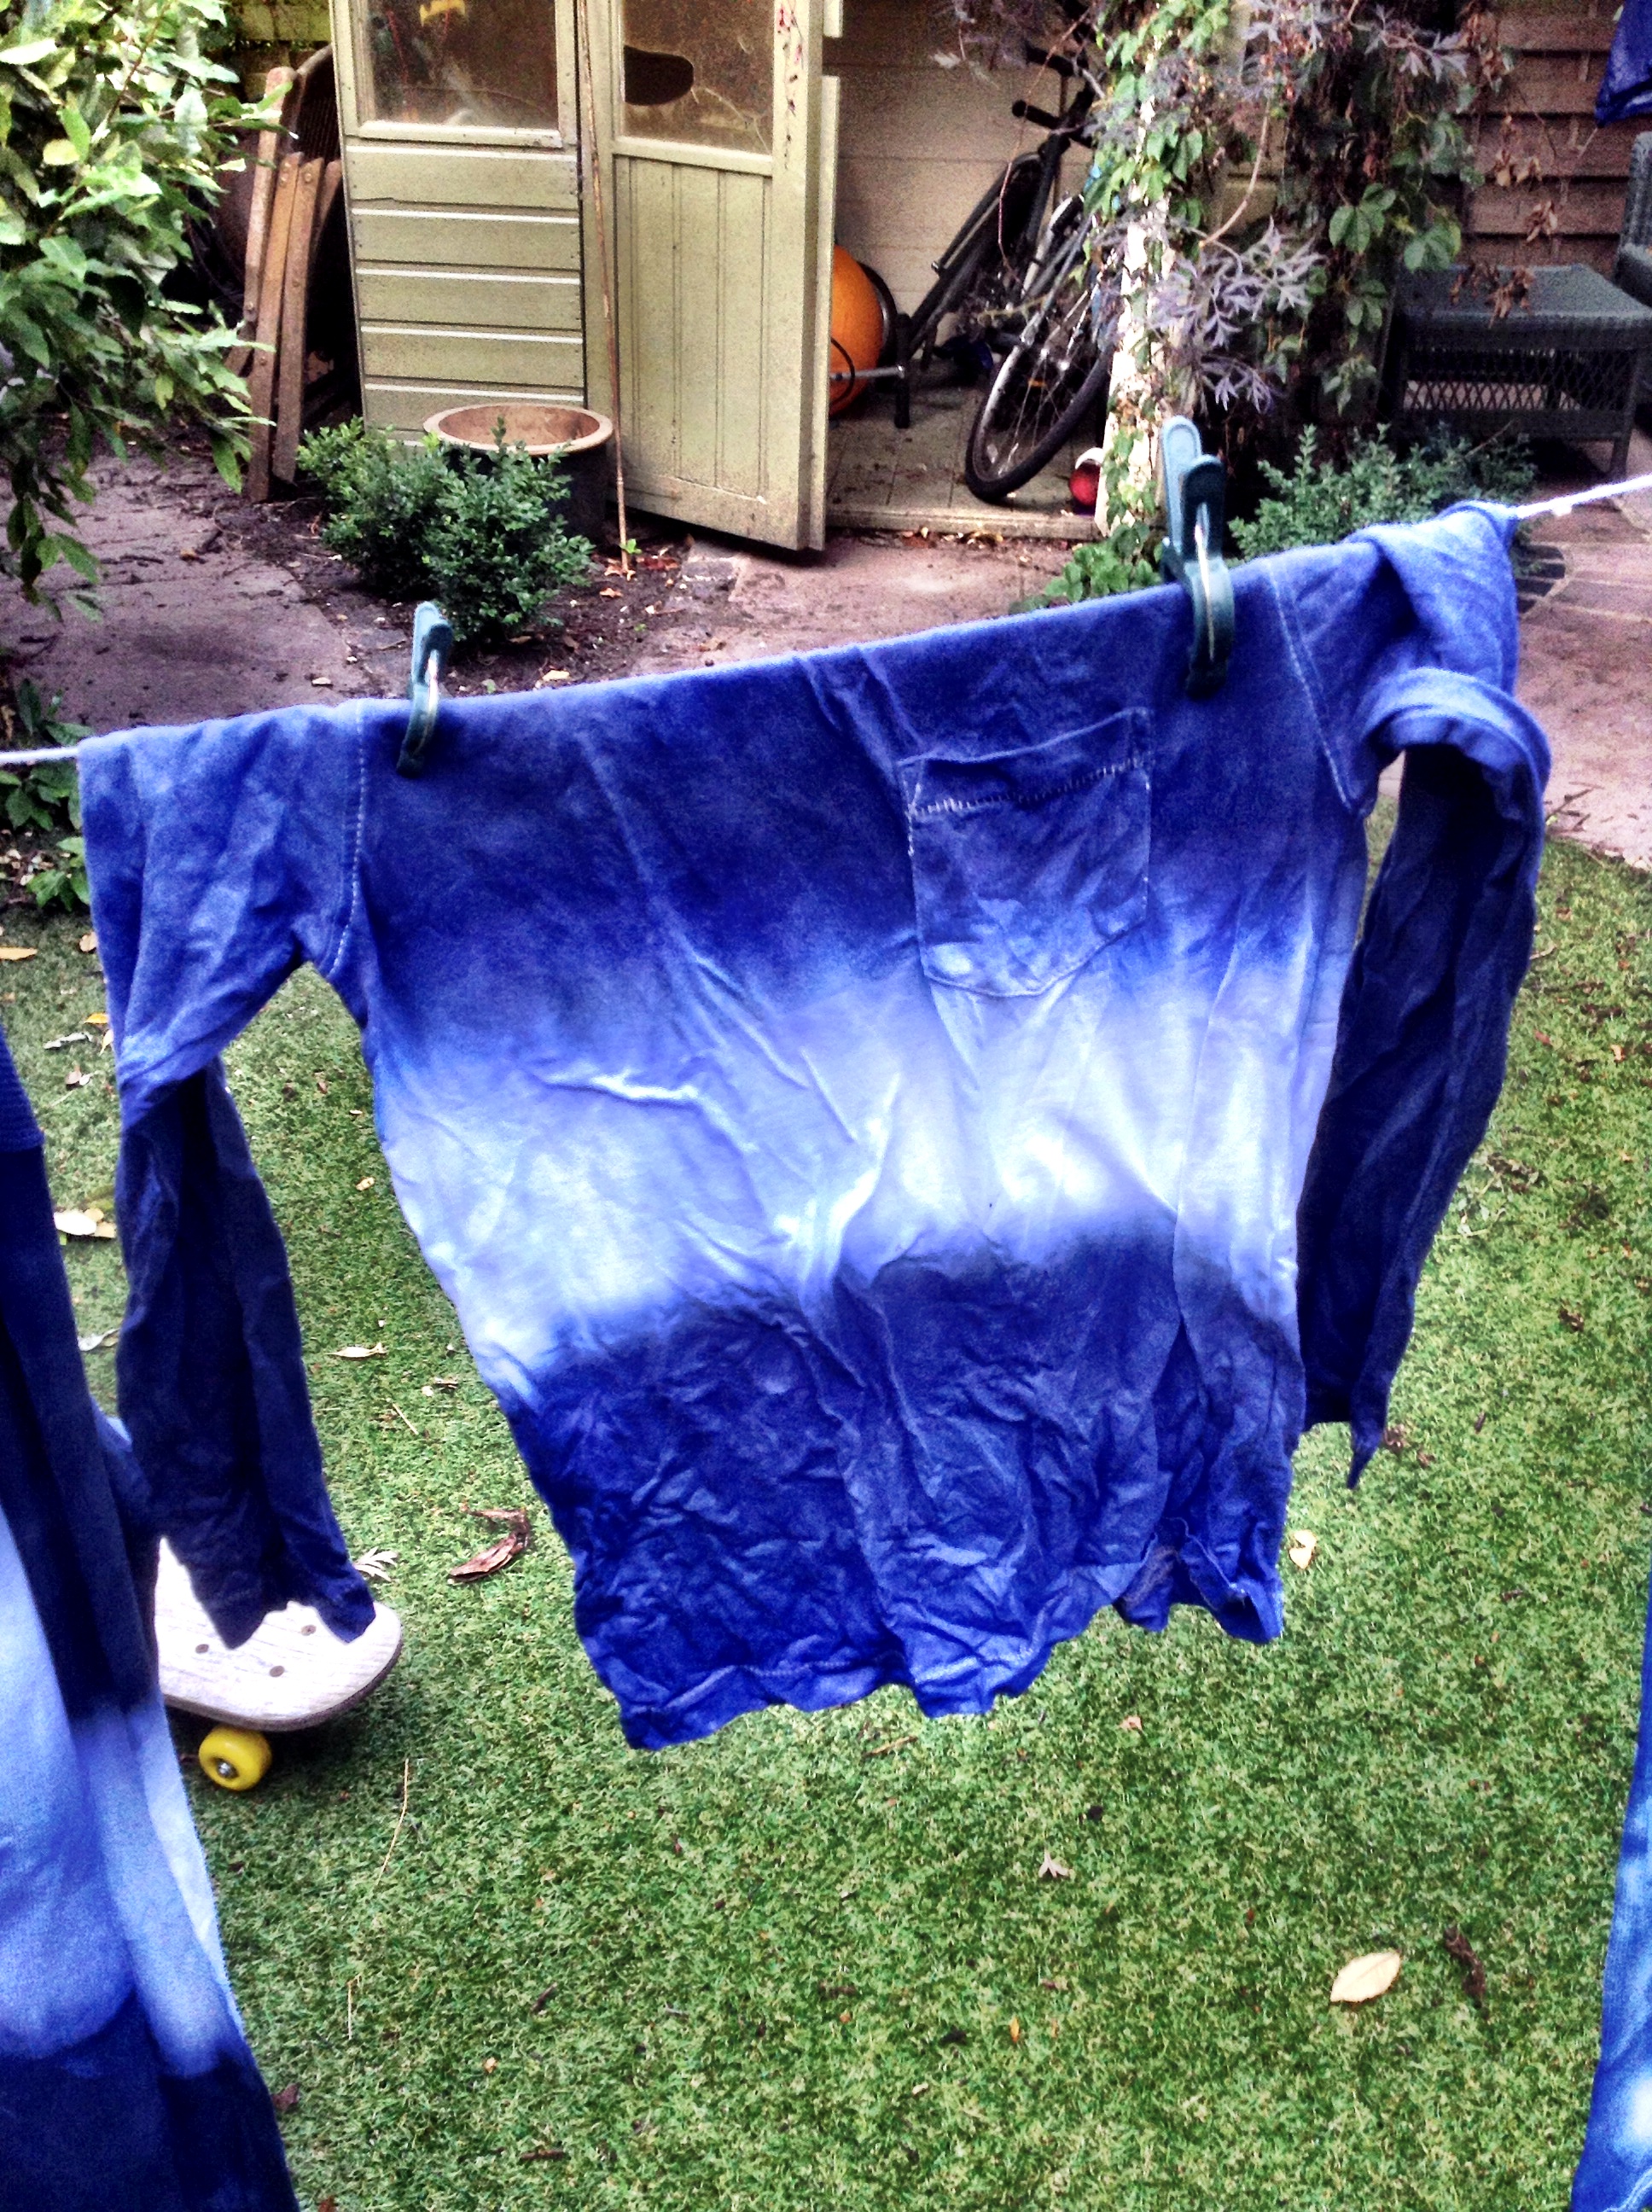


This beauty was the result of ‘stick’..it’s like looking up at the sea whilst diving..
Now I have the kids home and dying everything in sight! But honestly, I can’t blame them..it’s addictive..for a wonderful day with friends, it’s surprisingly easy, wonderfully effective and thoroughly recommended!
Laters, kate x
THE RESULTS! x

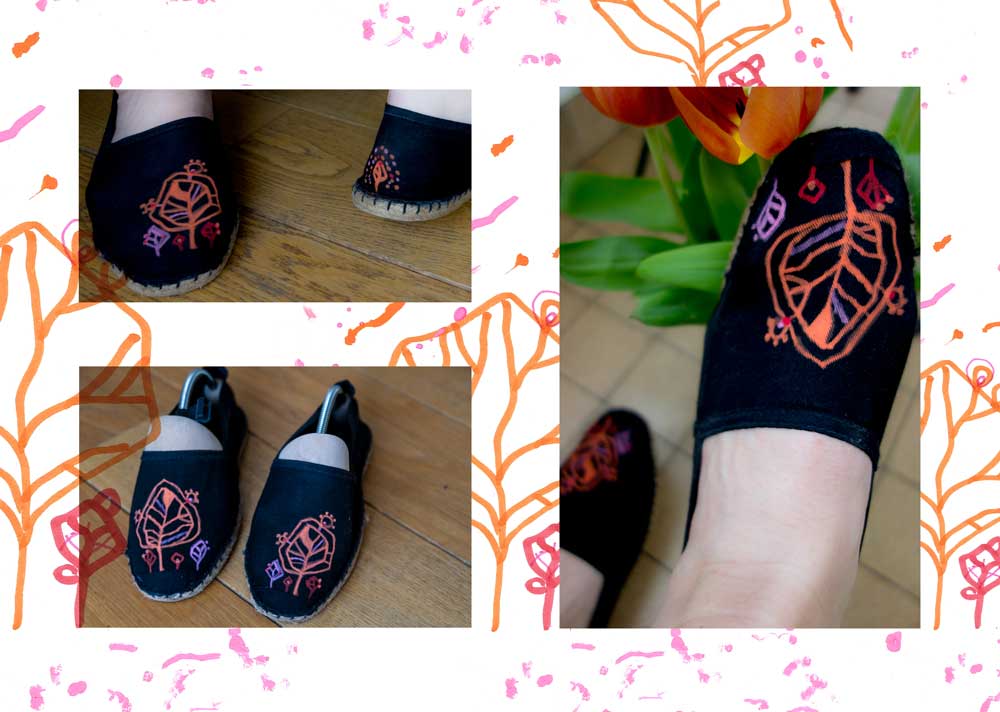
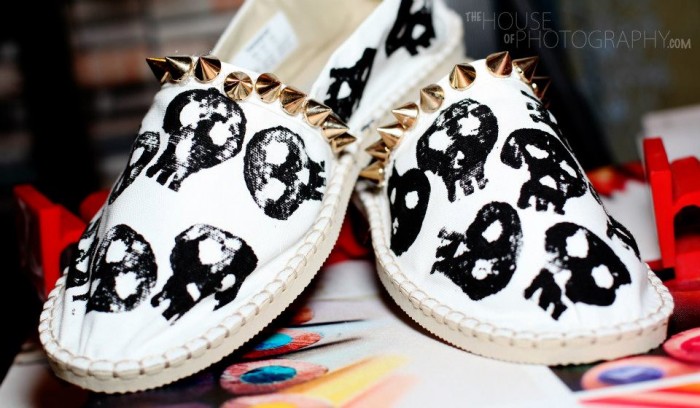
Pray silence for the Grand Announcement: This vintage lipstick case plus my favourite red lipstick will be travelling off to the talented and amazing Winner of the inaugural Design Your Own Espadrille Competition. The judges found the decision incredibly hard – the competition was fierce and the standard high and many had sleepless nights agonising over their choice…but we do have a result…the design with the most votes was……..drum roll please.…..

No. 4! Which was by………me! So I’m handing it on to the next successful original entry which was…..roll those drums..
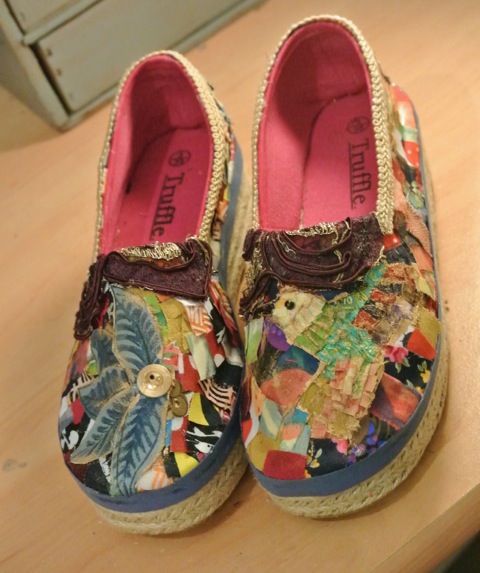
No. 5! By the lovely Vasiliki Machaira at Delightfully Peculiar! Huge congrats to you, you are our first ever winner!
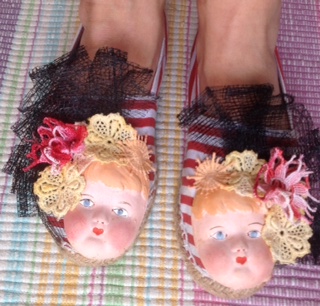
To reveal the identities of the other entrants…No. 1 was made by none other than the irrepressible Julie at Vintage Attitude! Who else?!

No 2 was made by…me again!

No.3 was made by the wonderful Amanda at Sew Deputy who I hope has signed up for the next BBC Sewing Bee..

No.6 was made by me, Bella and Charlie.
And No.7 was made by the talented Virginia Romo at virginiaromo.com – I still want to know how you did your design – was it with a bleach pen? But then how did you do the colours??! I think this design got swamped by all the larger photos as the beauty is in the very fine detail…
A Big round of applause and a huge thank you for all those who took part – you are all stars! And congrats and a flowing bottle of champagne to Vasiliki! Now…who’s for a large, cold, bubbly glass?!
Laters, Kate x
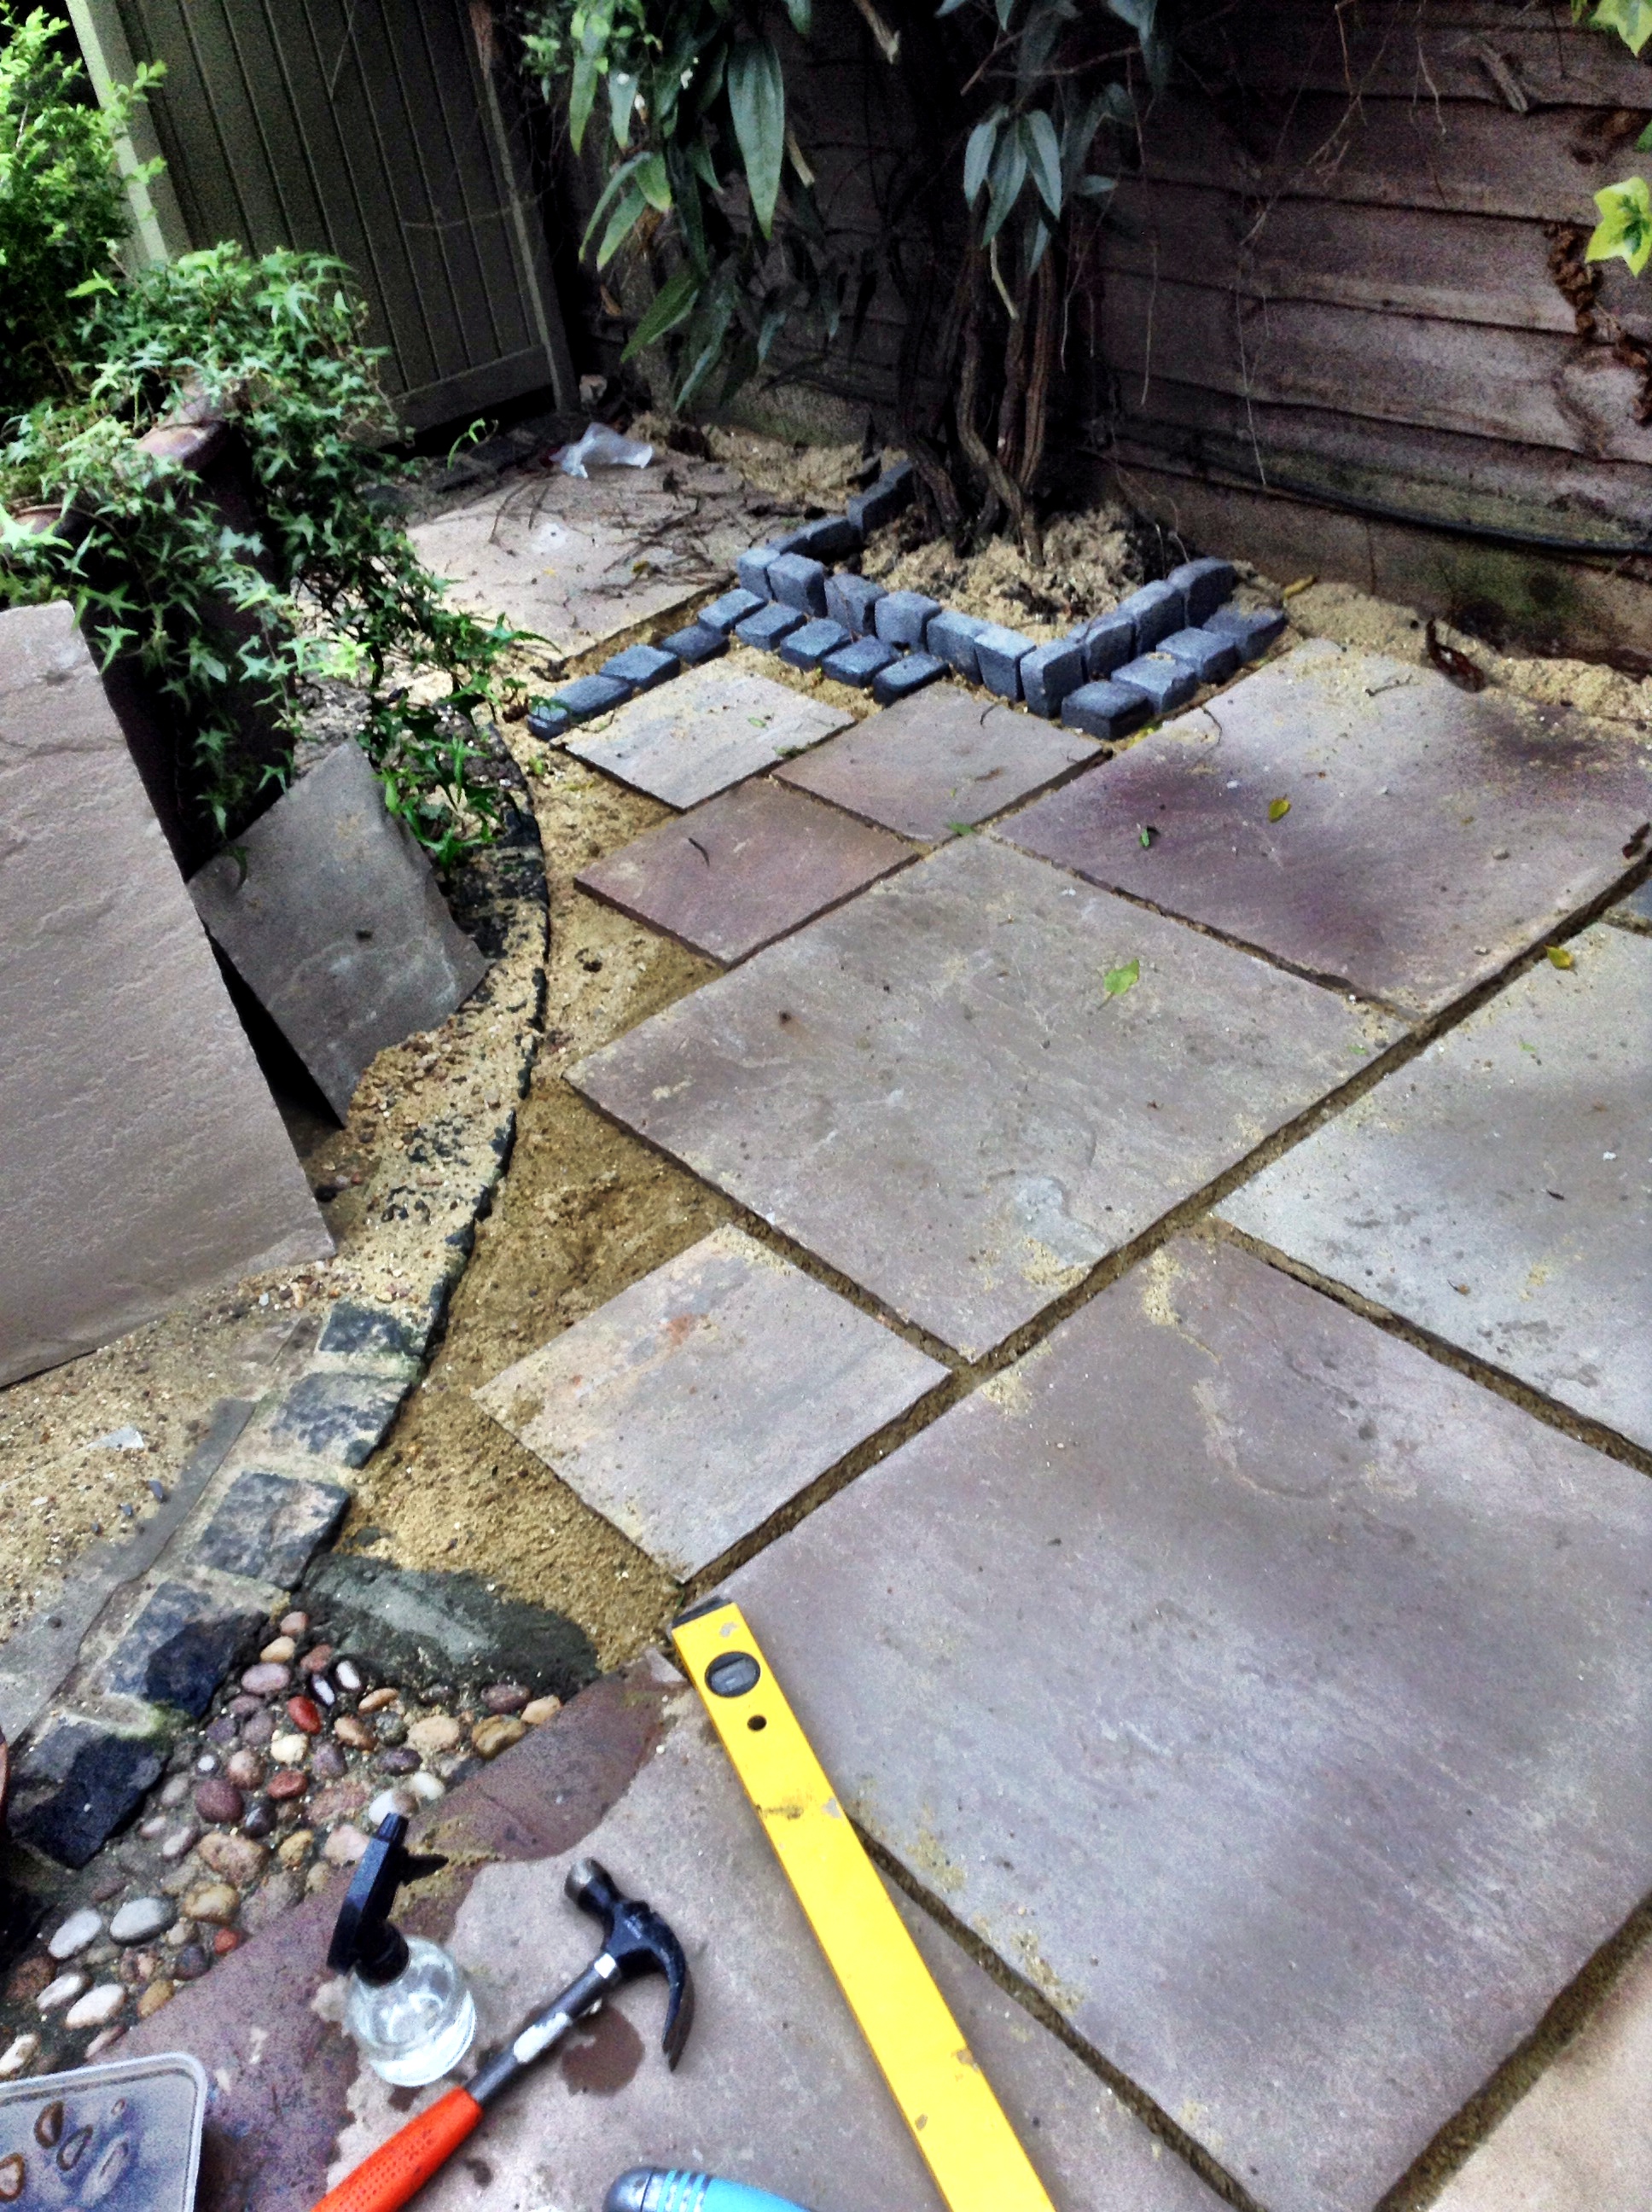
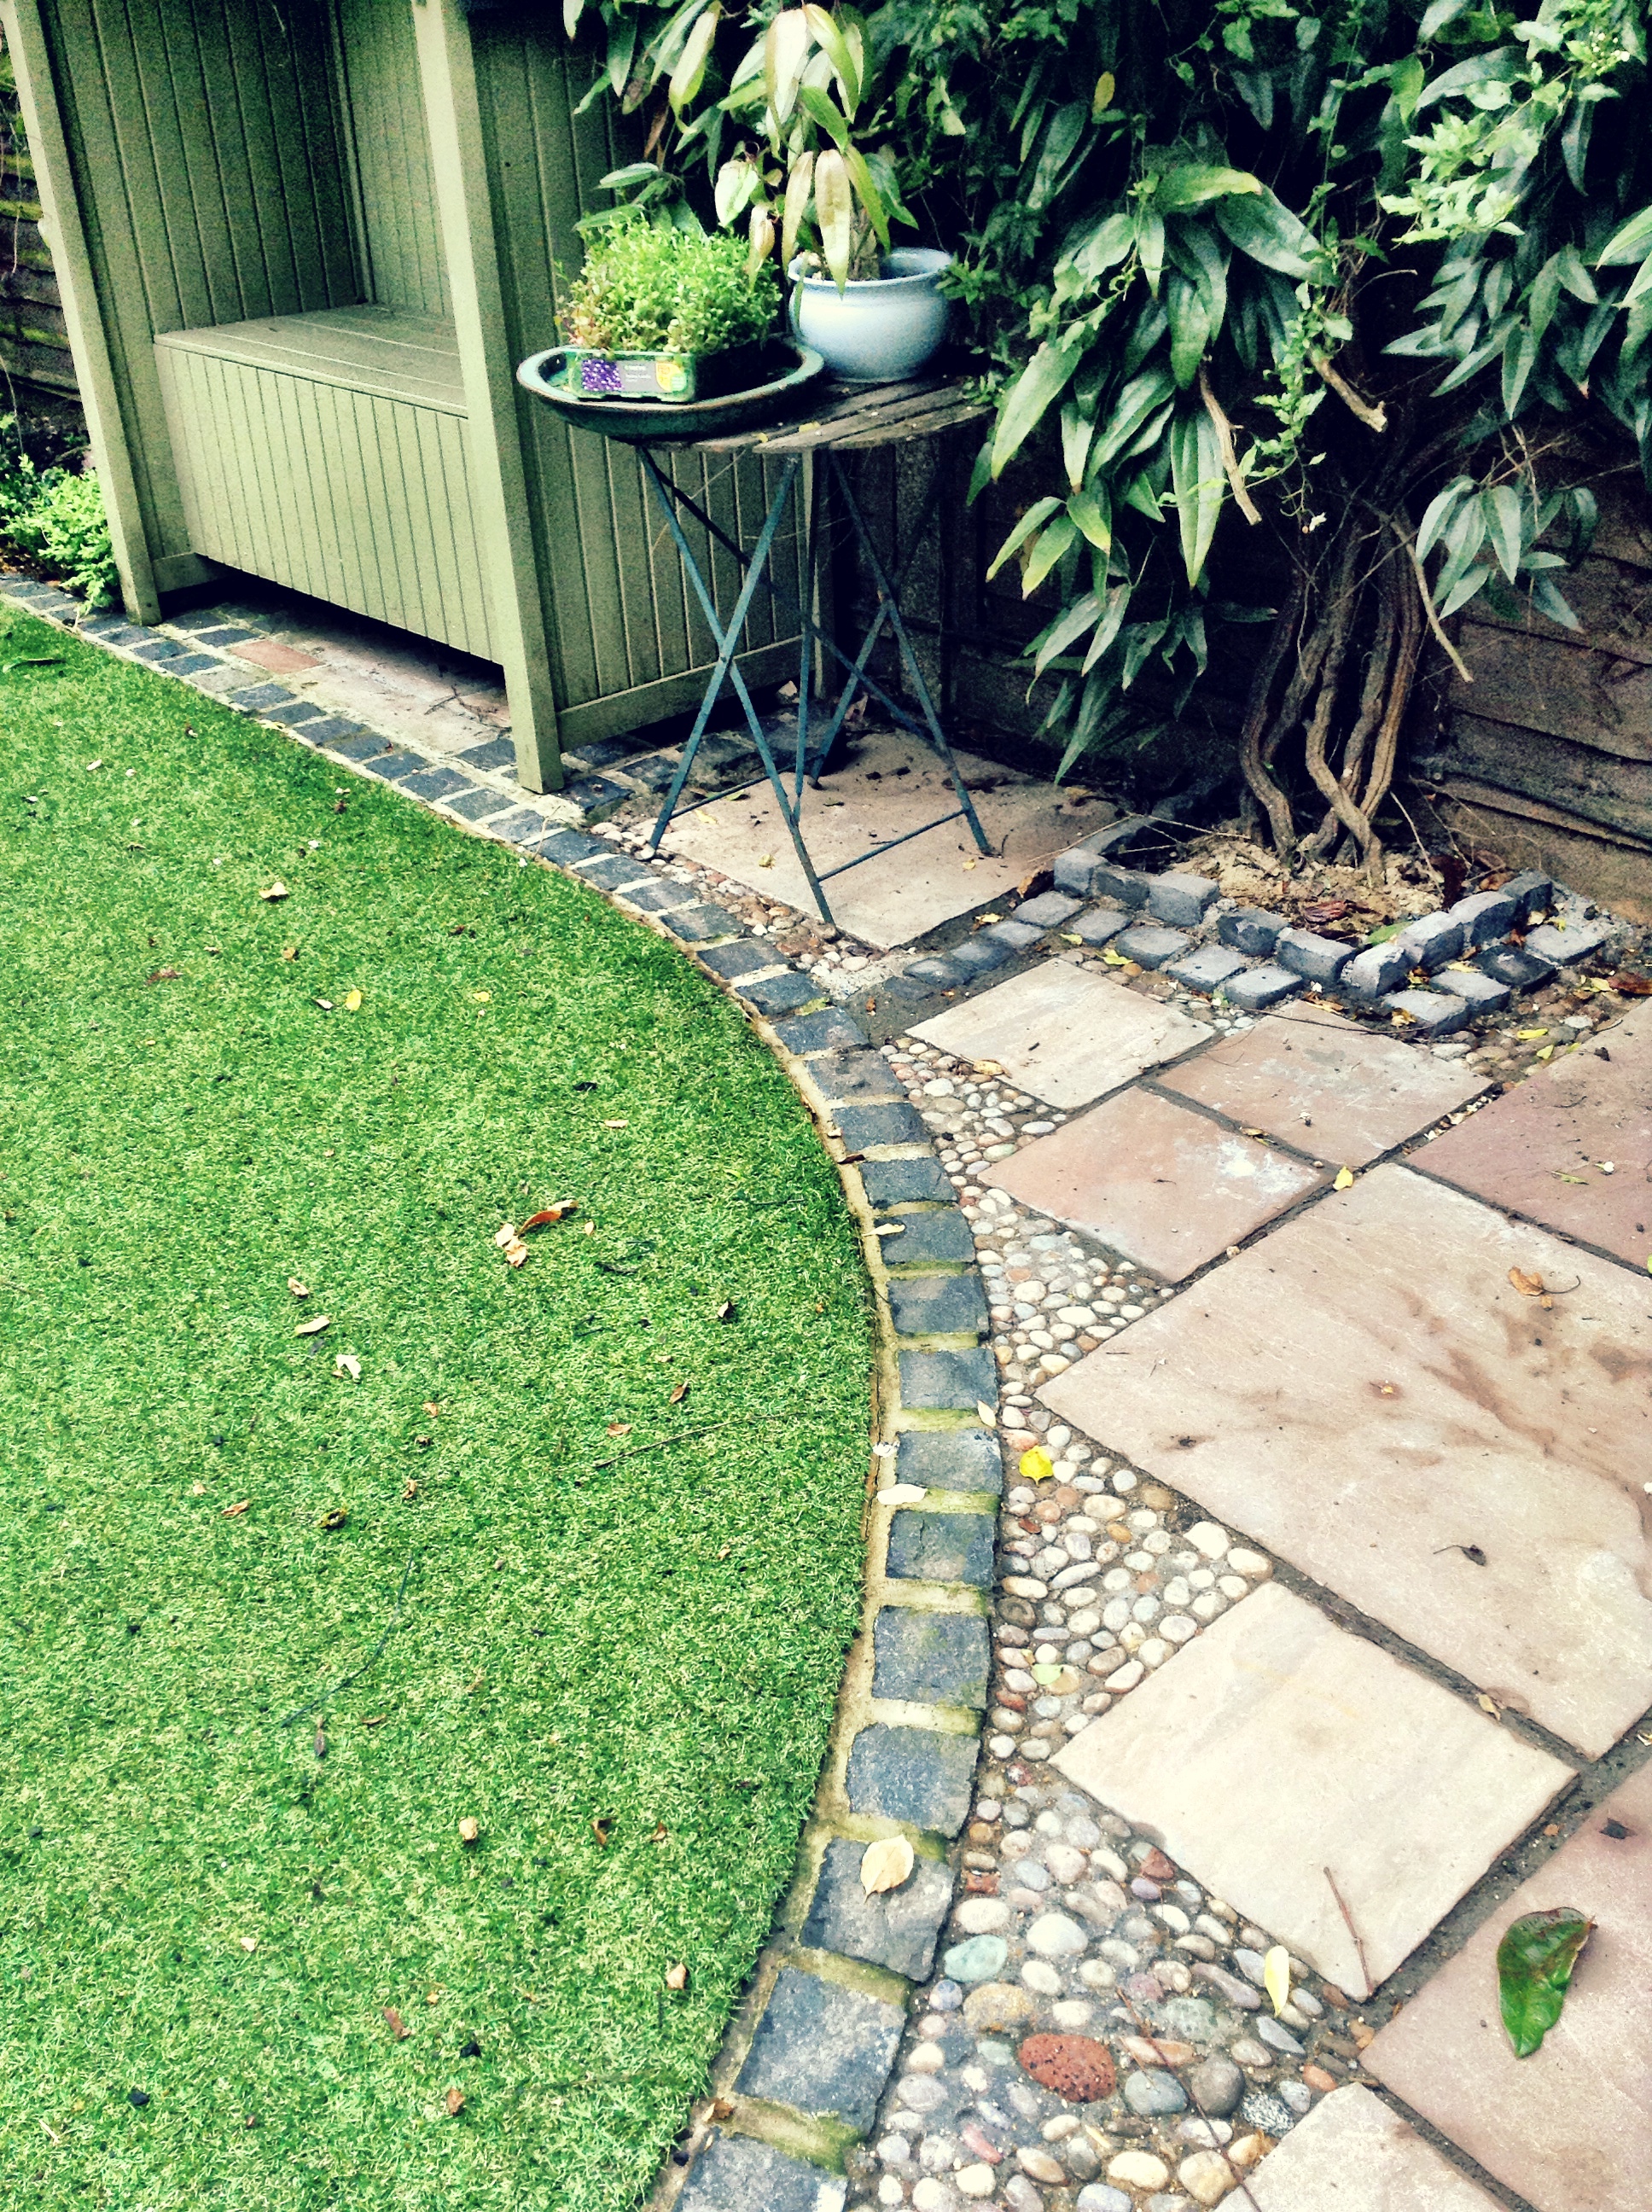
Done x
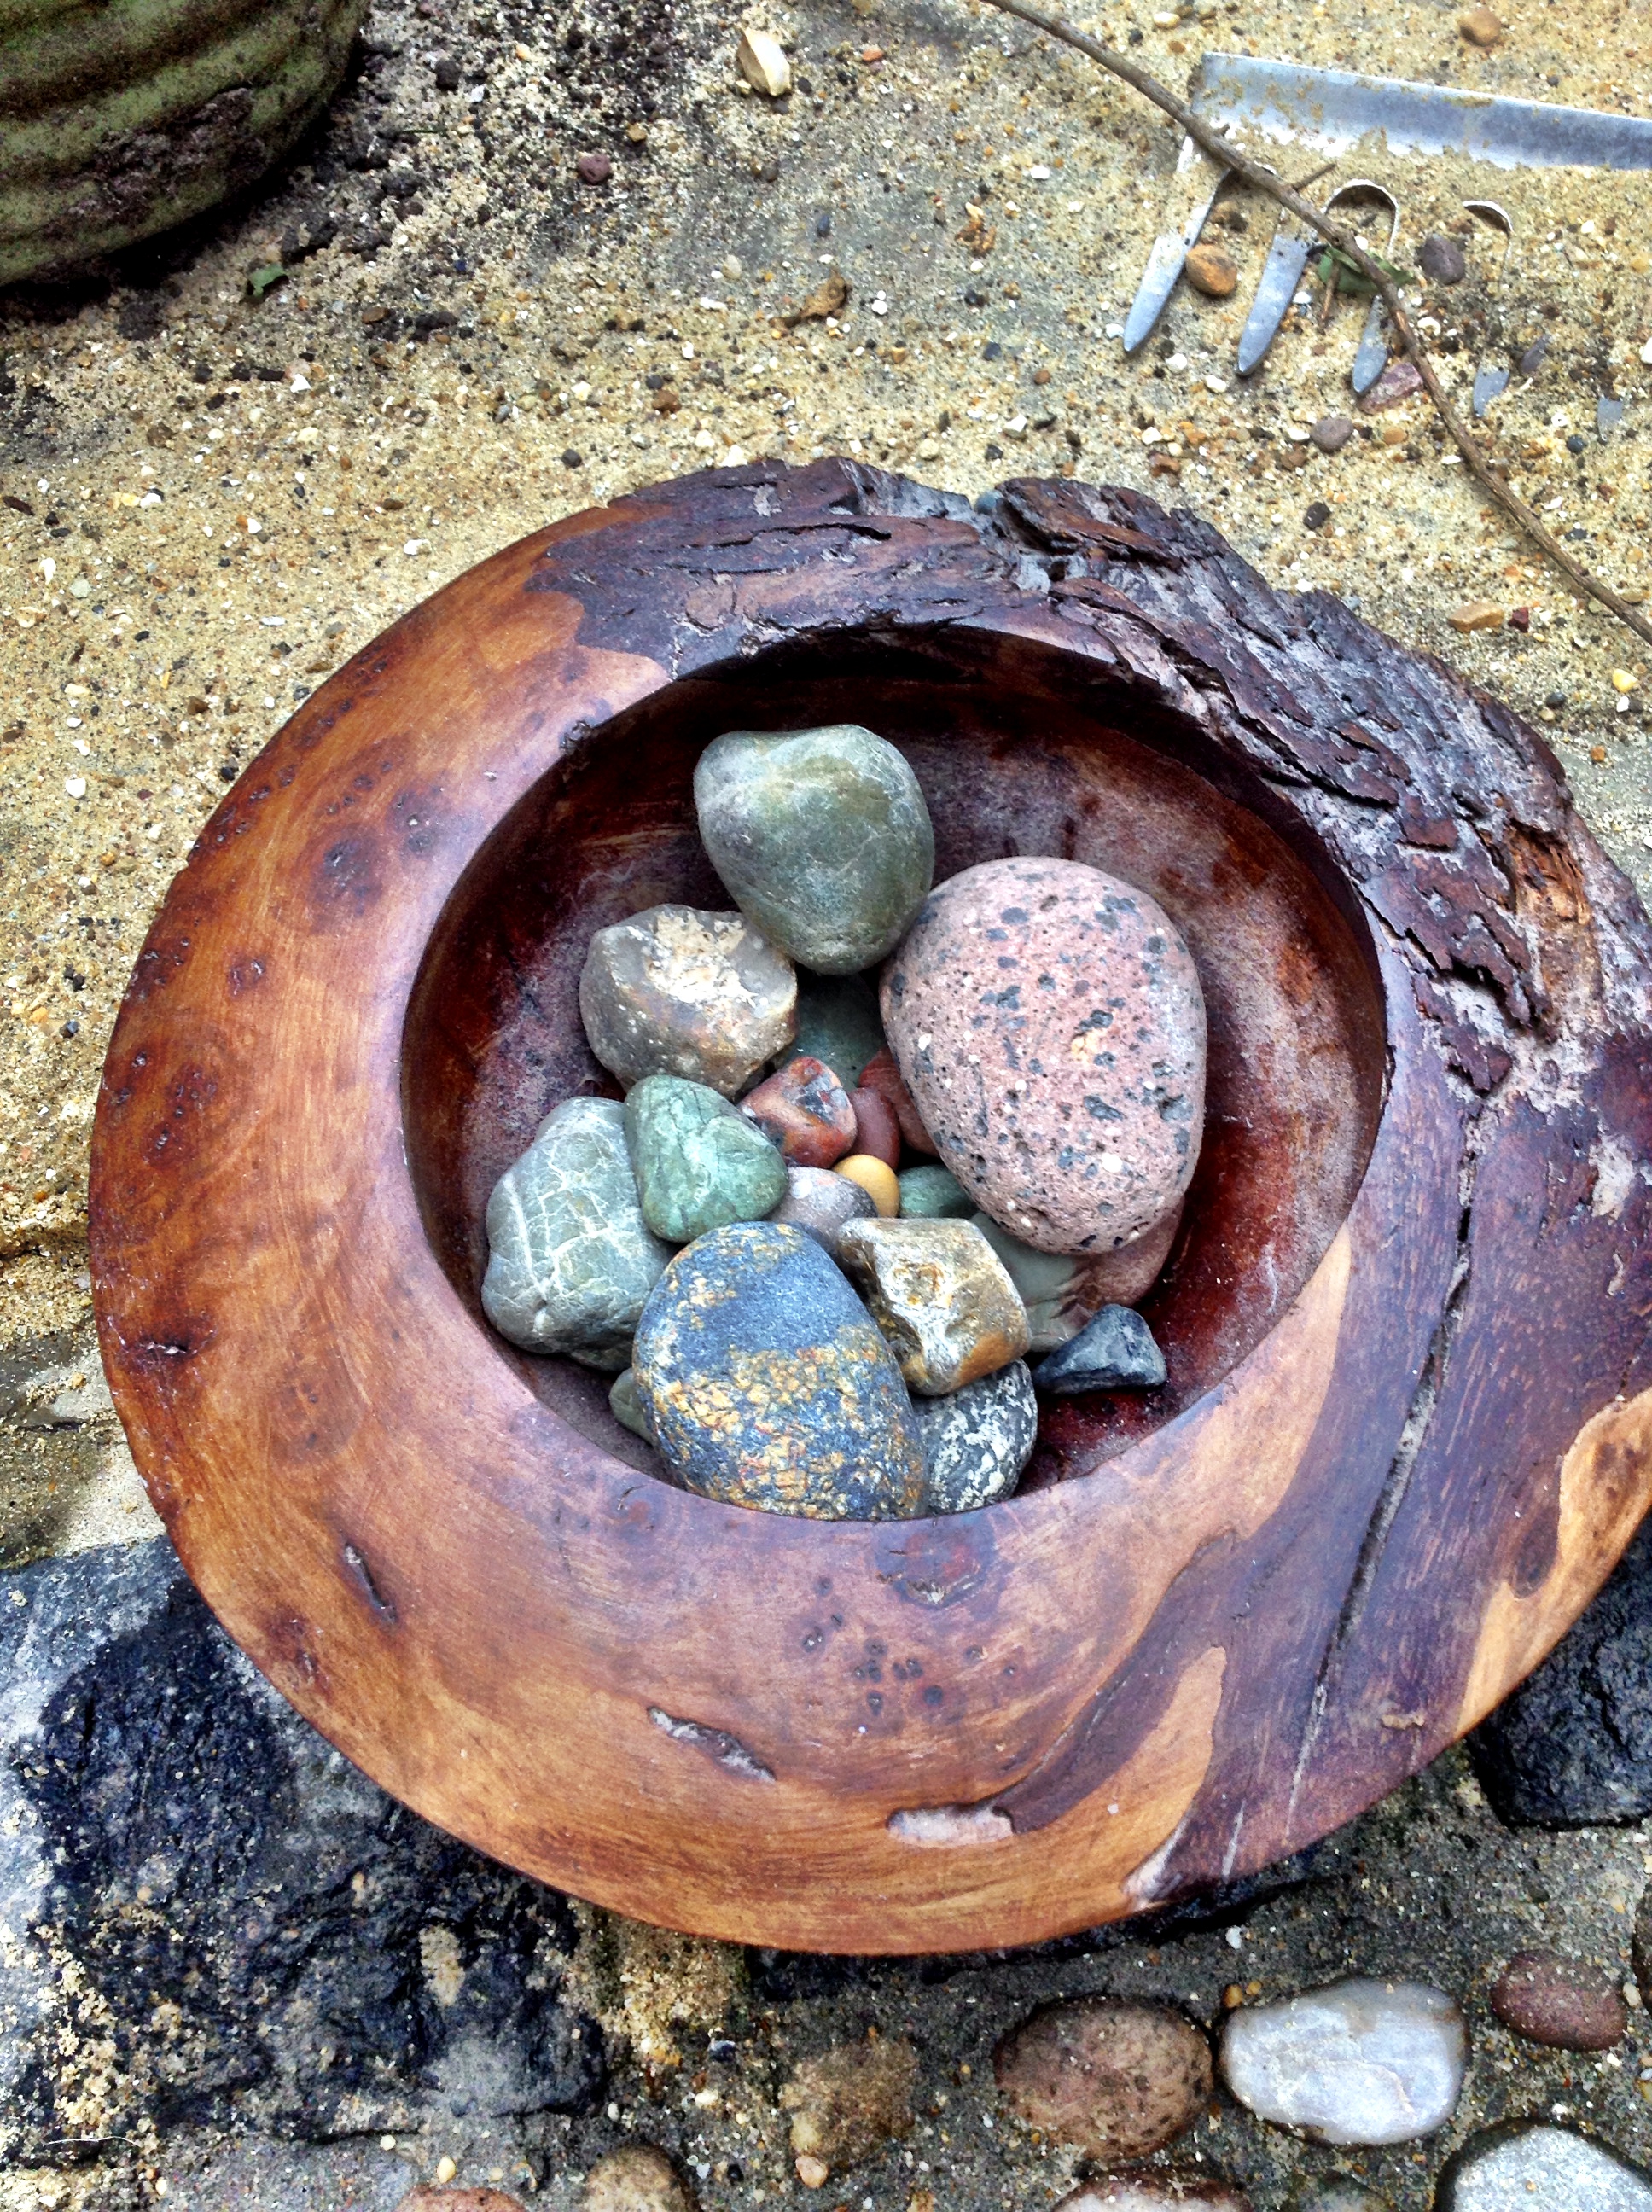
Baby it’s getting hot outside…but at least the patio is finished!

I LOVED doing the cobblestones – we incorporated stones we’d collected over the years from our holidays. I’d originally intended to polish them up – I’ve always fancied a proper stone polisher ever since I first saw them in the Science Museum as a child. But all these years later, I still haven’t got round to buying one..maybe underneath I’m concerned my house would be over run with hundreds shiny stones! It plays into my great love of Natural Art and the skill of embracing forms beyond – I remember years ago seeing a large, flat plate filled with a spiral of perfectly matching round stones in graduated shades of grey..I thought it was one of the most beautiful things I’d ever seen.
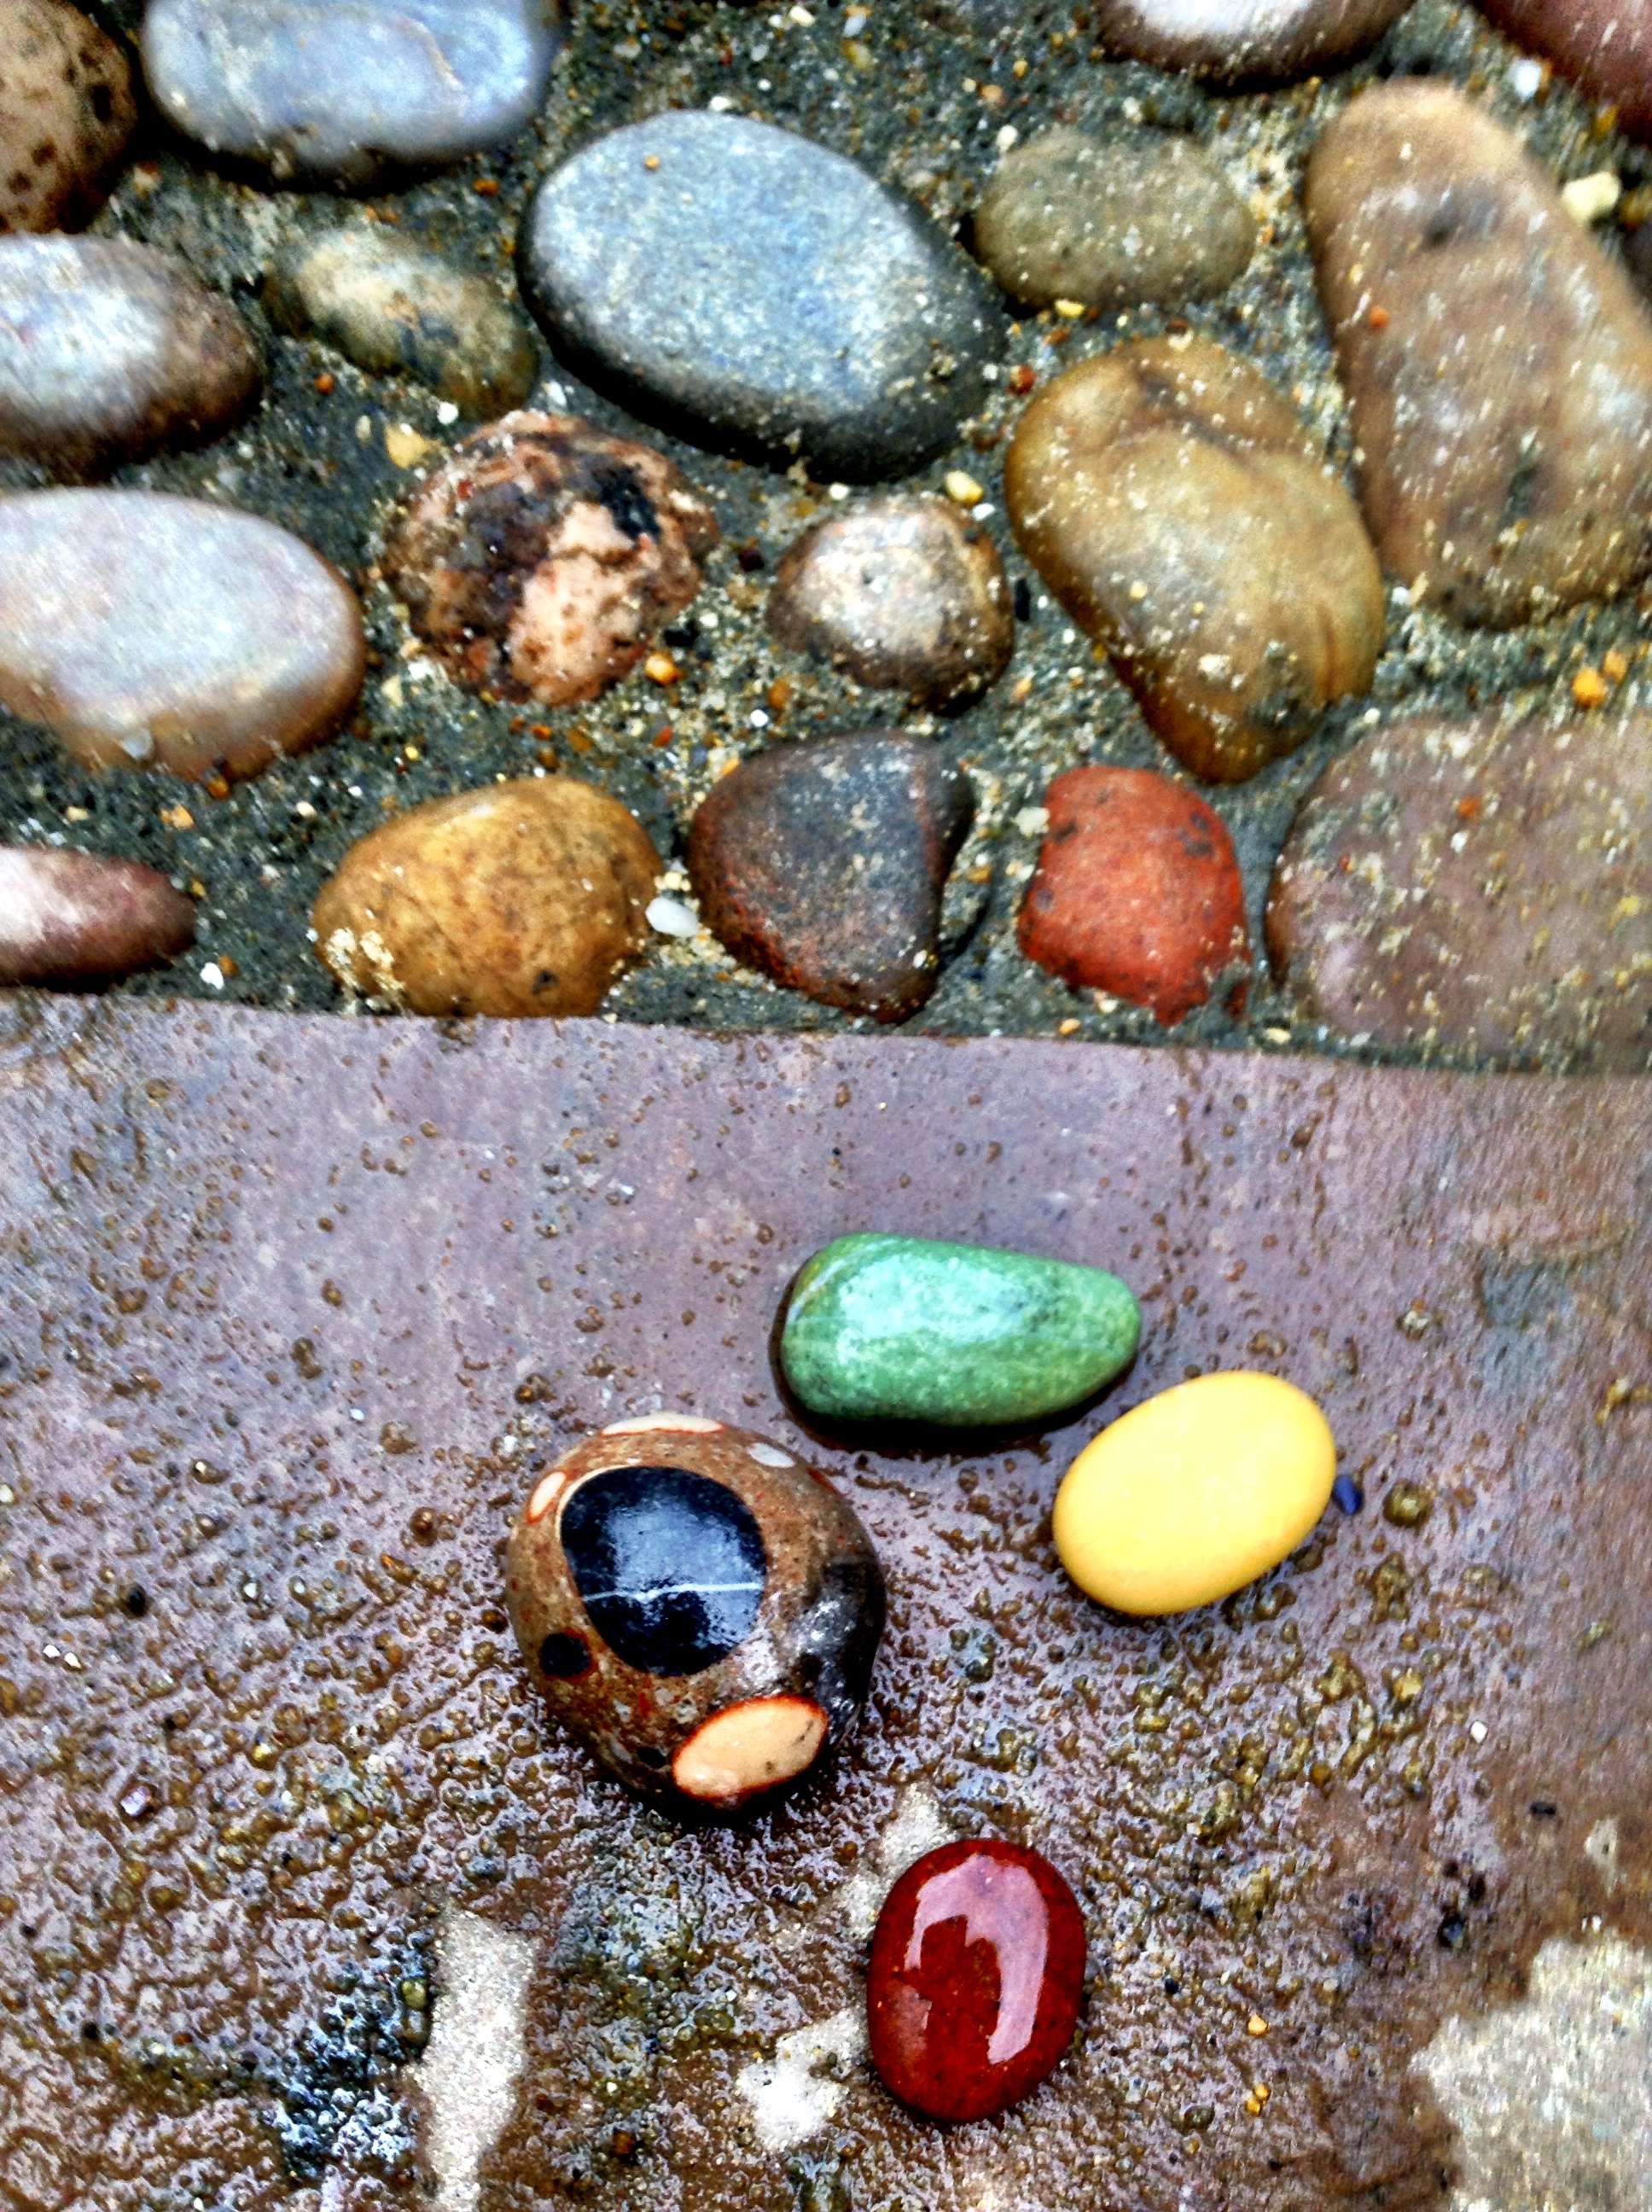
The magic really happens when they’re wet.
(Just a little side-note: The deadline for the Espadrille Competition is coming up – I’ve already have some amazing entries! But if you want to join the fun…time is starting to run out..)

So for the first time in many years I’ll actually be able to watch the Chelsea Flower Show (it’s just down the road) without feeling pangs of guilt. Now if only I could persuade the dog from digging up all the flowers……….
Laters, Kate x
Espie Inspo..

Update on Espadrille Competition: Due to various requests I’ve extended the deadline – Photos of creations to be submitted by Friday 23 May, winner announced Monday 26 May!

Mine have arrived – I ordered a white and a navy pair. the white were a bit grey and disappointing – like six month old sports socks – so I took the plunge and sat them upside down in a bowl of bleach..worked perfectly! They are now a glow in the dark white. In fact, if the above pictures float your boat, then check out ‘Bleach fashion’ on Pintrest – has some incredible offerings like how to make a bleach pen by leaving a yellow felt tip pen soaking in bleach for a day…….just think of the possibilities!
This pair were made with the a basic potato print!
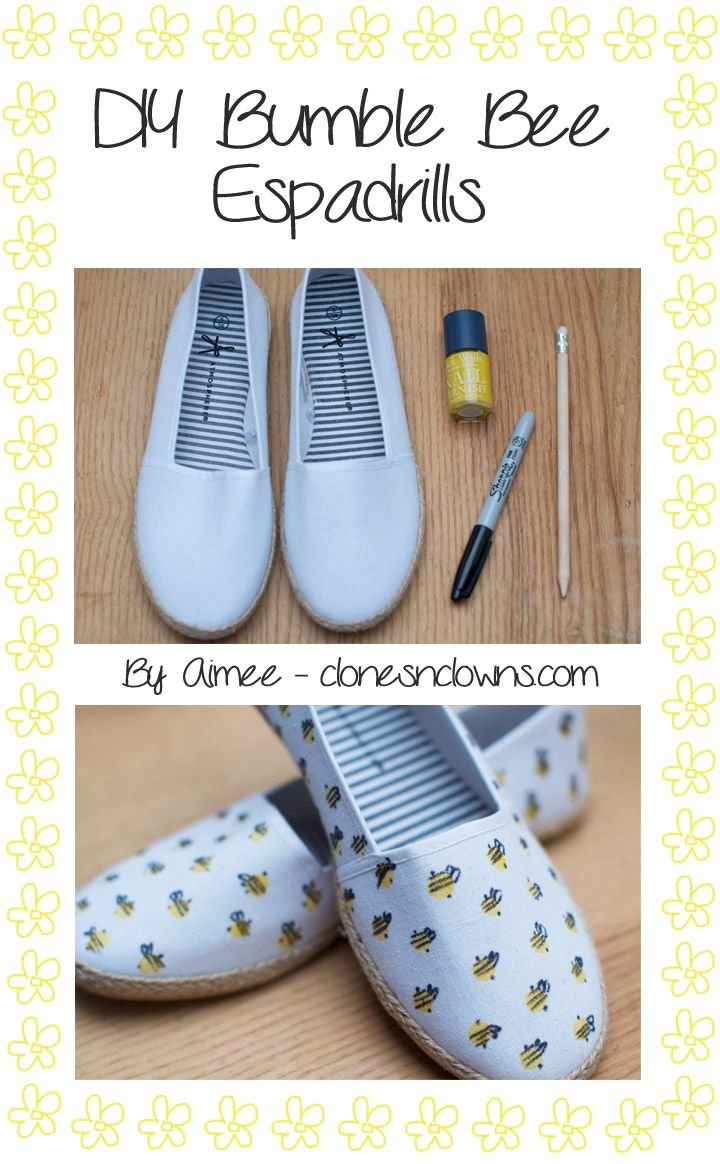
Or there’s always the humble permanent marker…
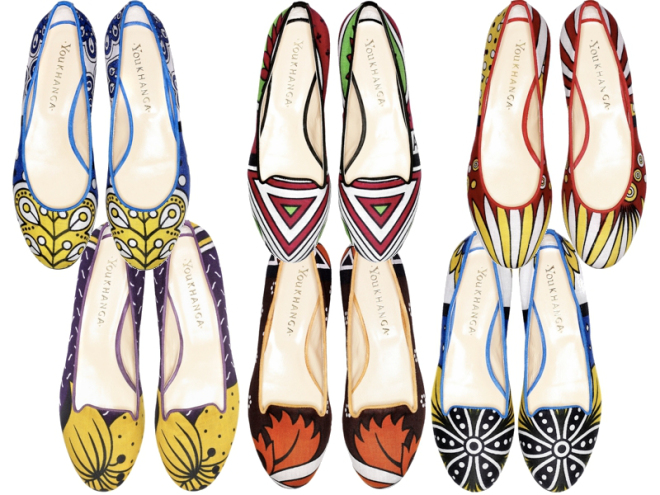
Taking these YouKhanga shoes as inspiration, the options are deliciously infinite…
Laters, Kate x
(All pictures Pintrest)
Beautiful Bracelets x
Spotted this whilst riding the computer waves. There was no re-bog button – but all credit goes to Erica at ‘Honestly WTF’ with a link to the original blog post here. Sometimes one just has to create – and it helps if it is something beautiful…. Enjoy x
DIY Macrame Bracelet
Posted by Erica on May 1st, 2012

You’ll need:
- 4 yards of 0.5mm chinese knotting cord
- a connector or charm
- an embroidery needle
- a pair of scissors
- flat nose pliers (optional)
- a lighter (optional)

Start by cutting the knotting cord into two 30 inch, two 20 inch and one 10 inch lengths. Fold the 20 inch piece in half, pull the loop through the ring, fold it over the ring, and pull the rest of the cord through the loop. Repeat the step on the other side of the ring. These strands will be anchored and remain stationary.

Center the 30 inch cord under the two middle strands. Fold the right cord over the middle strands and under the left cord. Pull the left cord under the right and middle strands and through the loop on the right side.

Pull tightly and slide the knot up to the top.

Finish the 2nd half of the square knot by folding the left cord over the middle strands and under the right cord. Pull the right cord under the left and middle strands and through the loop on the left side.

Pull tightly and repeat the steps – left, right, left, right . . . Continue knotting until the desired length is reached. Keep in mind that the clasp will take up approximately half an inch.

To finish the knots, thread one of the cords onto a needle and sew up the center of 3-4 knots along the backside. Pliers will help pull the needle through the tight knots.

Repeat the same step on the other cord.

After sewing up both knotting cords, trim away any excess. Save the scraps and melt the tips with a lighter to seal it for extra hold. Repeat the same exact step on the second half of the bracelet.

To make a sliding closure, shape the bracelet into a circle and overlap the middle strands. Use scraps to temporarily tie the cords together at each end.

Take the 10 inch cord and center it under the strands. Start tying square knots exactly the same way the bracelet was executed.

Stop at about half an inch and sew the knotting cords into the backside of the closure. Remove the temporary ties.

The two sets of middle strands are now the adjustable ties of the bracelet. Adjust to fit the wrist and tie each end into knots. Trim away any excess.

Your adjustable knotted bracelets are finished!! xx

(HonestlyWTF DIY bracelets & Tai pink crystal bracelet; Mr. Kate & Catbird rings; all images by HonestlyWTF)
